Step 10 – HVAC Fencing

244

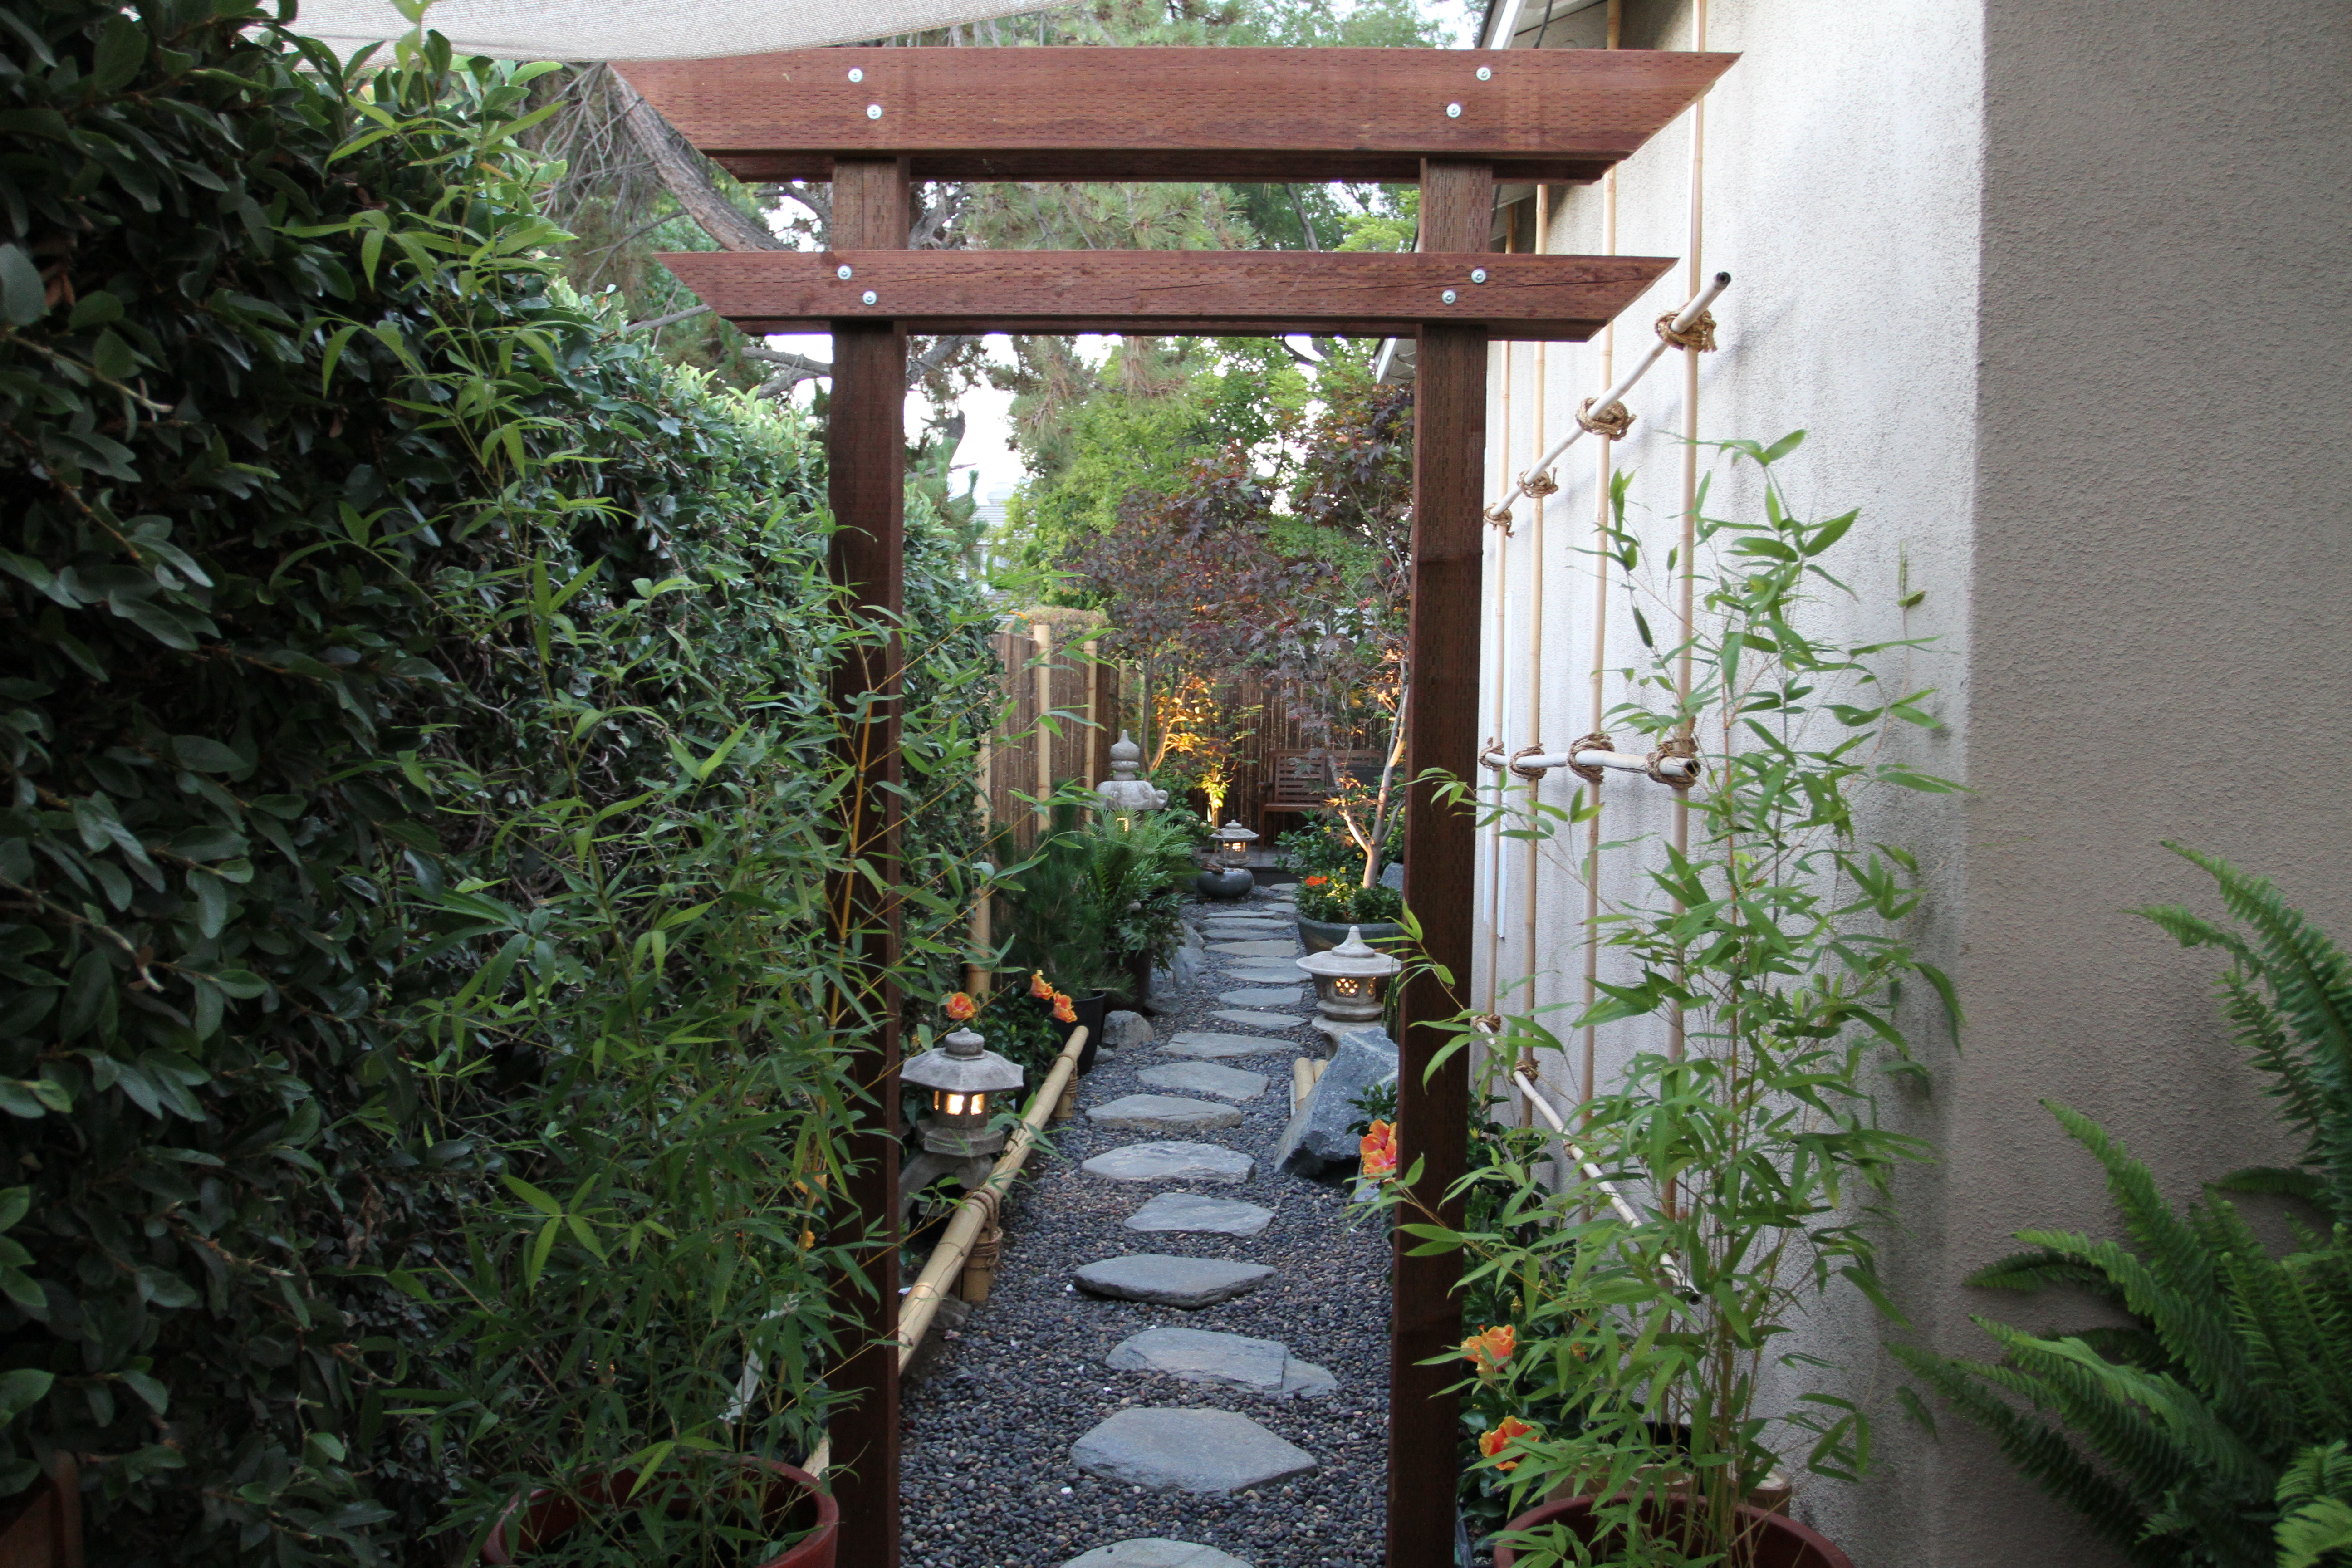
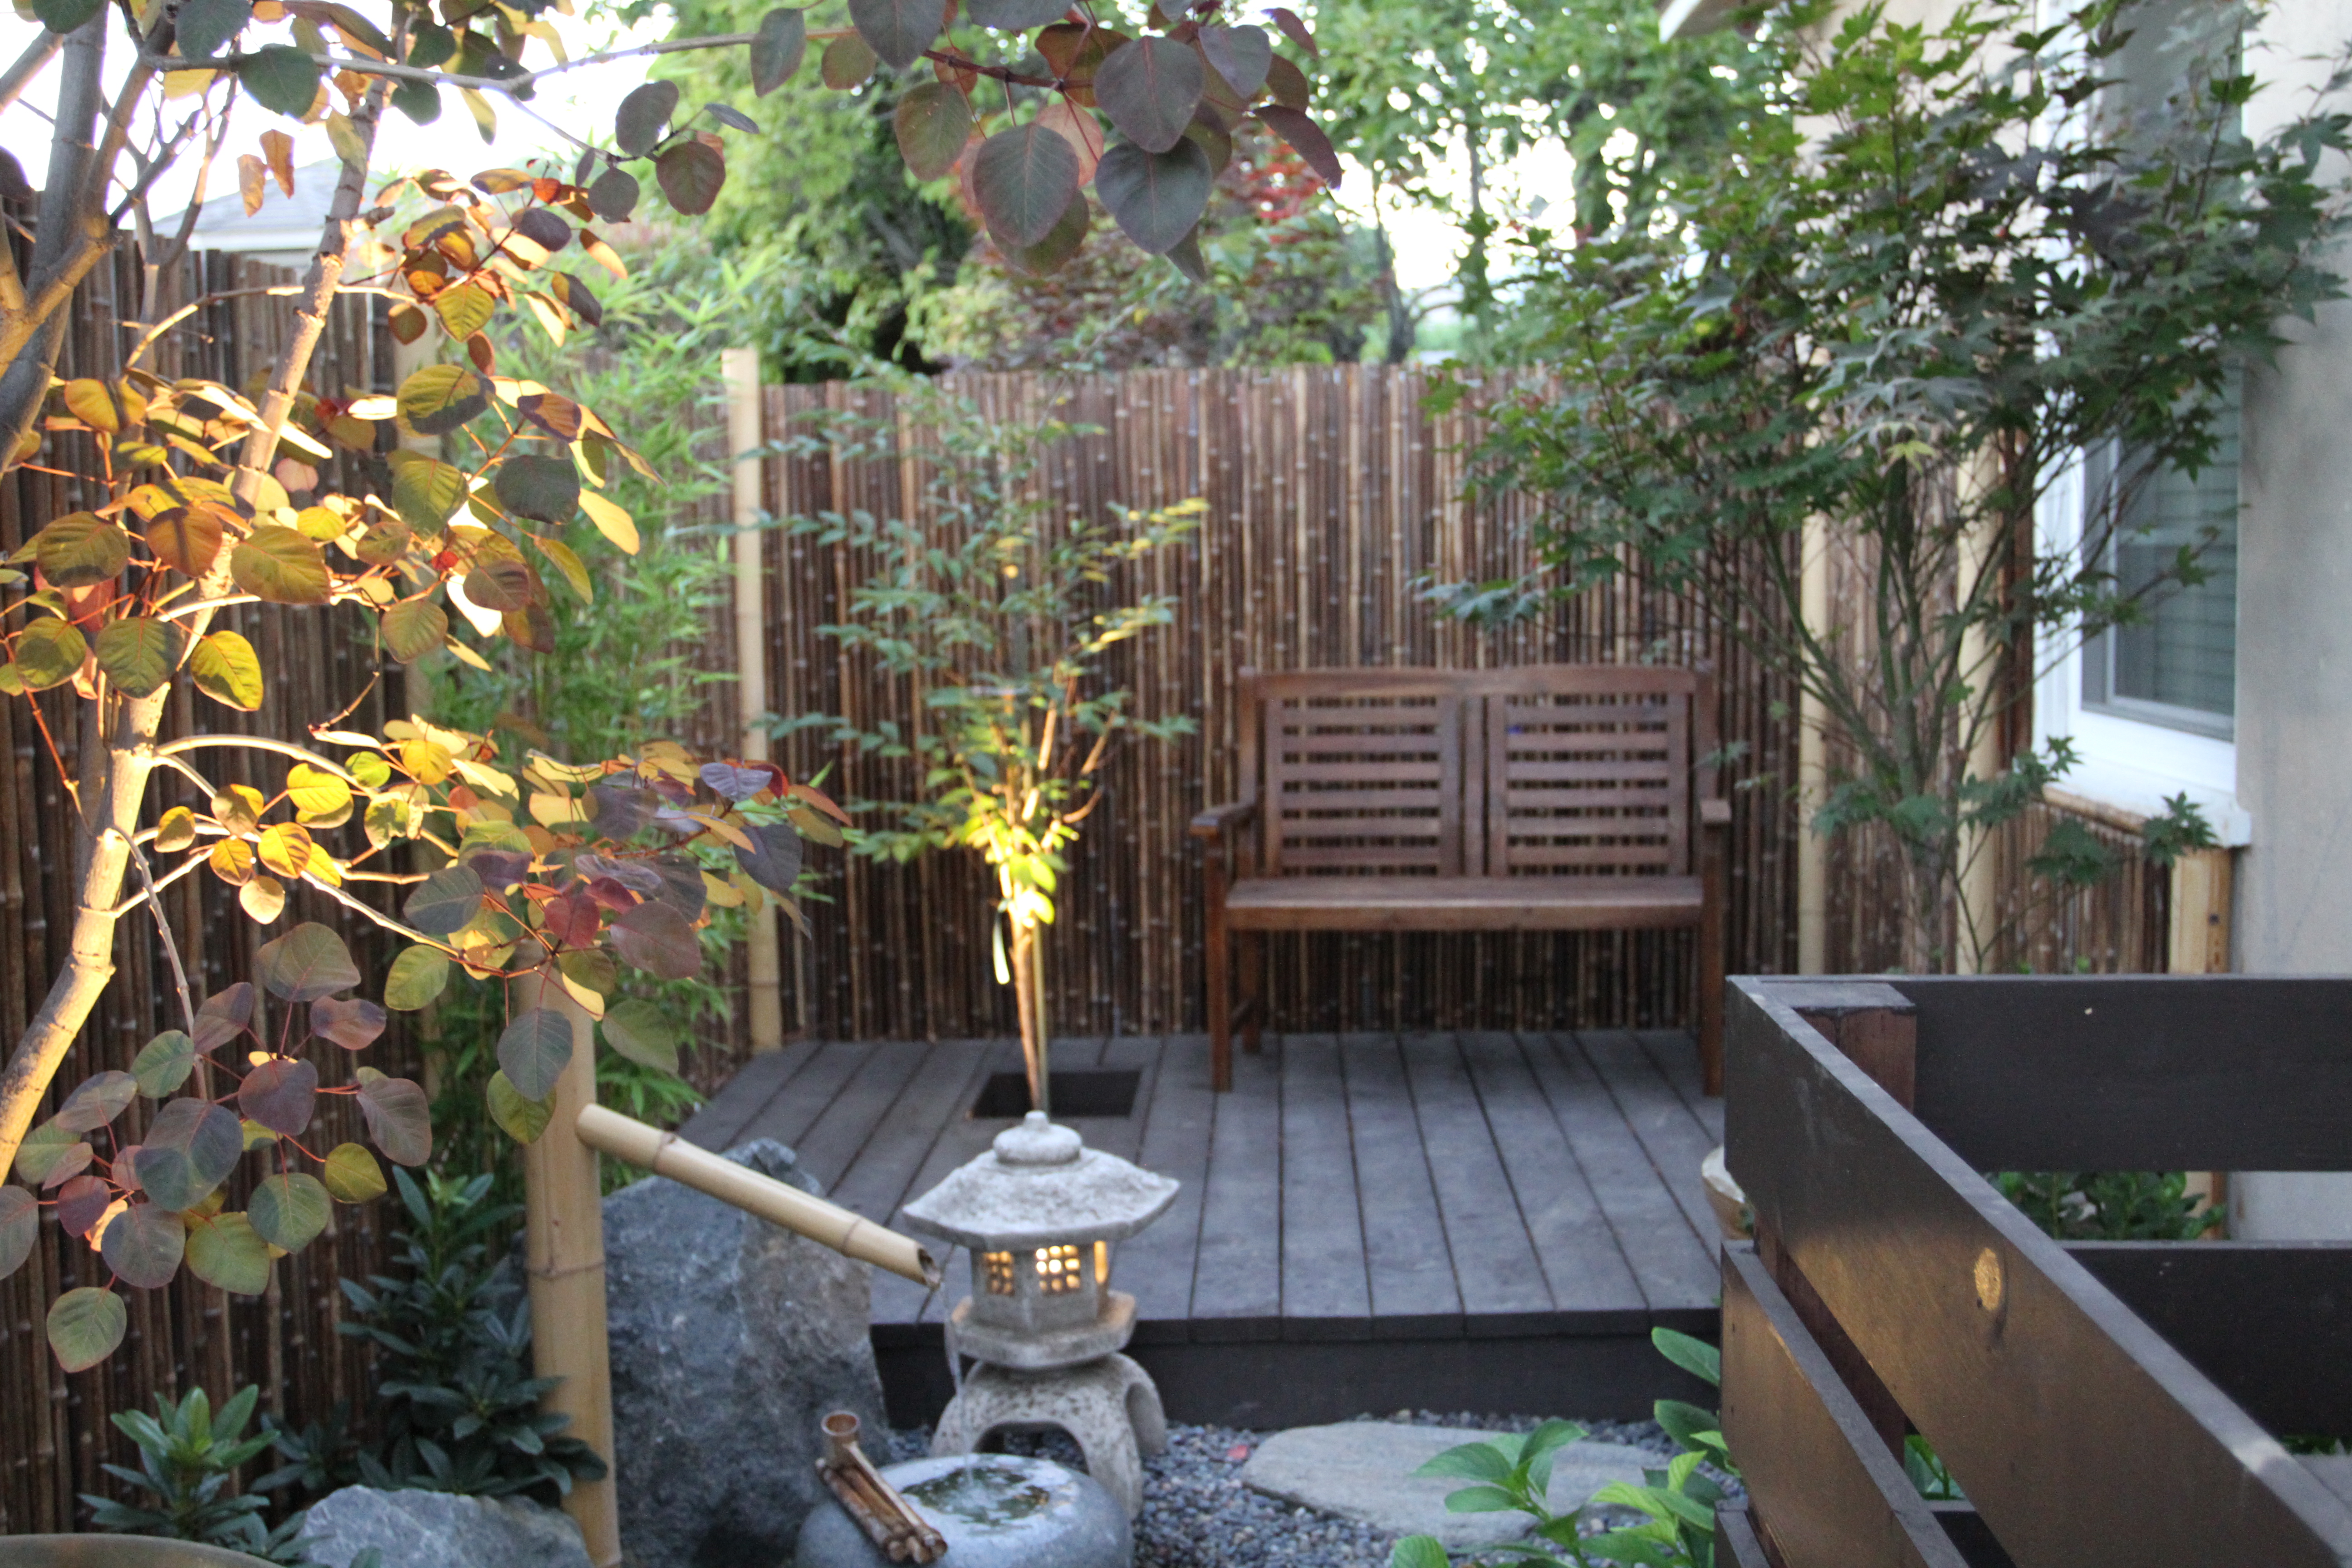
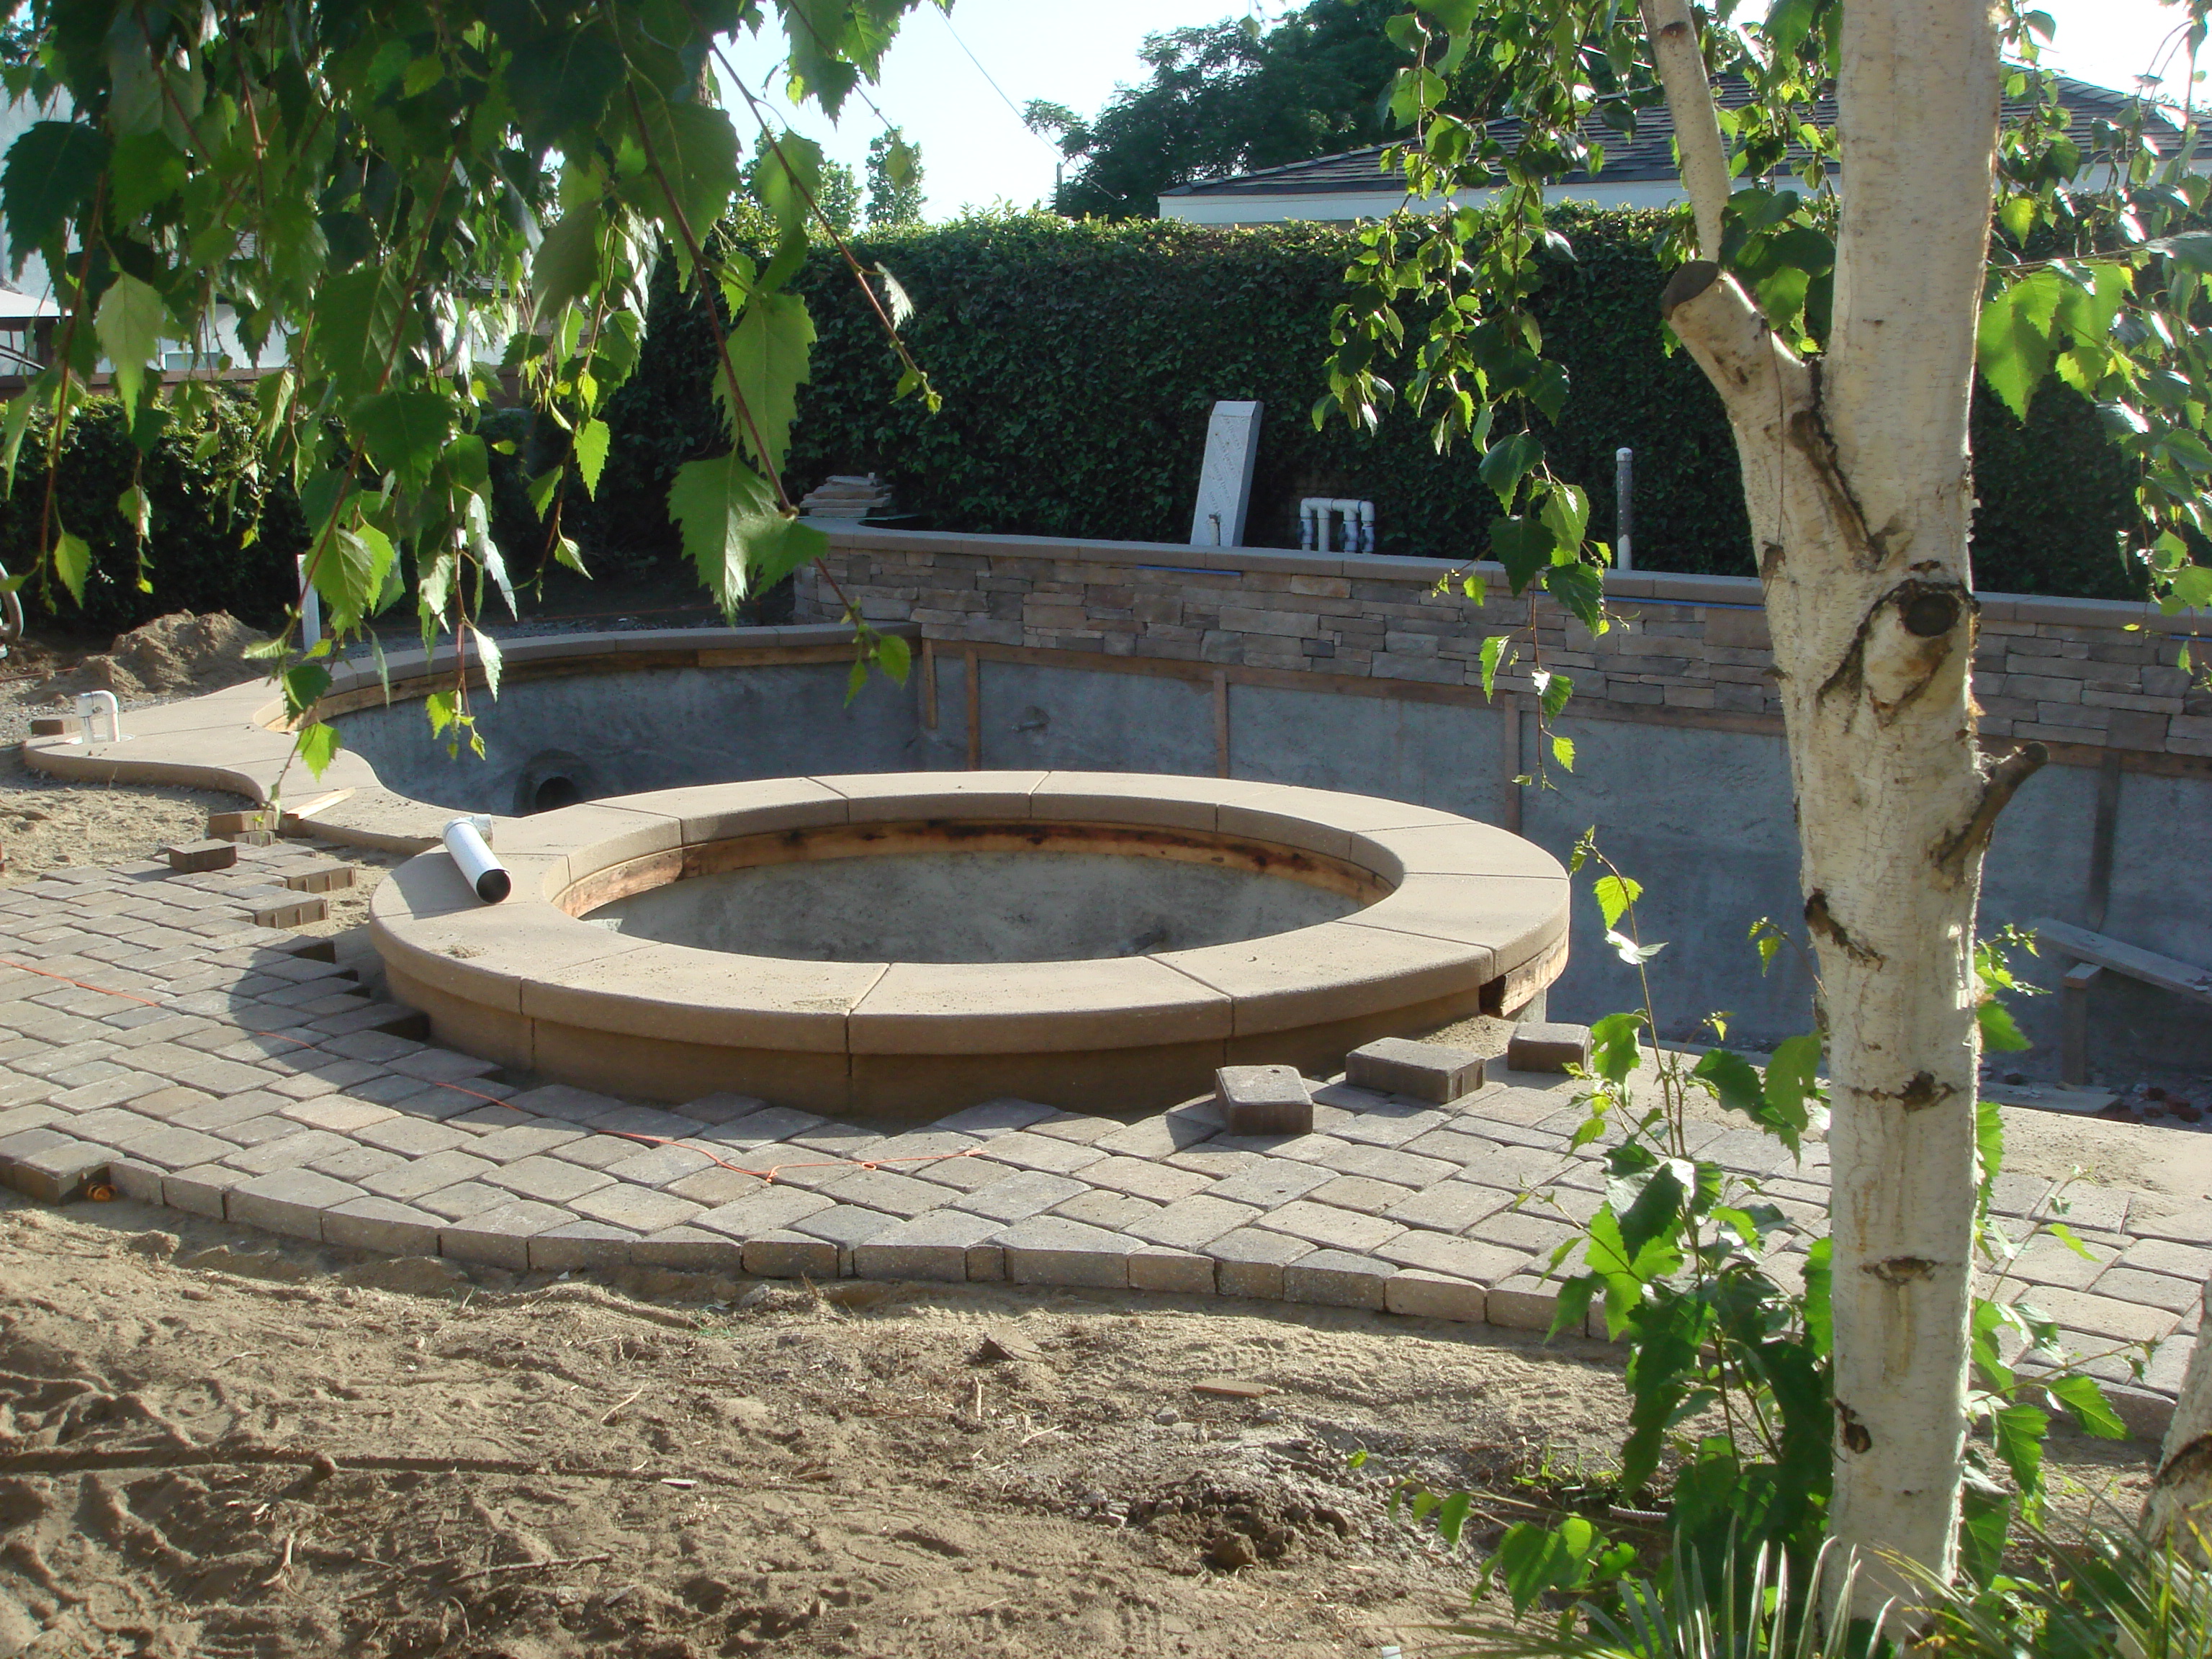
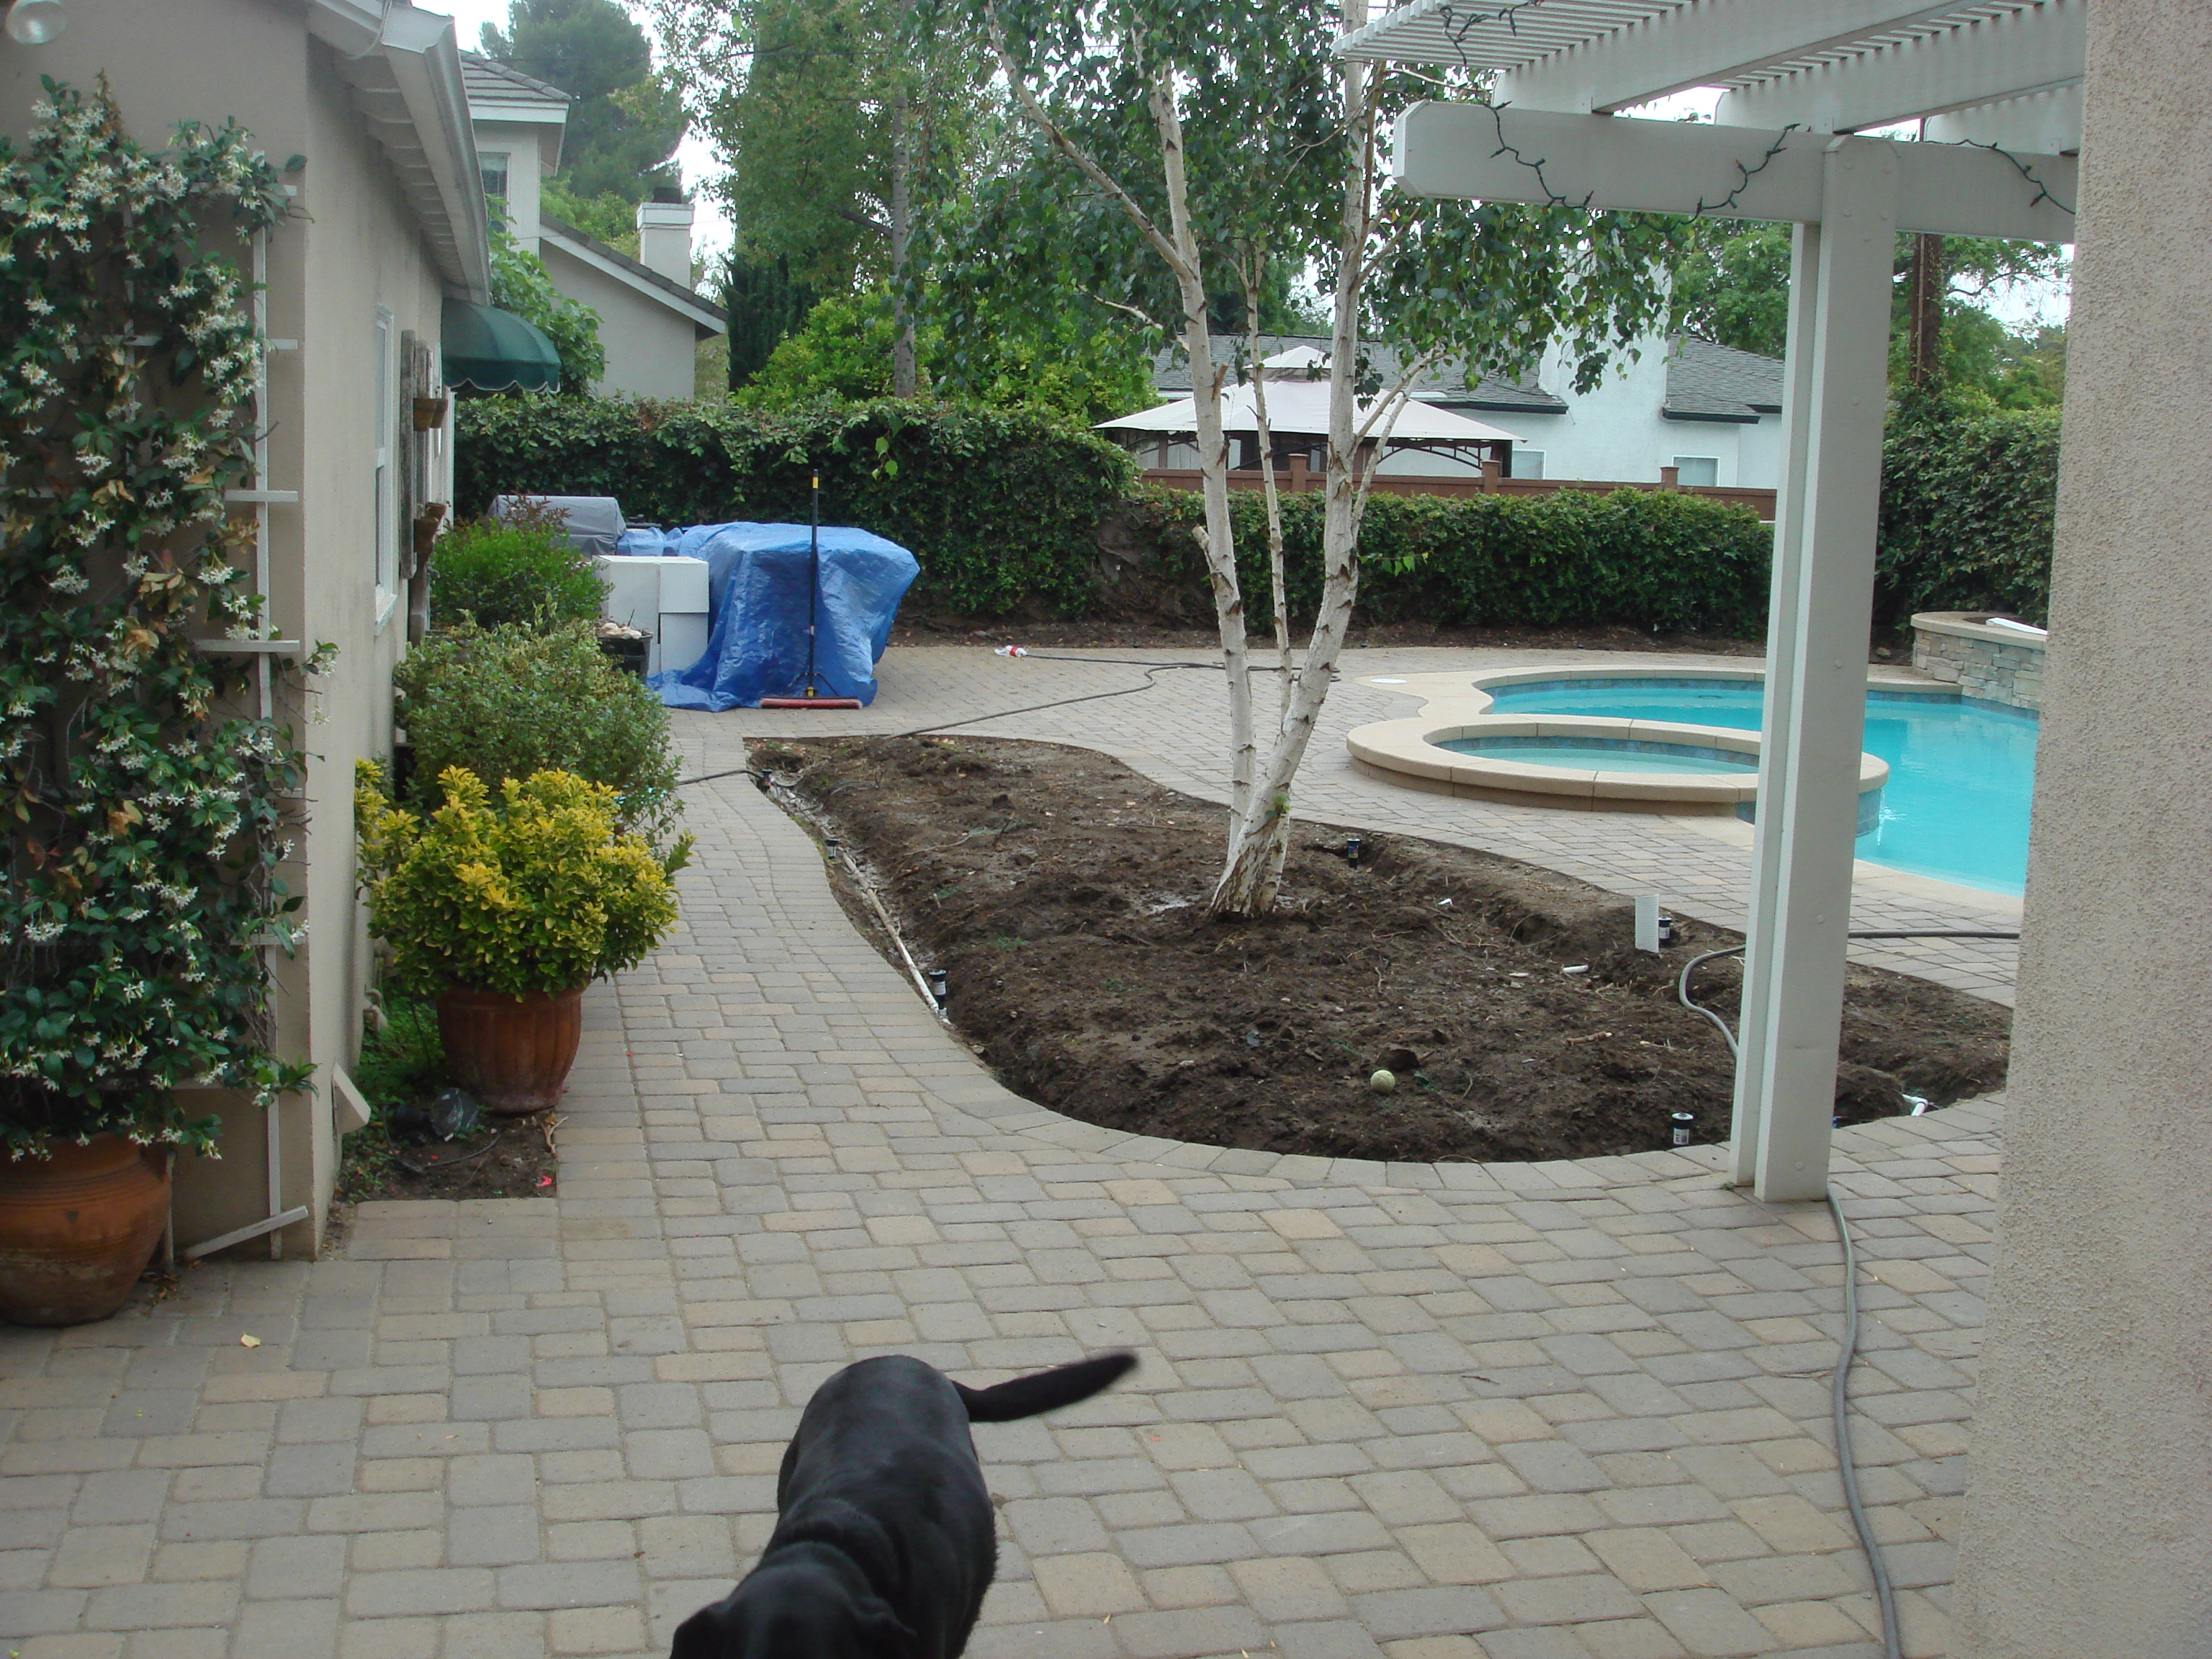
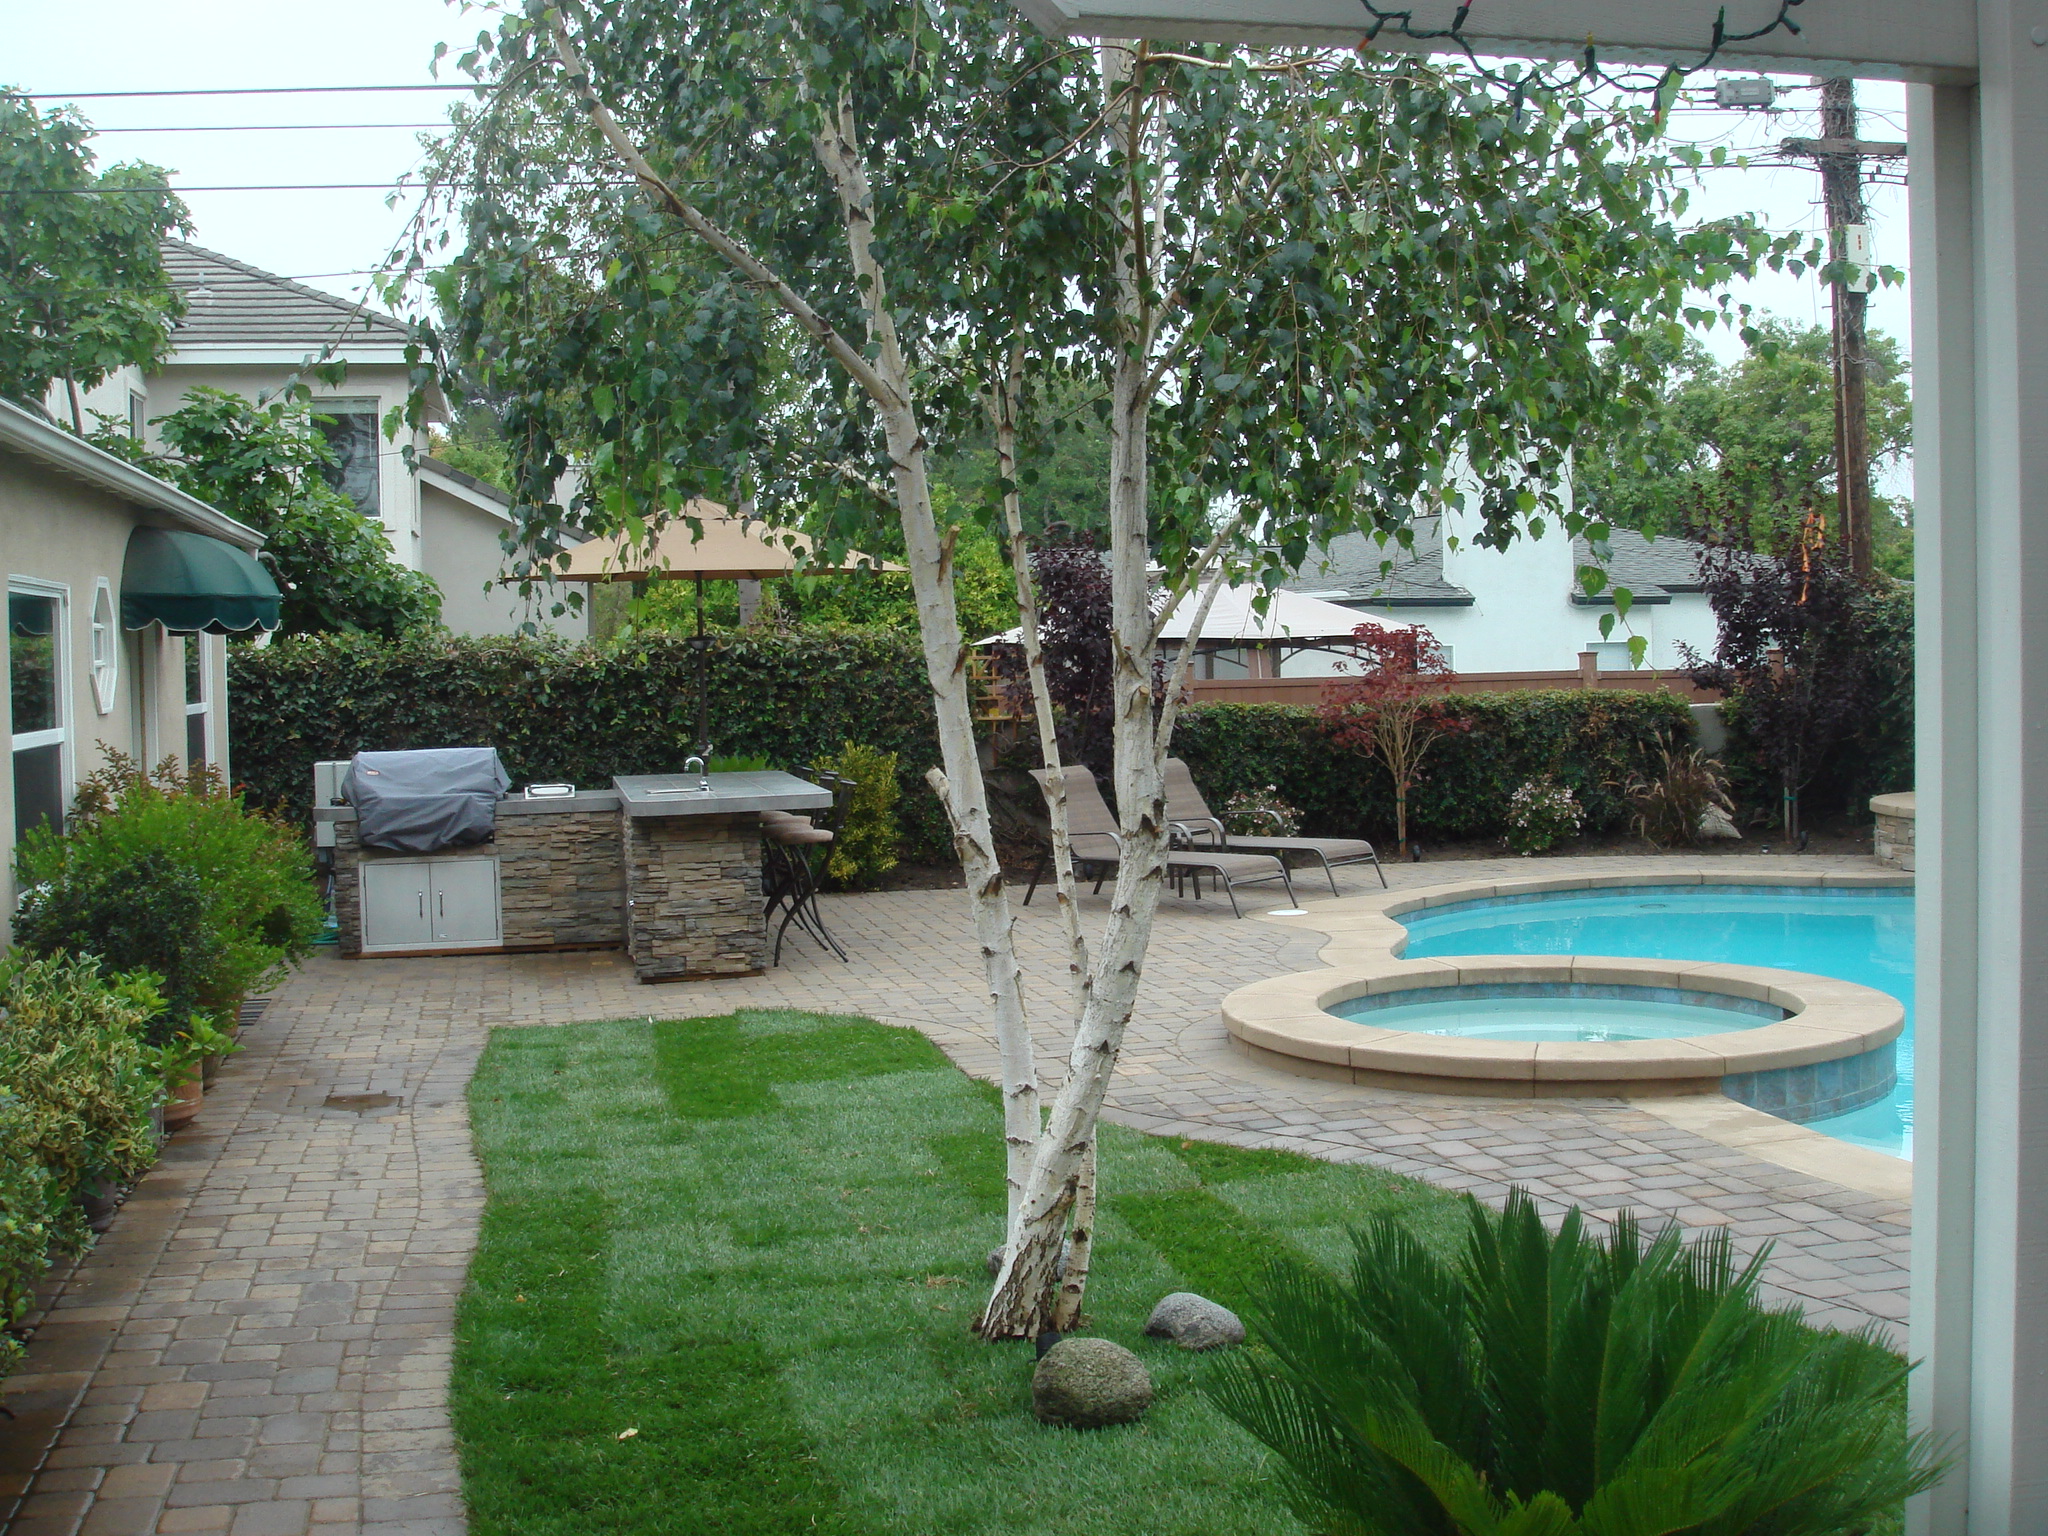
Once I completed the Deck and Water Basin steps, which were the two most critical components to my garden, my plan is to slowly work my way from the end of the Garden towards the entrance and create the elements alone the way.

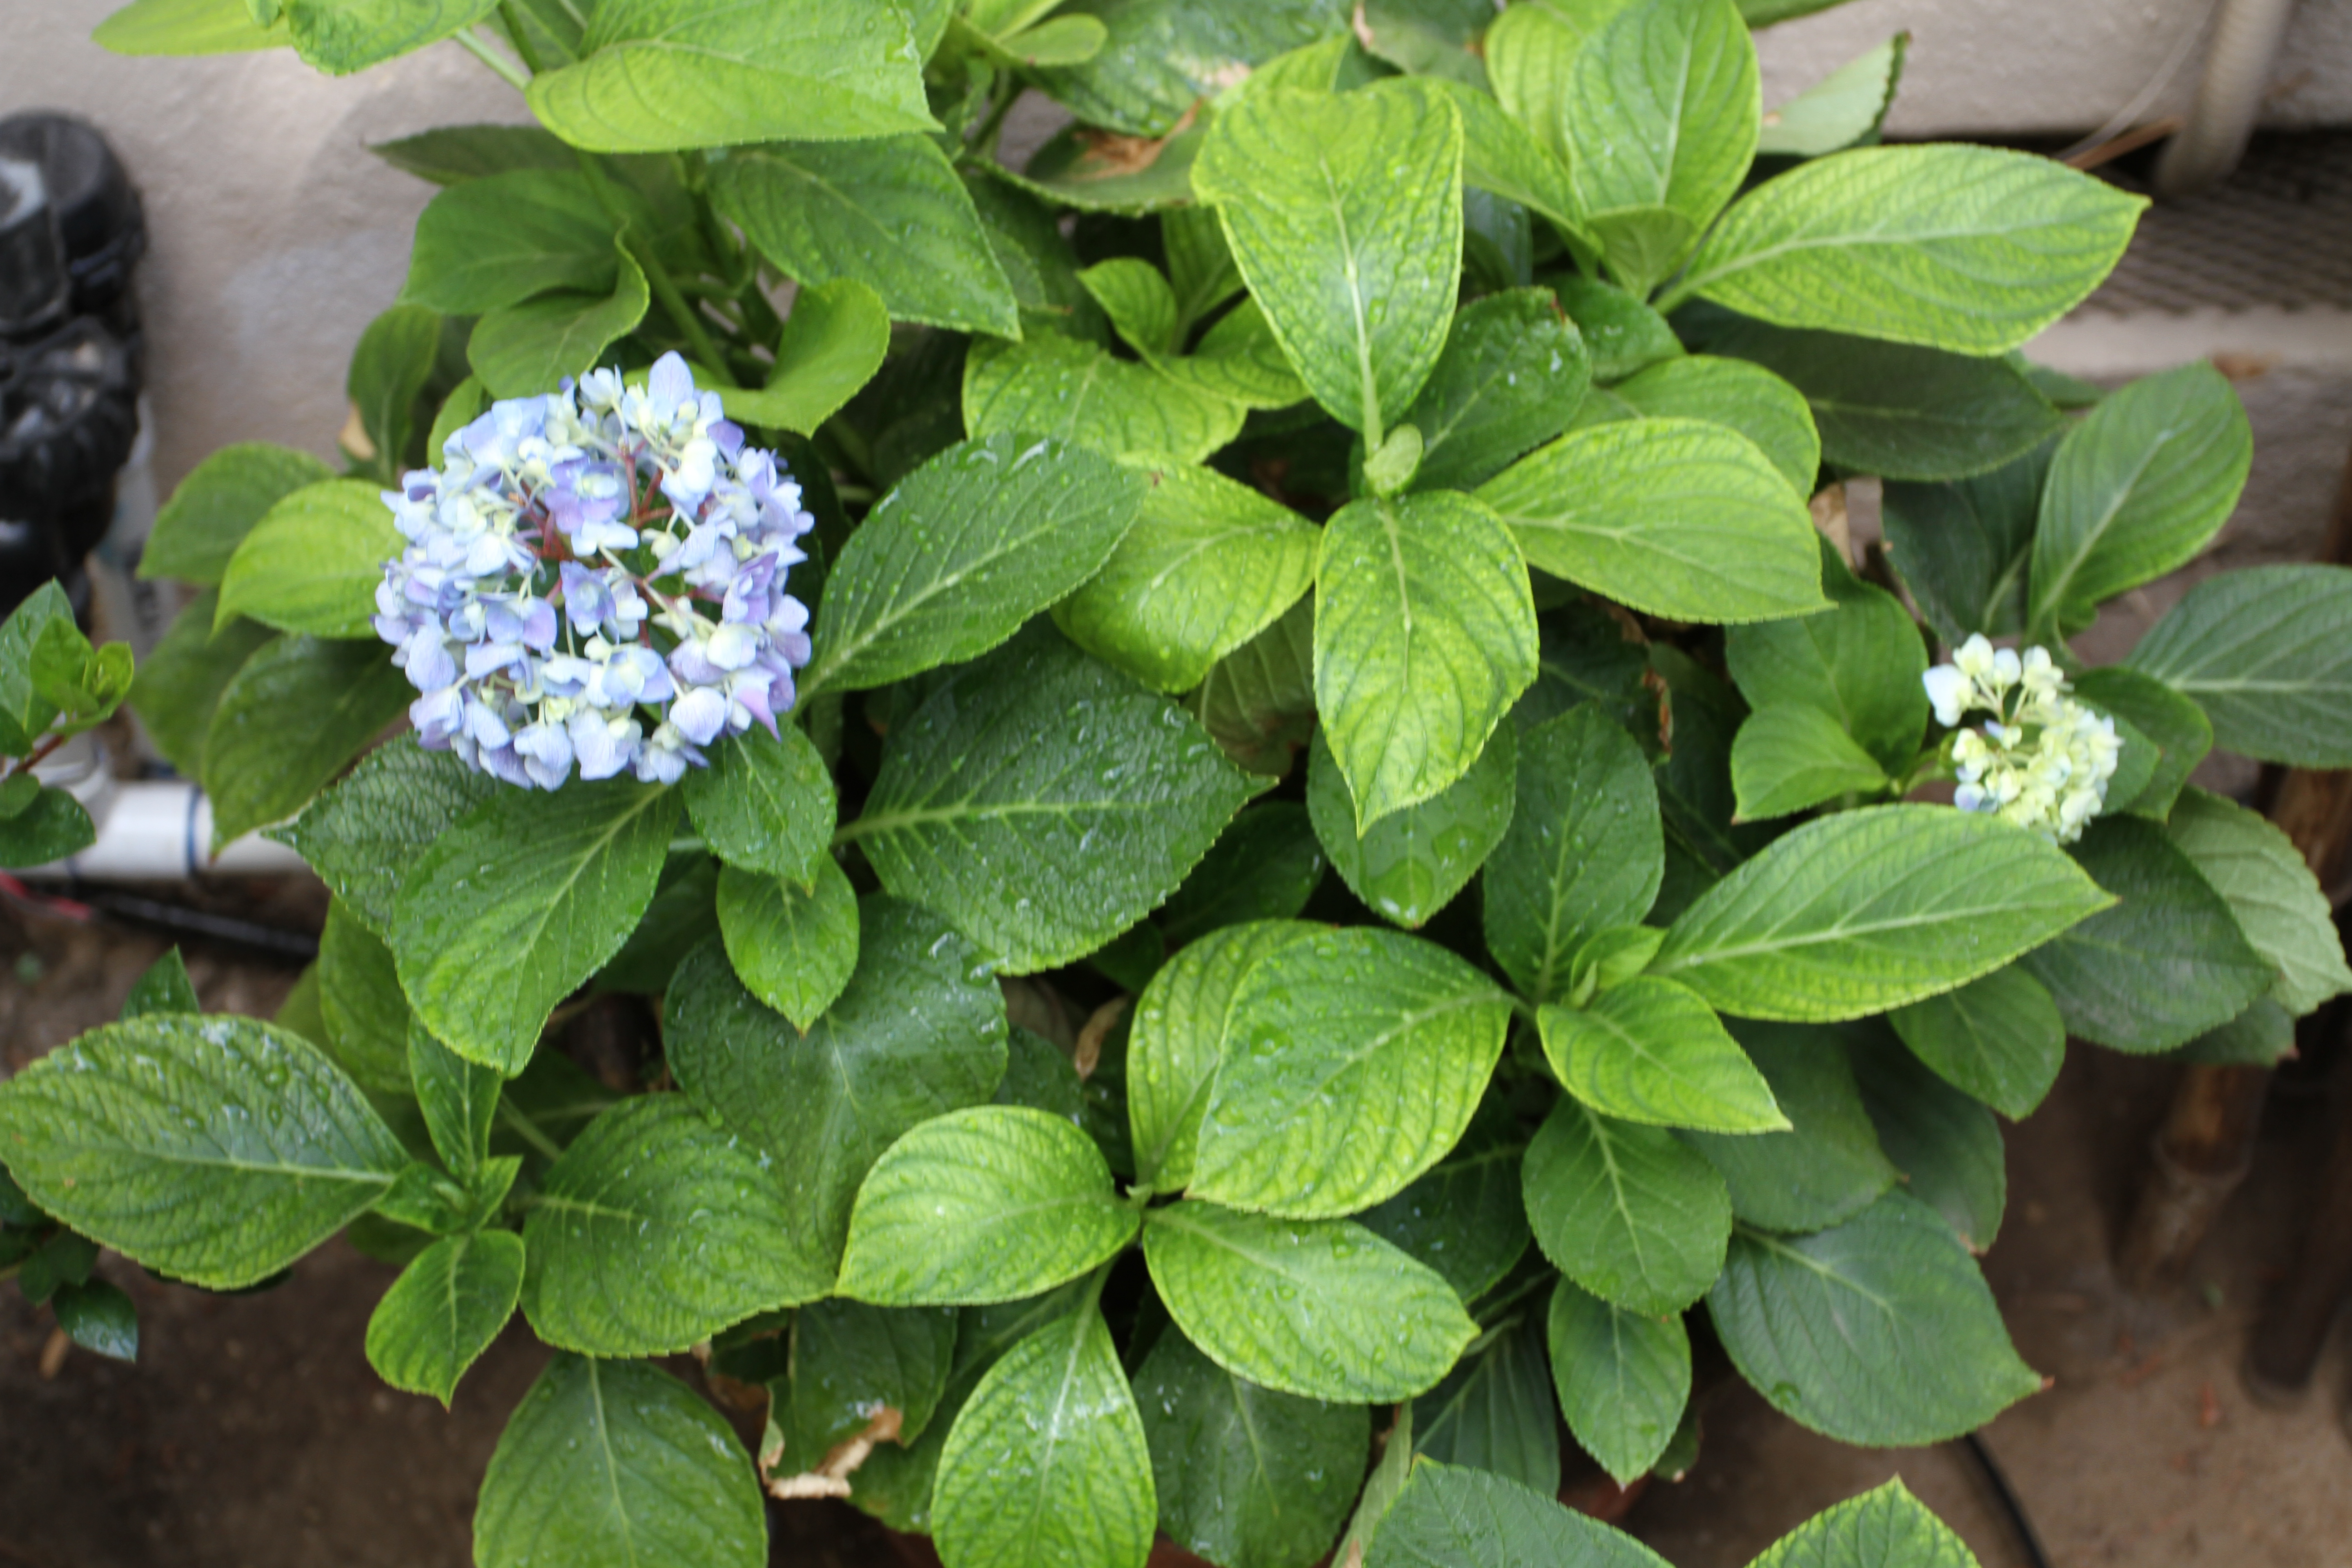
With that being my course of action, the next stage of my garden is unfortunately partially occupied by my HVAC unit (Air conditioning Condenser.) While I won’t complain about having an air conditioner, especially after the mid 90 degree temperatures this past weekend, the unit is really an eyesore and pretty difficult to disguise for a few reasons. The unit is fairly large and sits from the house wall to about 1/3 of the way into the middle of the garden. The other issue is its intended use, which is to create air flow into the unit, and home which requires the unit to be clear and fee of debris or anything else that might obstruct consistent access to air.

After doing my normal pre-project web search, I found a few good examples of homeowner remedies on Pinterest.com and Houzz.com.

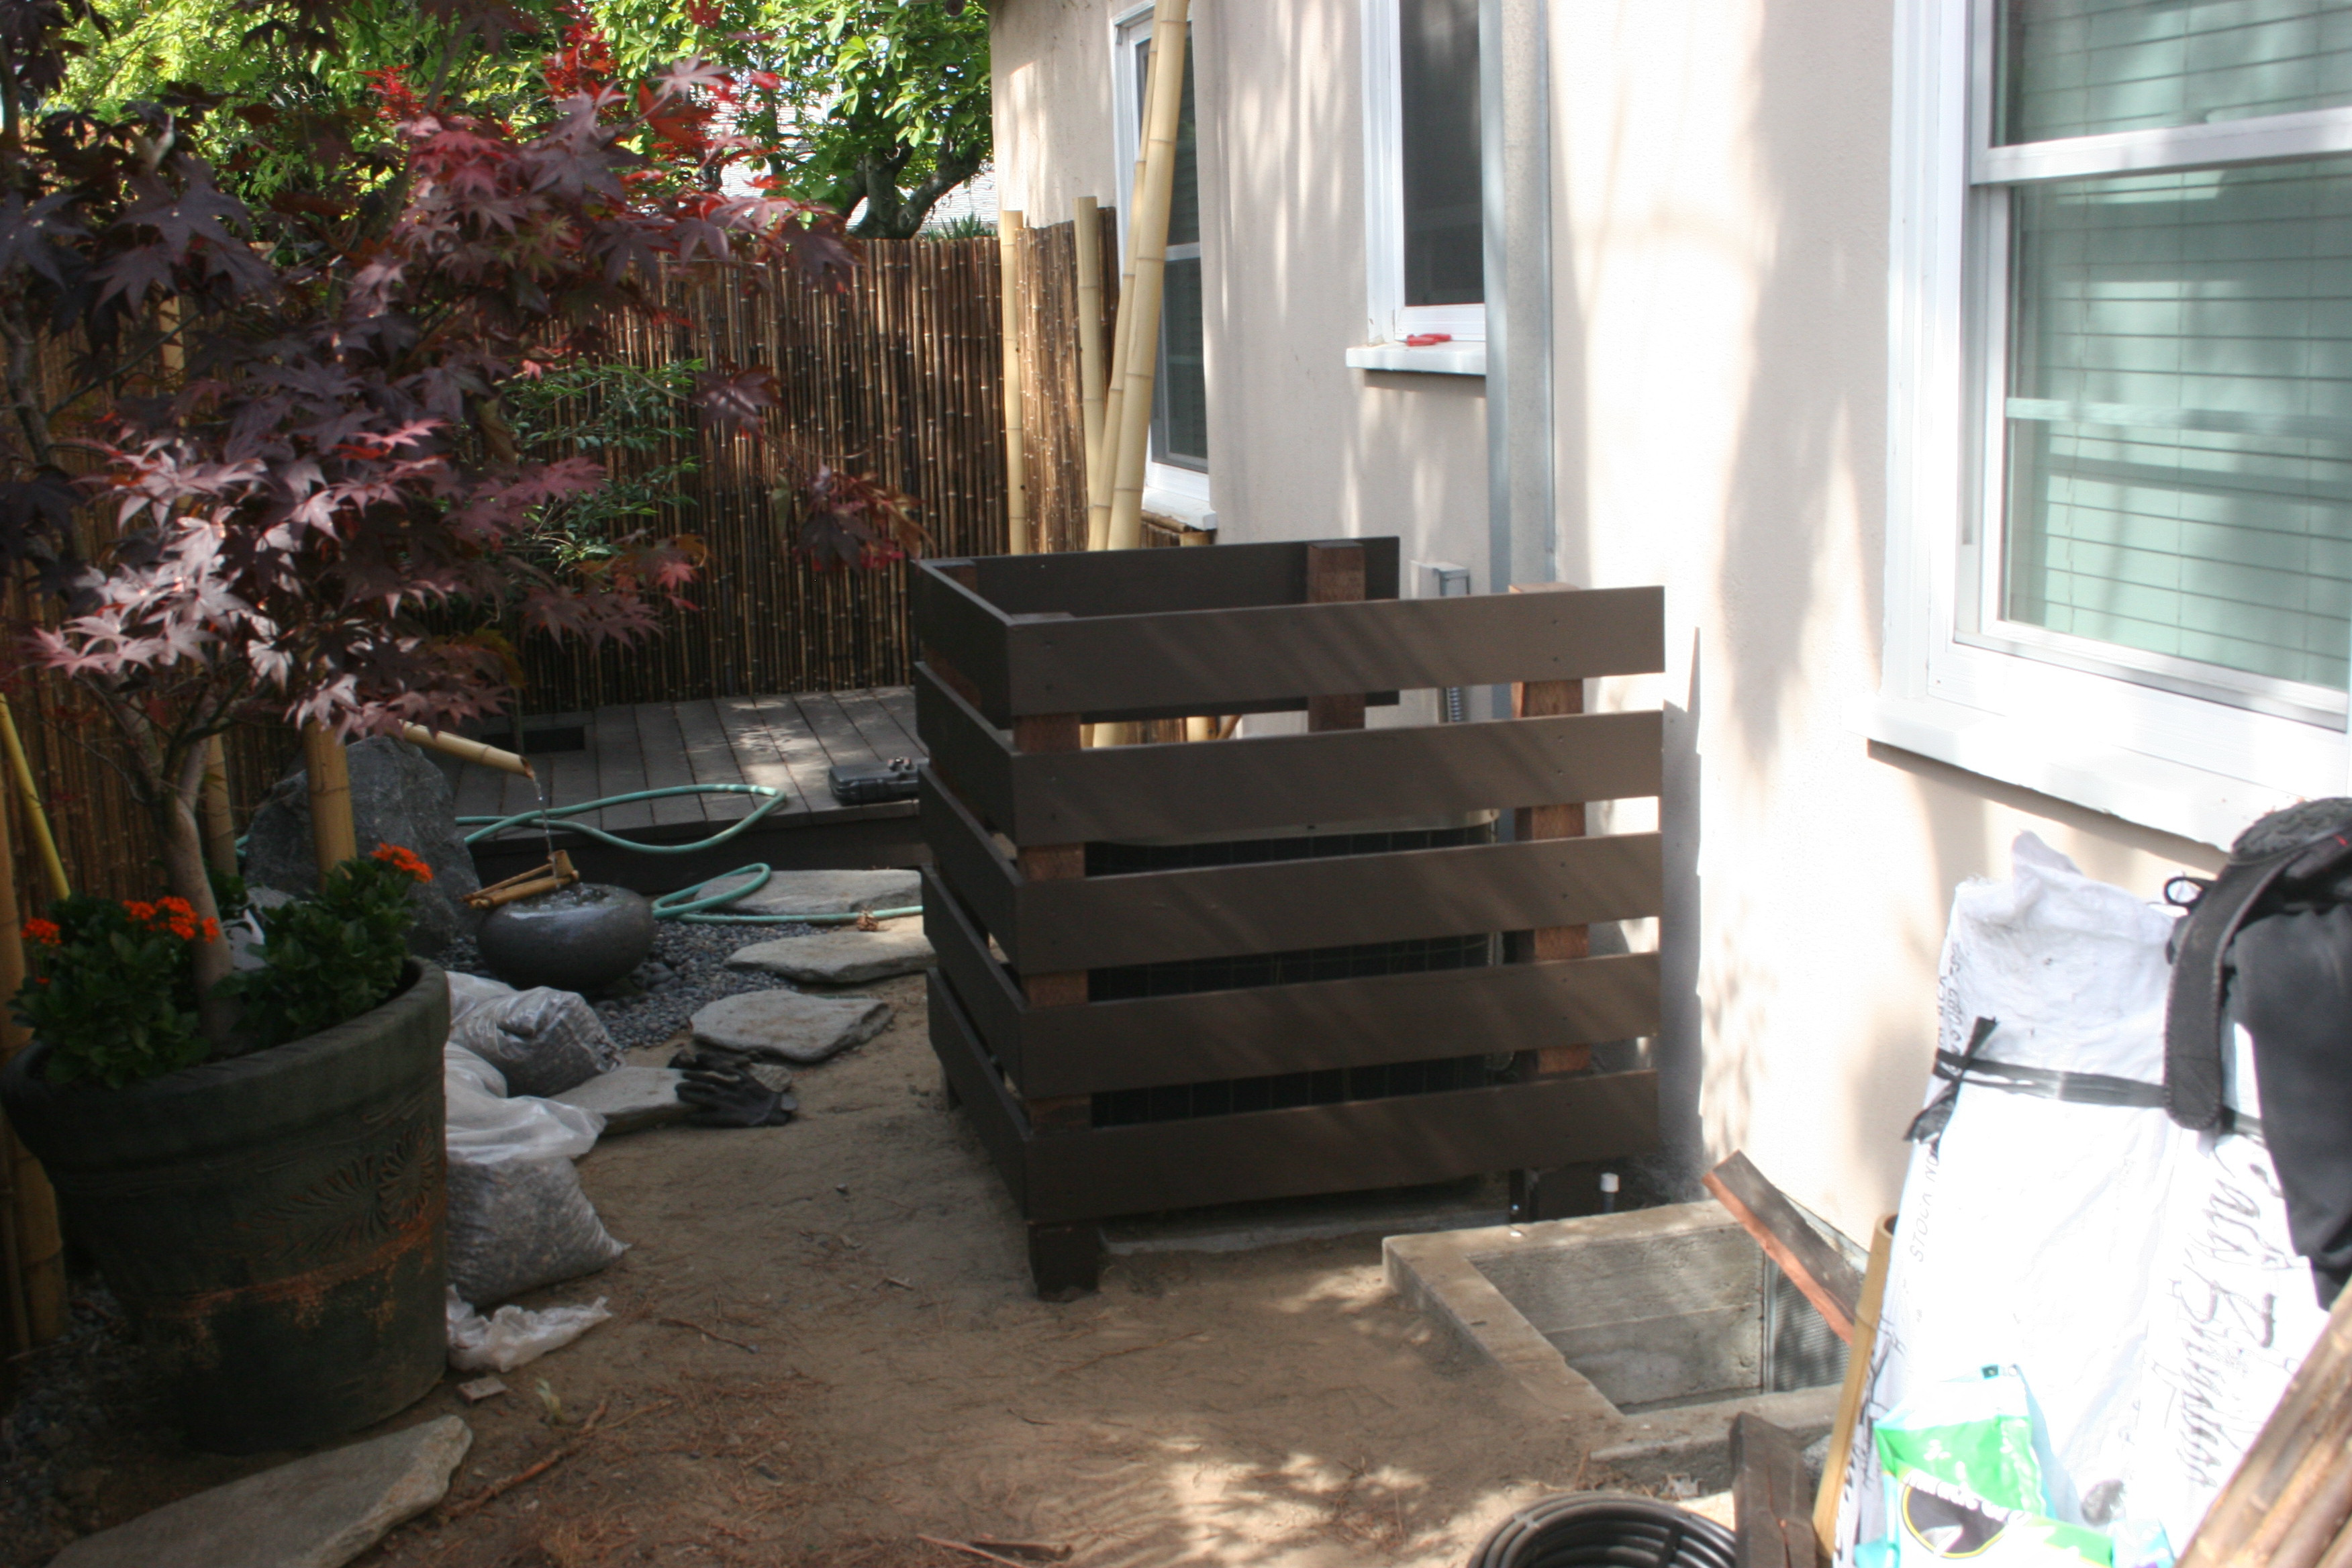
My solution was to build a crate type fence around the unit which would allow me to disquiet the unit but still provide for adequate air intake. Once completed I would paint the fencing to match the deck which would hopefully take some attention away from the fence by blending it into the existing color scheme.

Once I settled on a design, I decided to use metal fence posts in case I need to remove the fencing to allow work on or the remove and replacement of my HVAC unit at a later date.

http://www.homedepot.com/p/LTL-Home-Products-24-in-Grey-Groundmaster-Post-System-GM-24/100072482

241

240

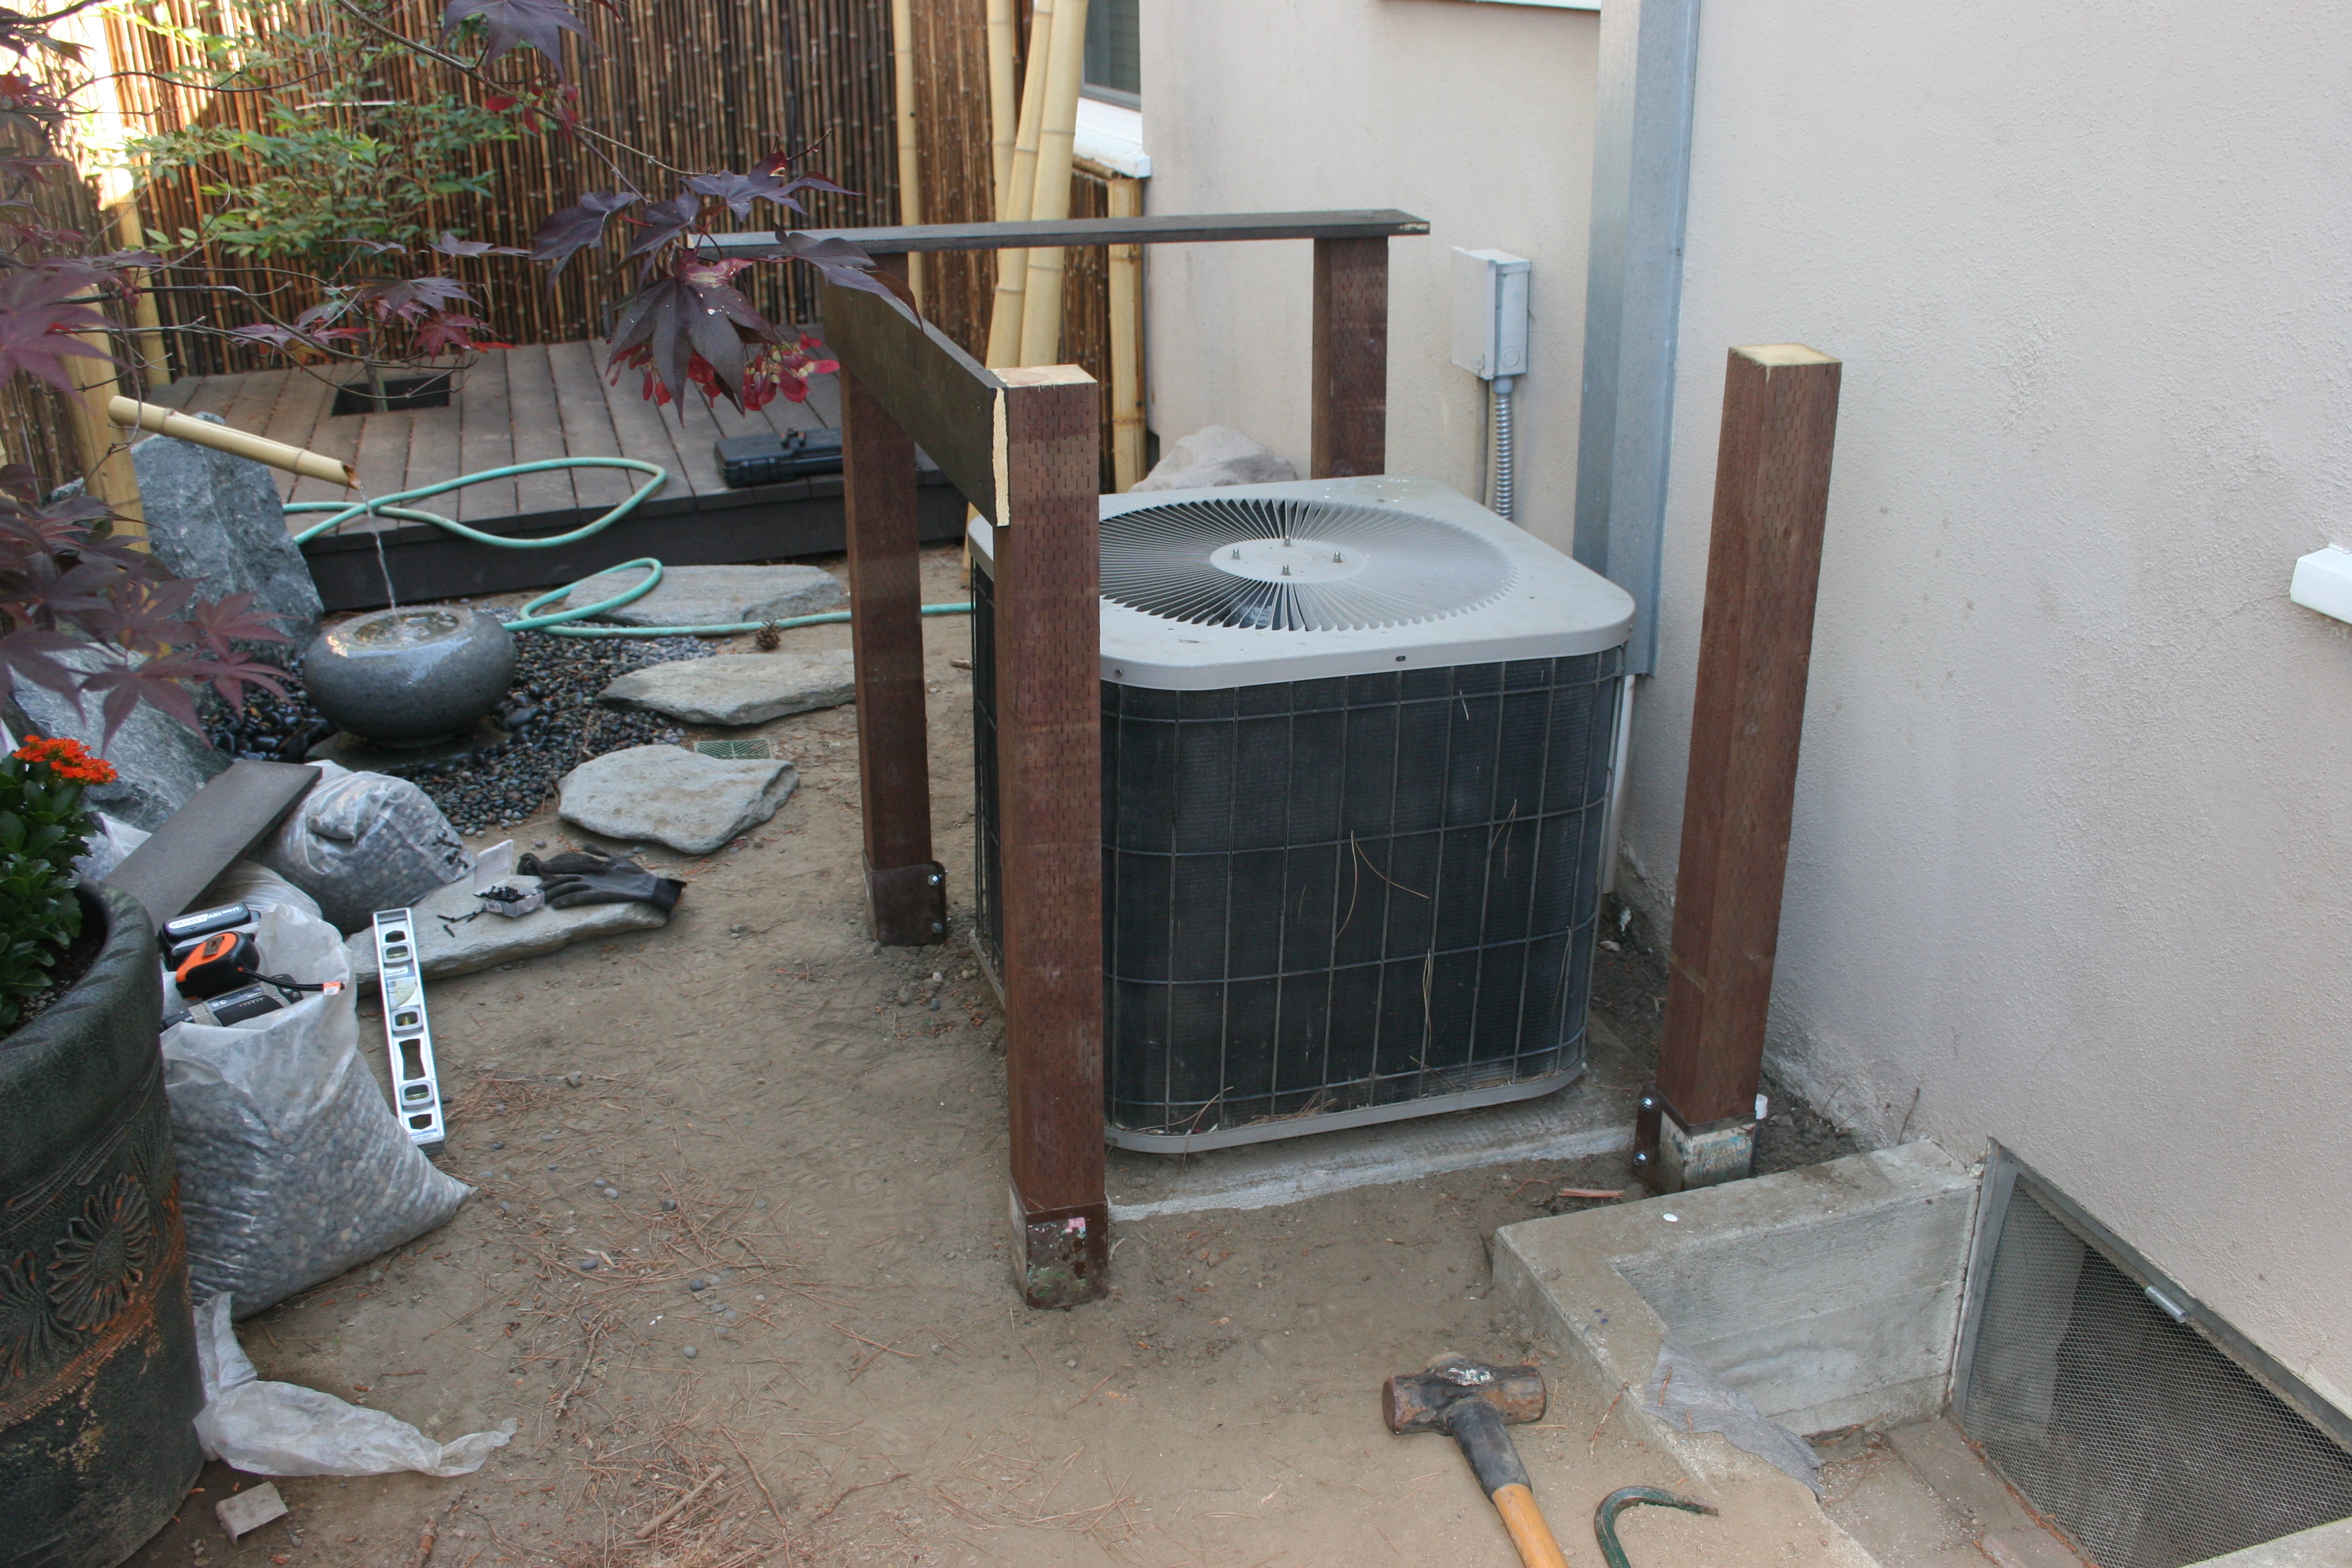
After the four posts were hammered into the ground with the use of a sledge Hammer and a small 4X4 piece of wood, I cut four posts from 4X4 pressure treated wood, installed them into the groundmaster post holders and leveled and tightened them with the post screws

http://www.homedepot.com/p/Unbranded-4-in-x-4-in-x-8-ft-Hem-Fir-Brown-Stain-Pressure-Treated-Timber-17956/202287539

Next I cut the cross planks to size and installed using black deck screws. For the plants, I opted for inexpensive common wood to keep costs down and for ease of replacement.

http://www.homedepot.com/p/Unbranded-1-in-x-6-in-x-8-ft-Common-Board-914770/202074483

Finally, I painted the wood with the same Behr deck stain I used for my decking.

243

Overall, a pretty easy project although getting the posting in straight and level took some time. Once my project is complete, I will do some additional paint touch up on the fence.


Costs of HVAC project: $125

Total Project Cost: $3,730

Step 11 – Water and Electrical

442
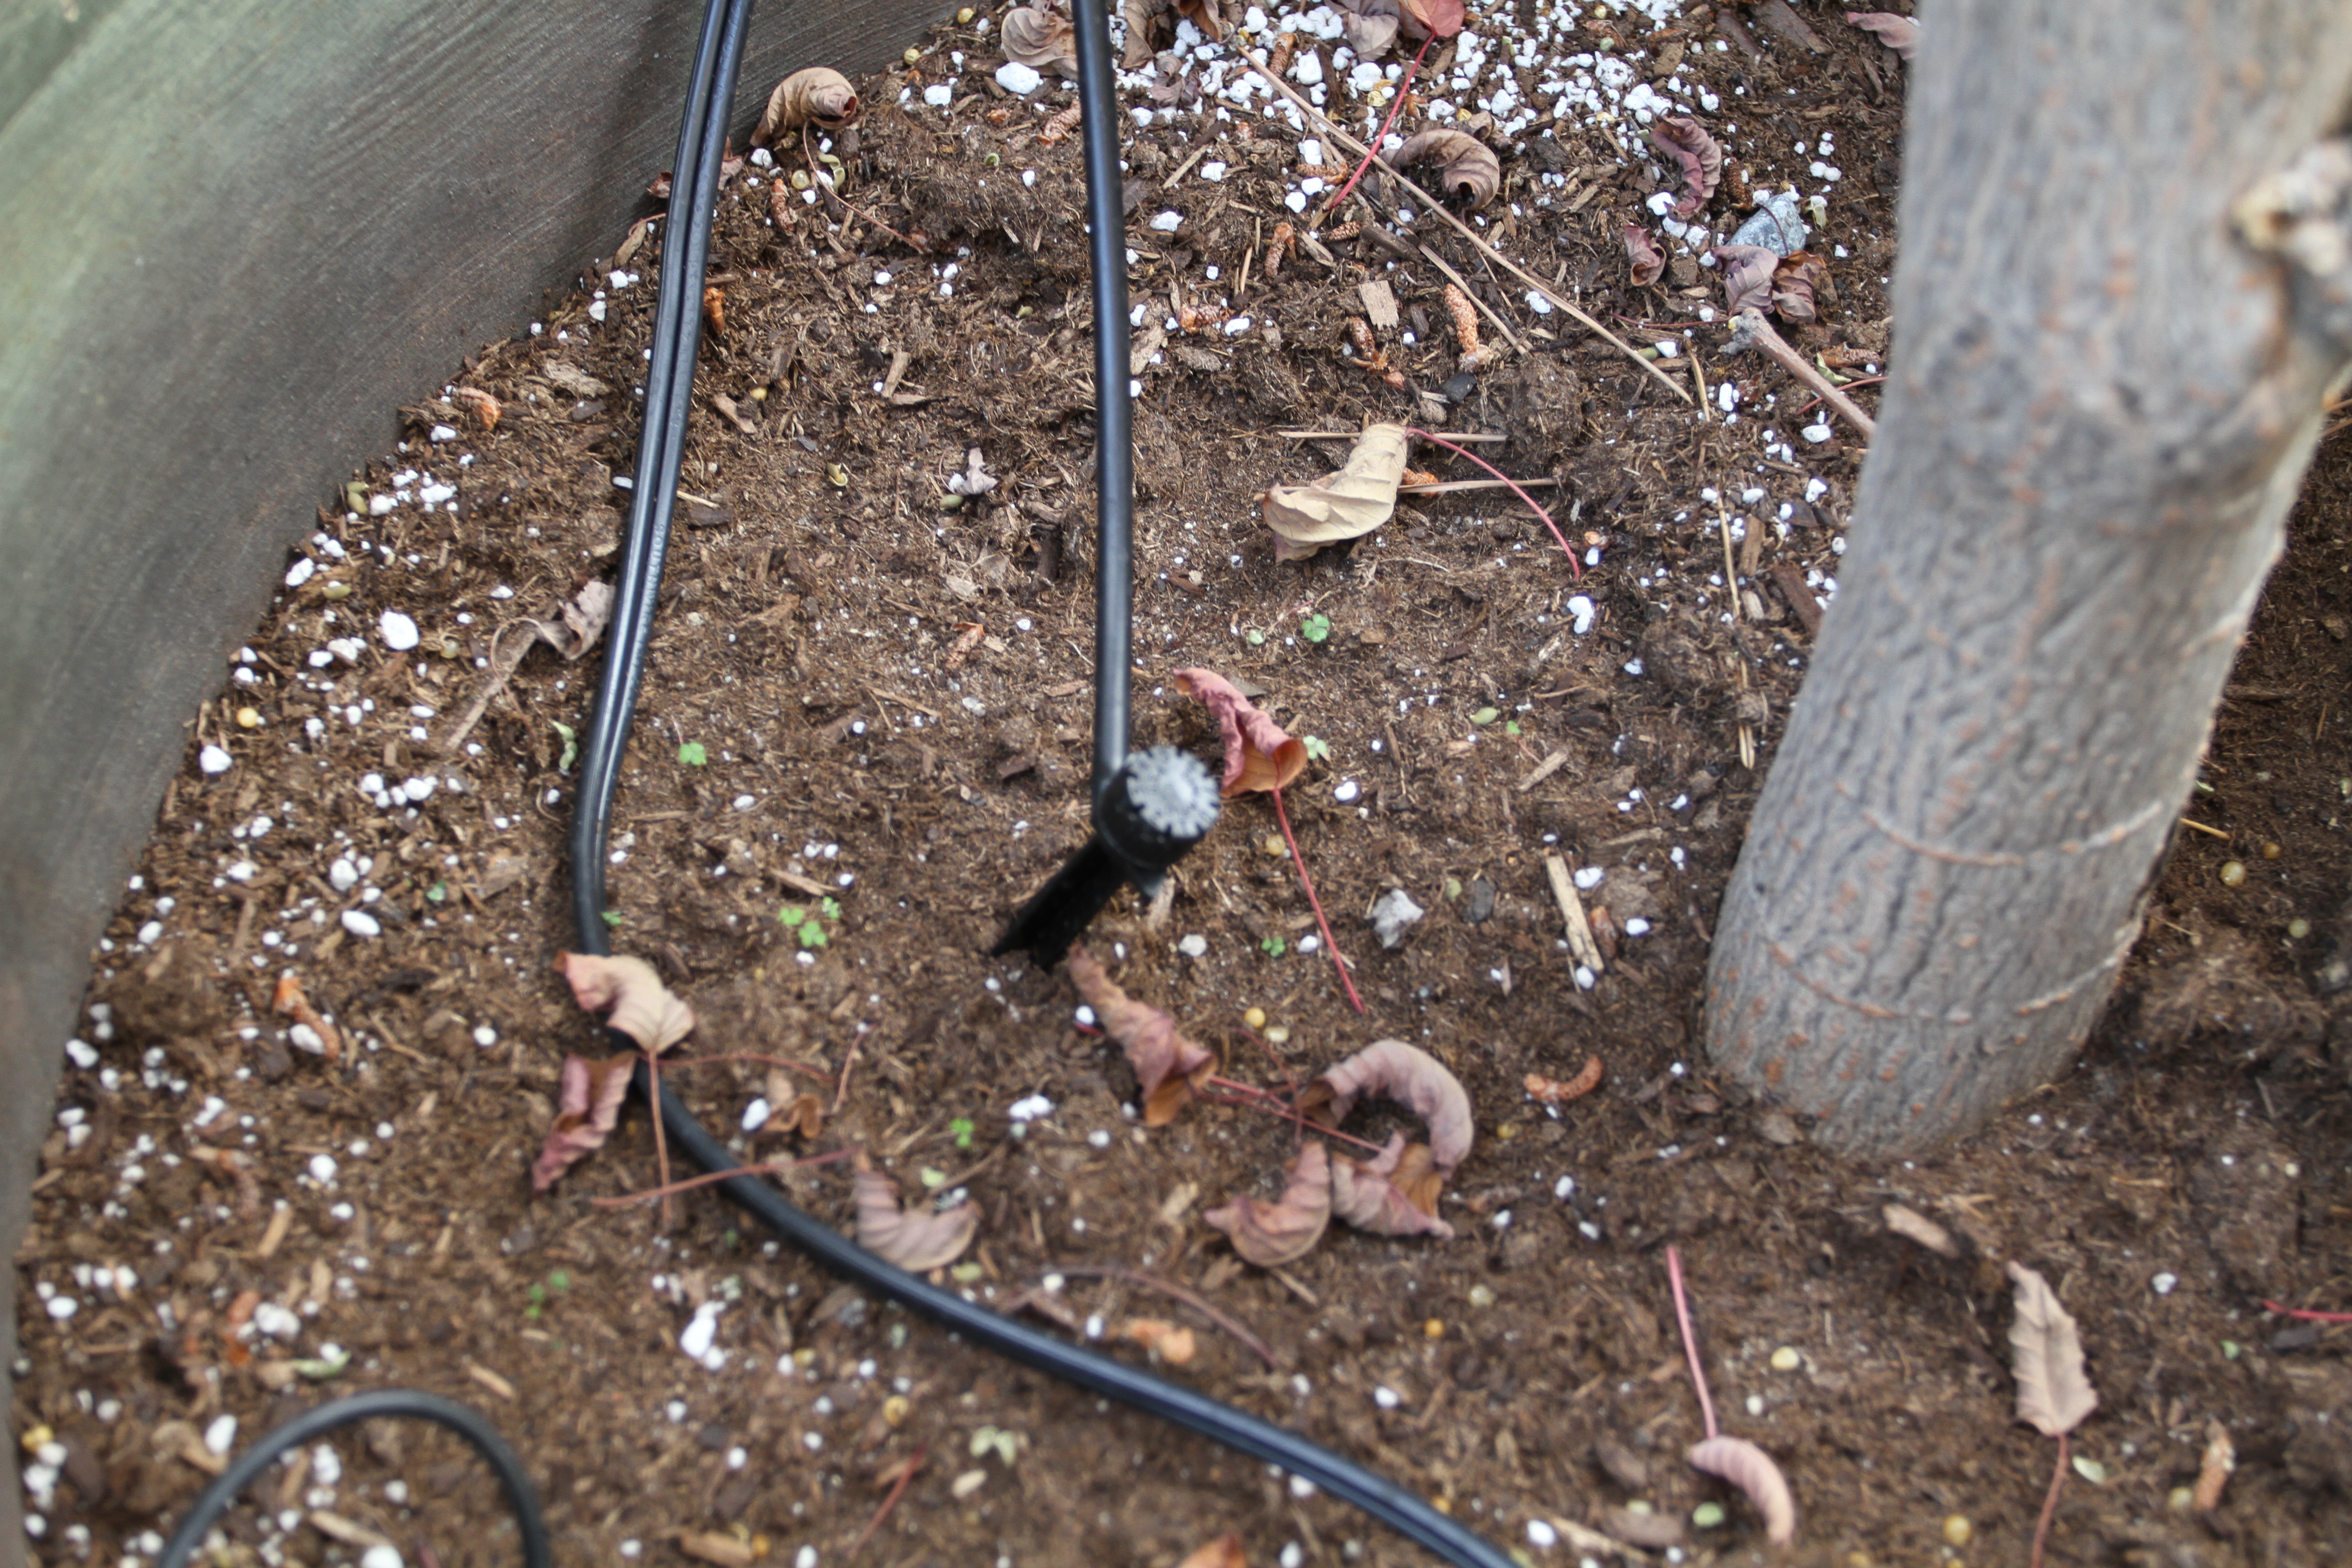
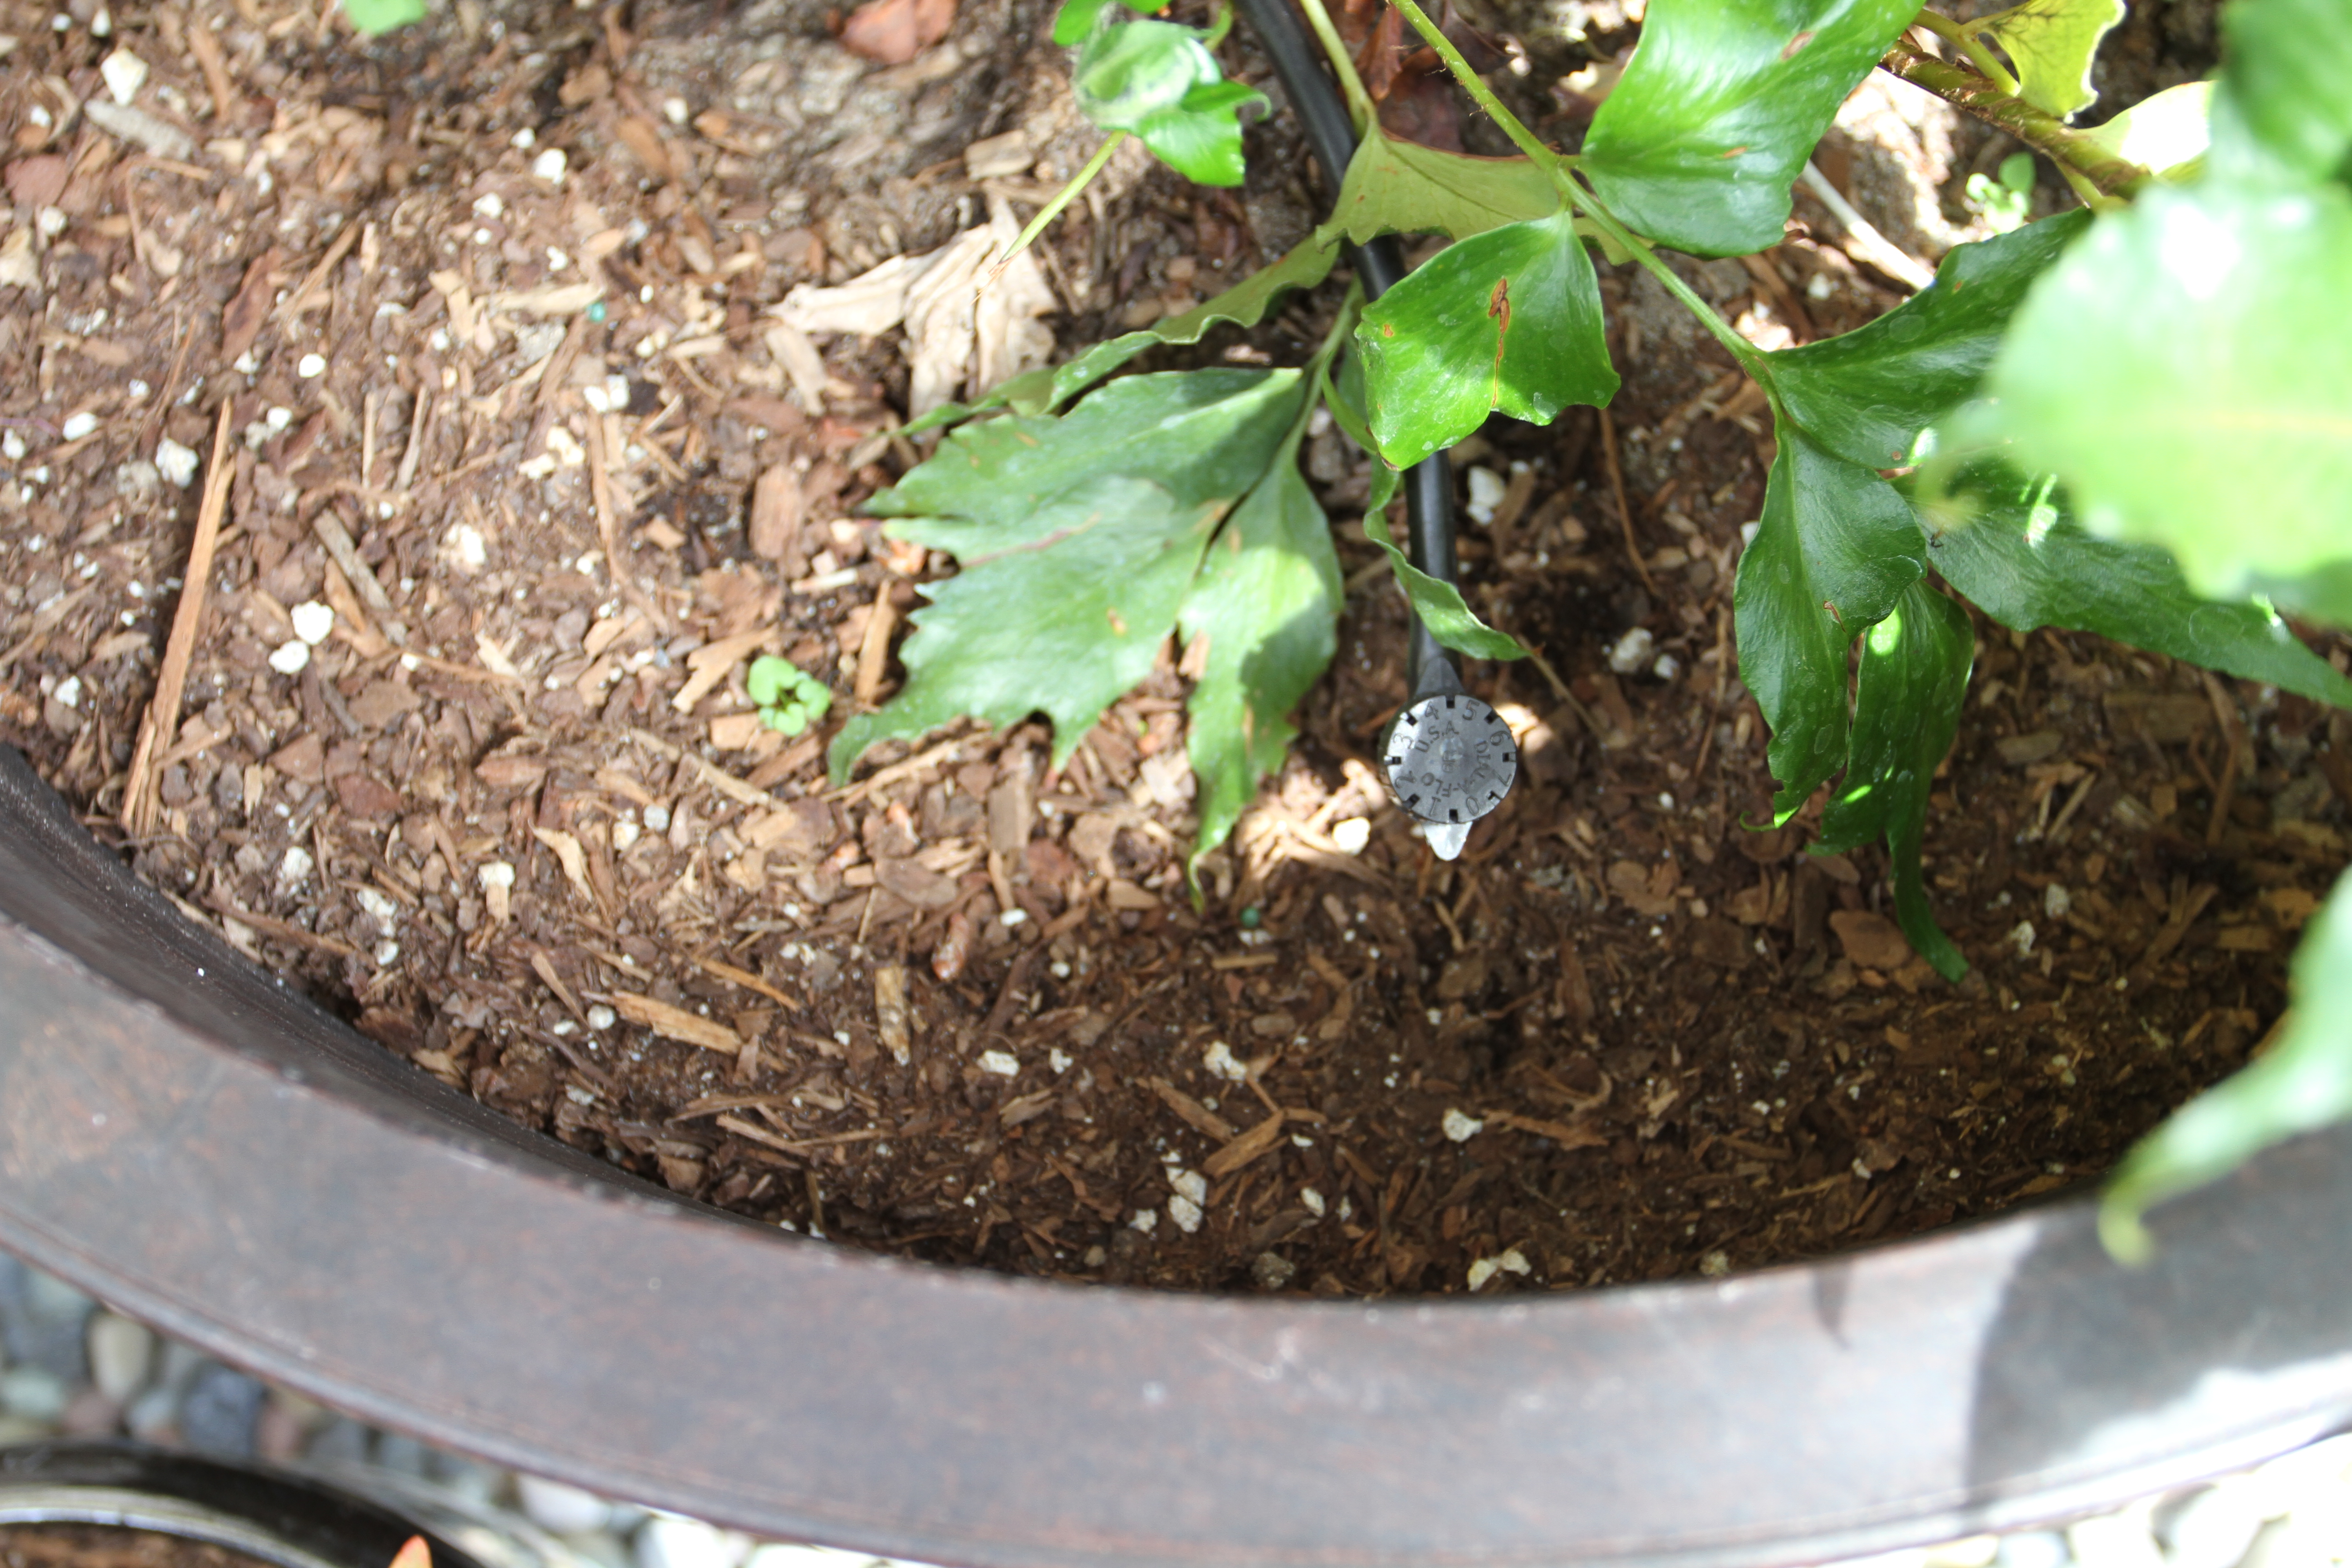
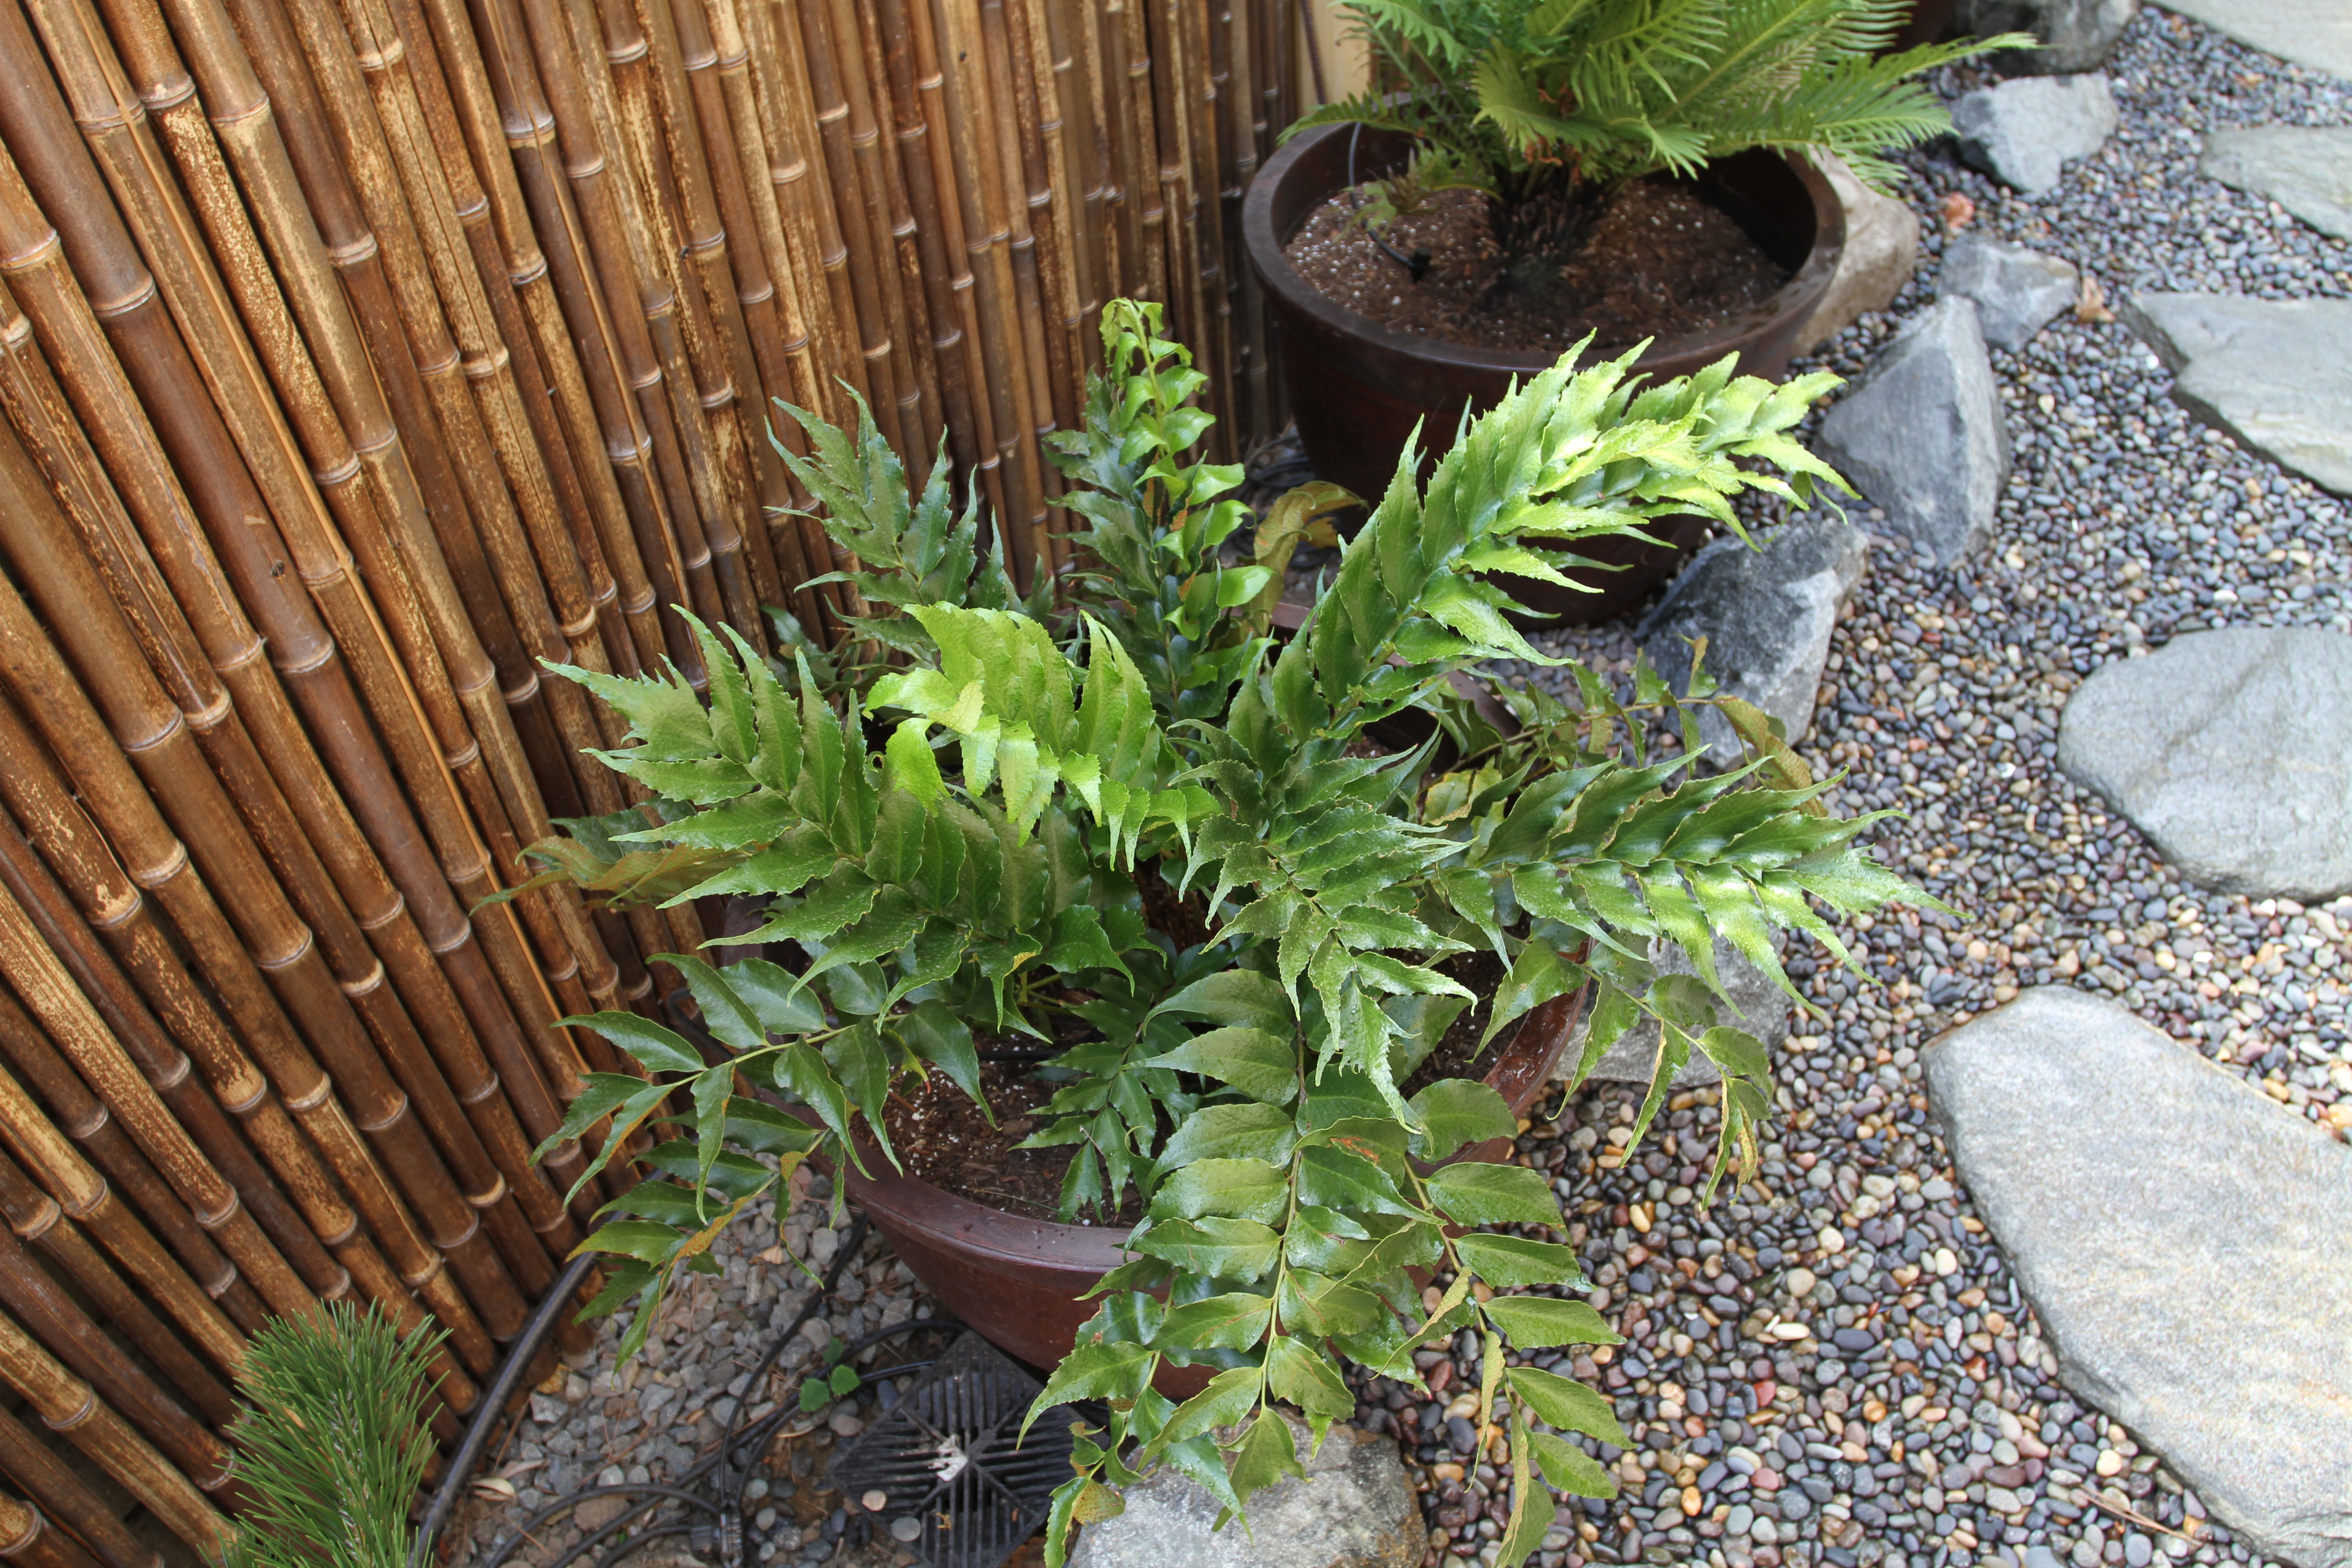
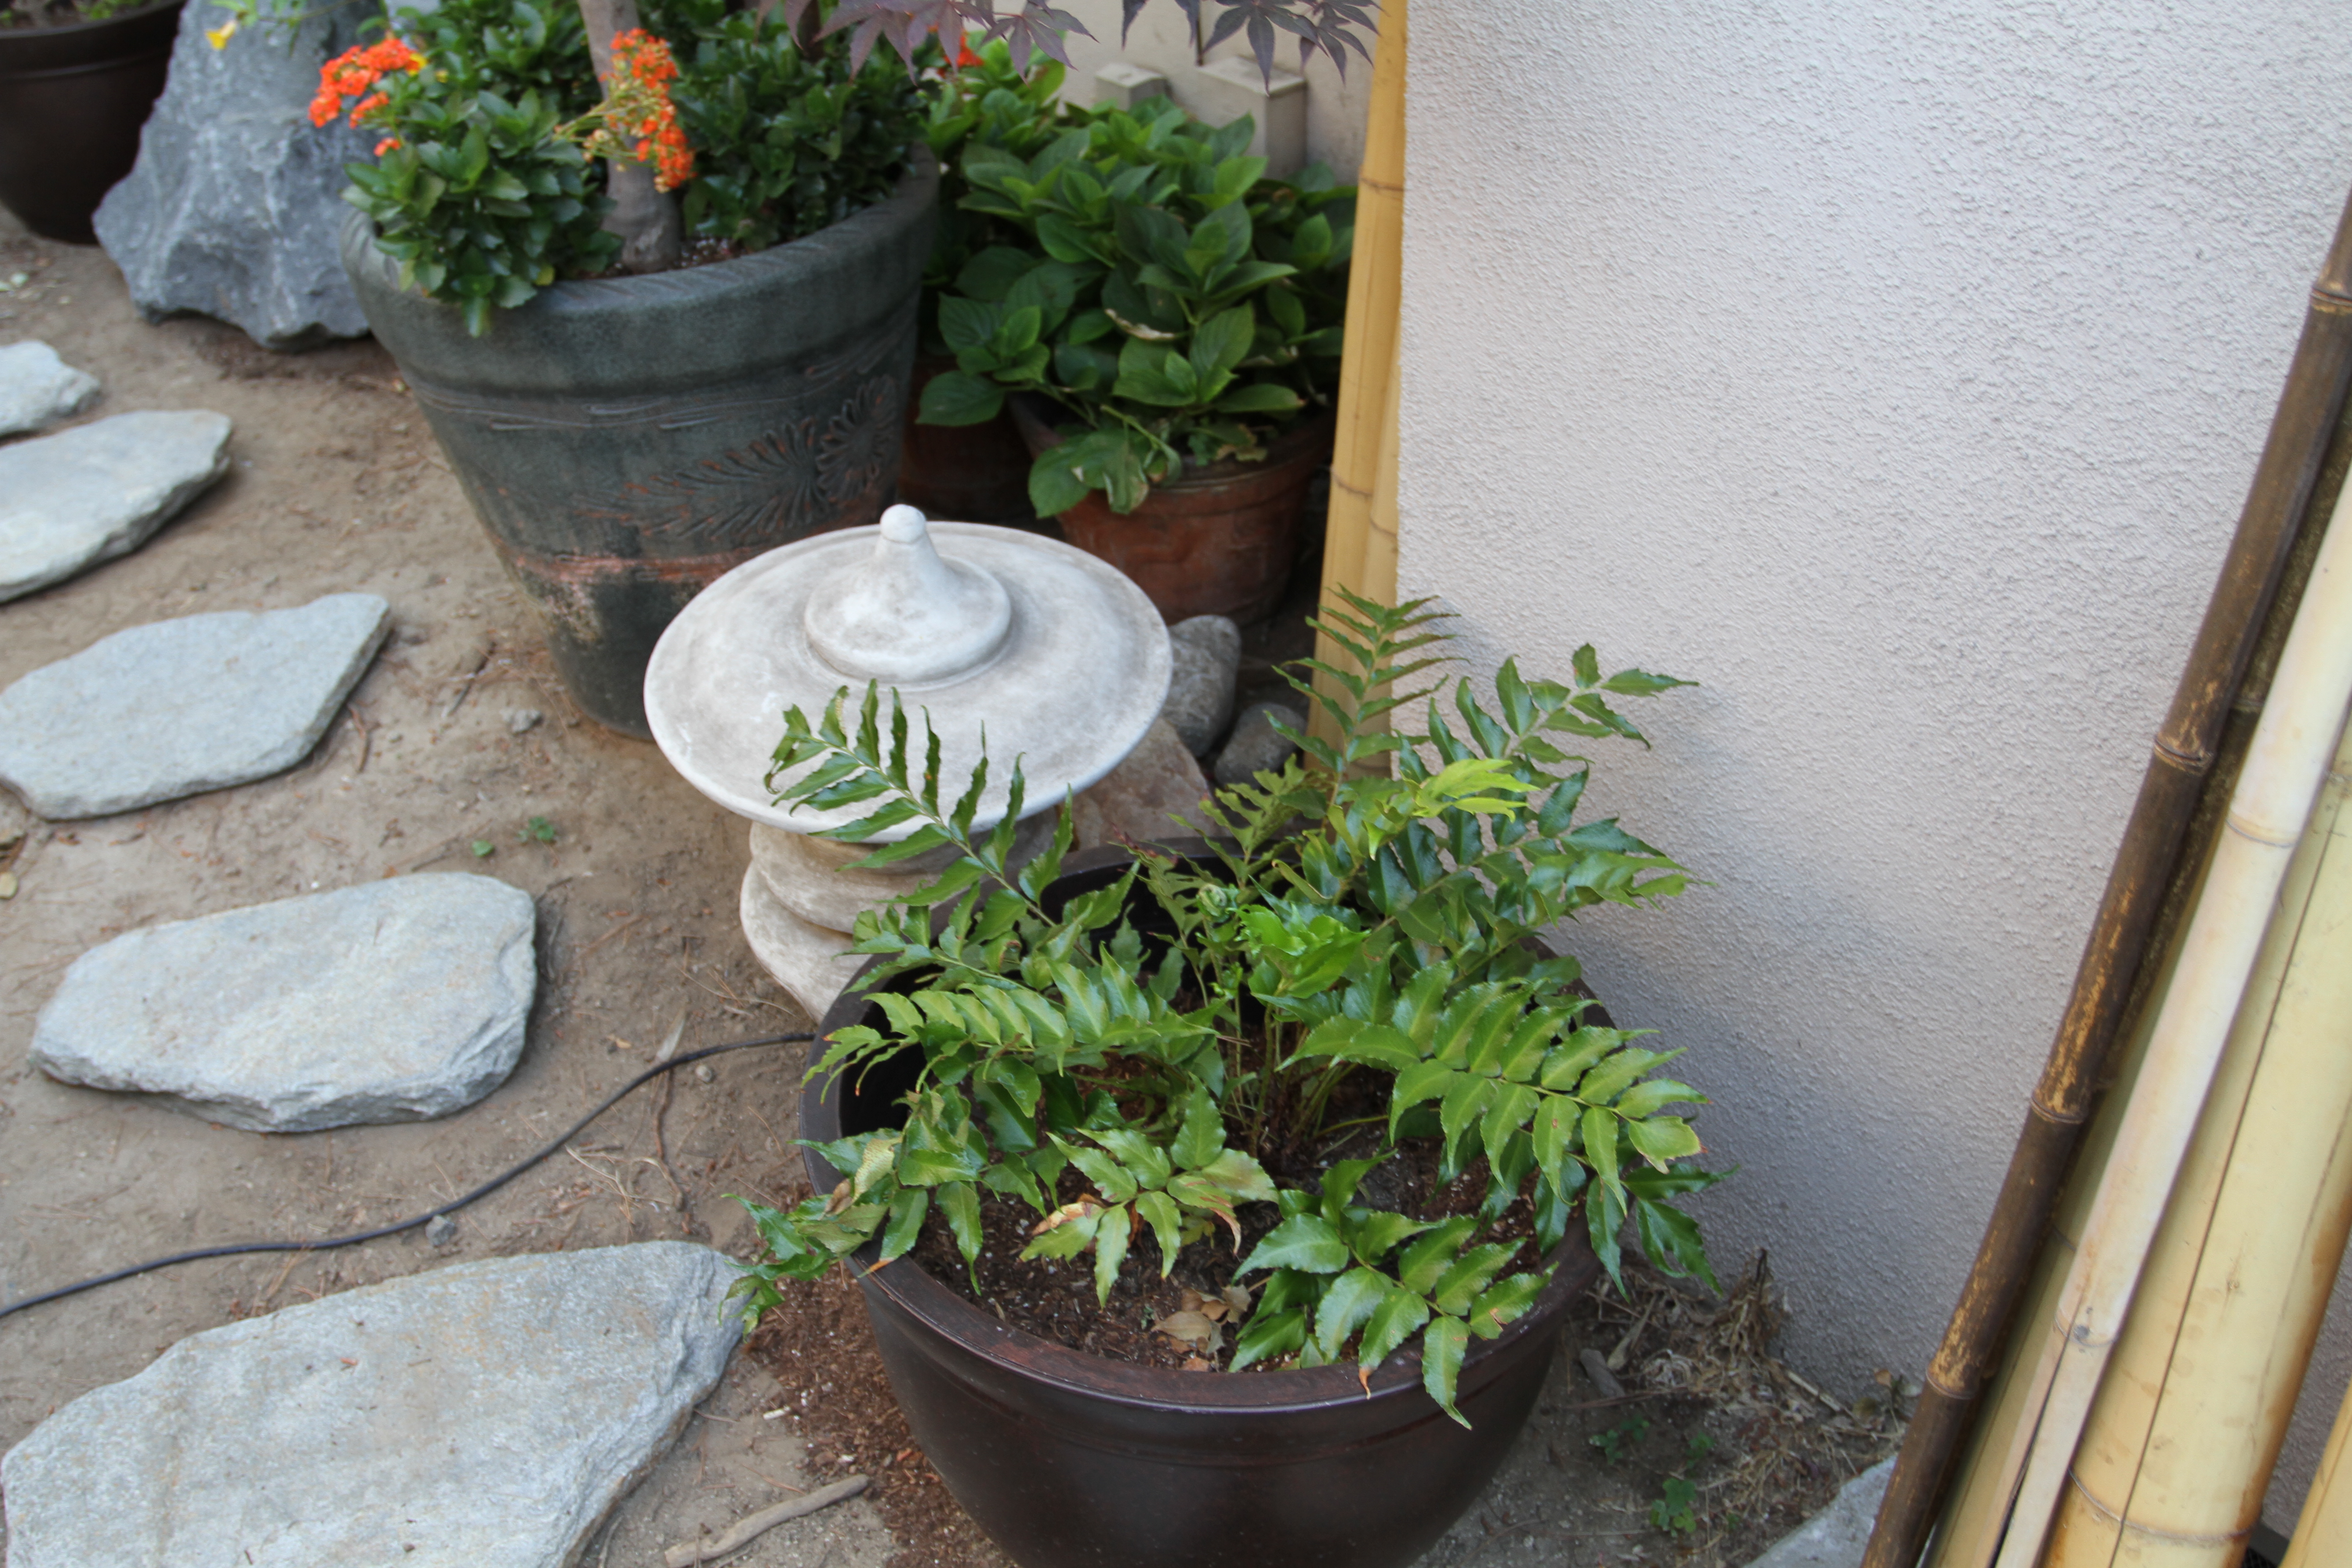
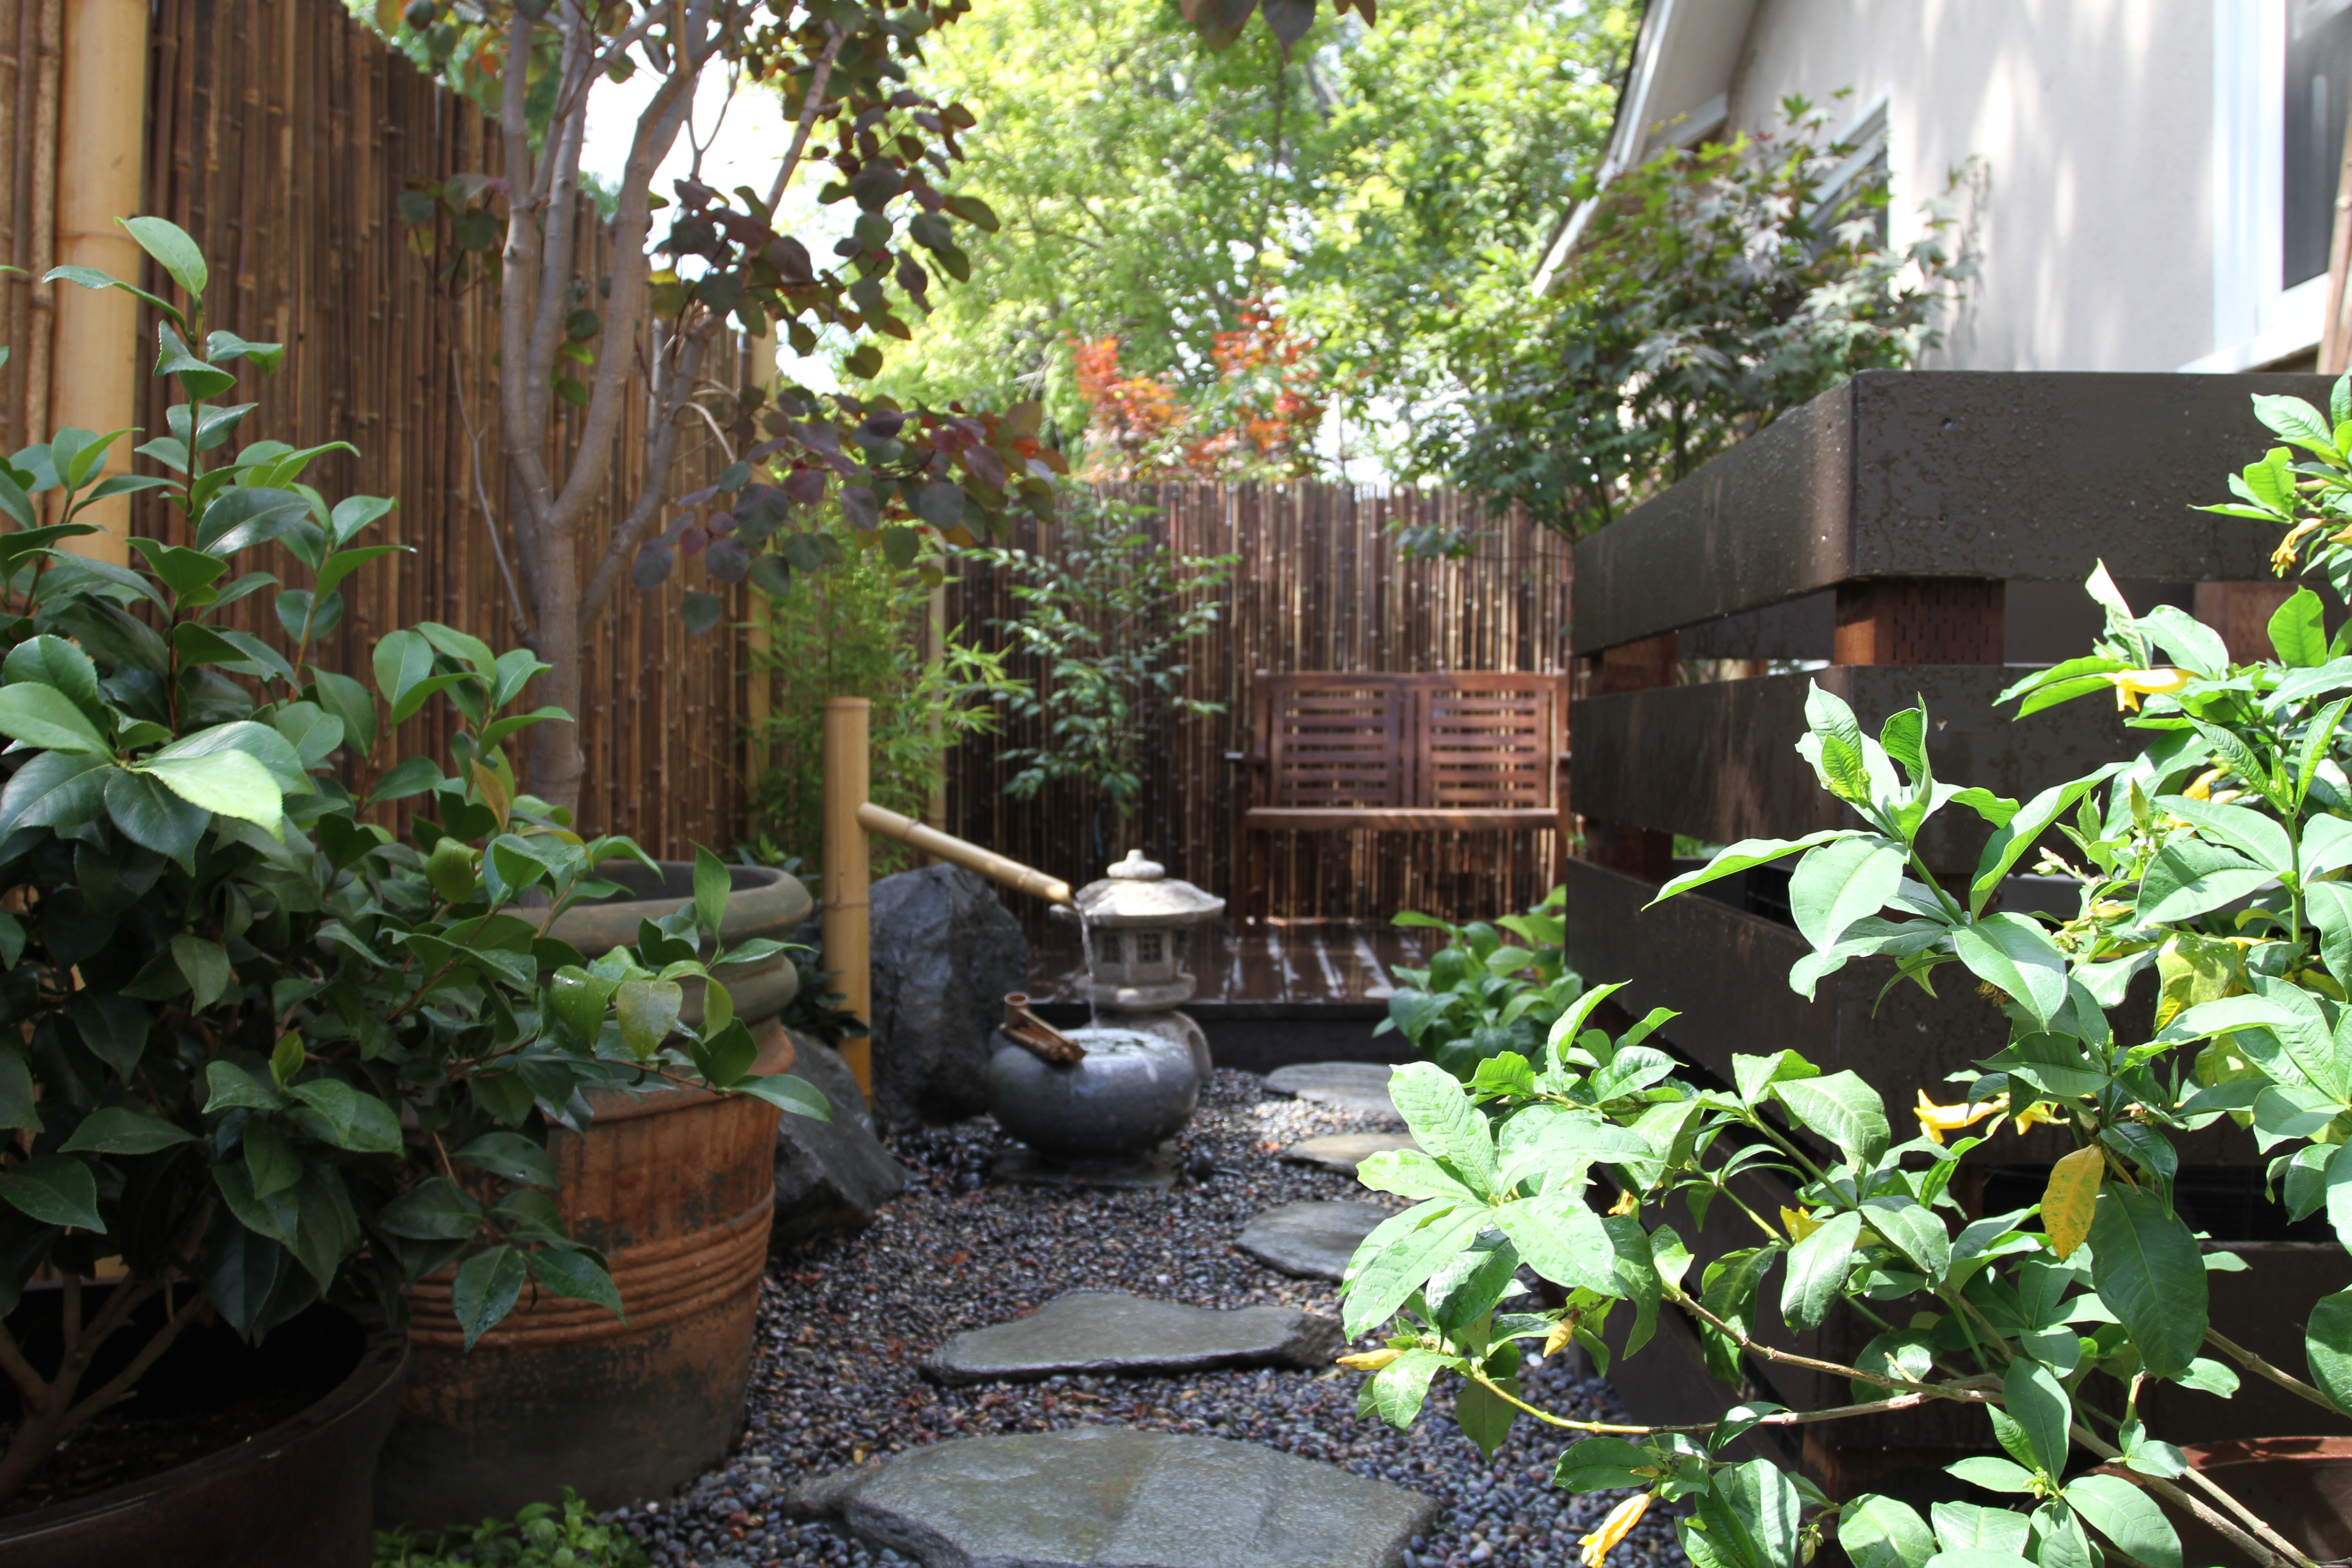
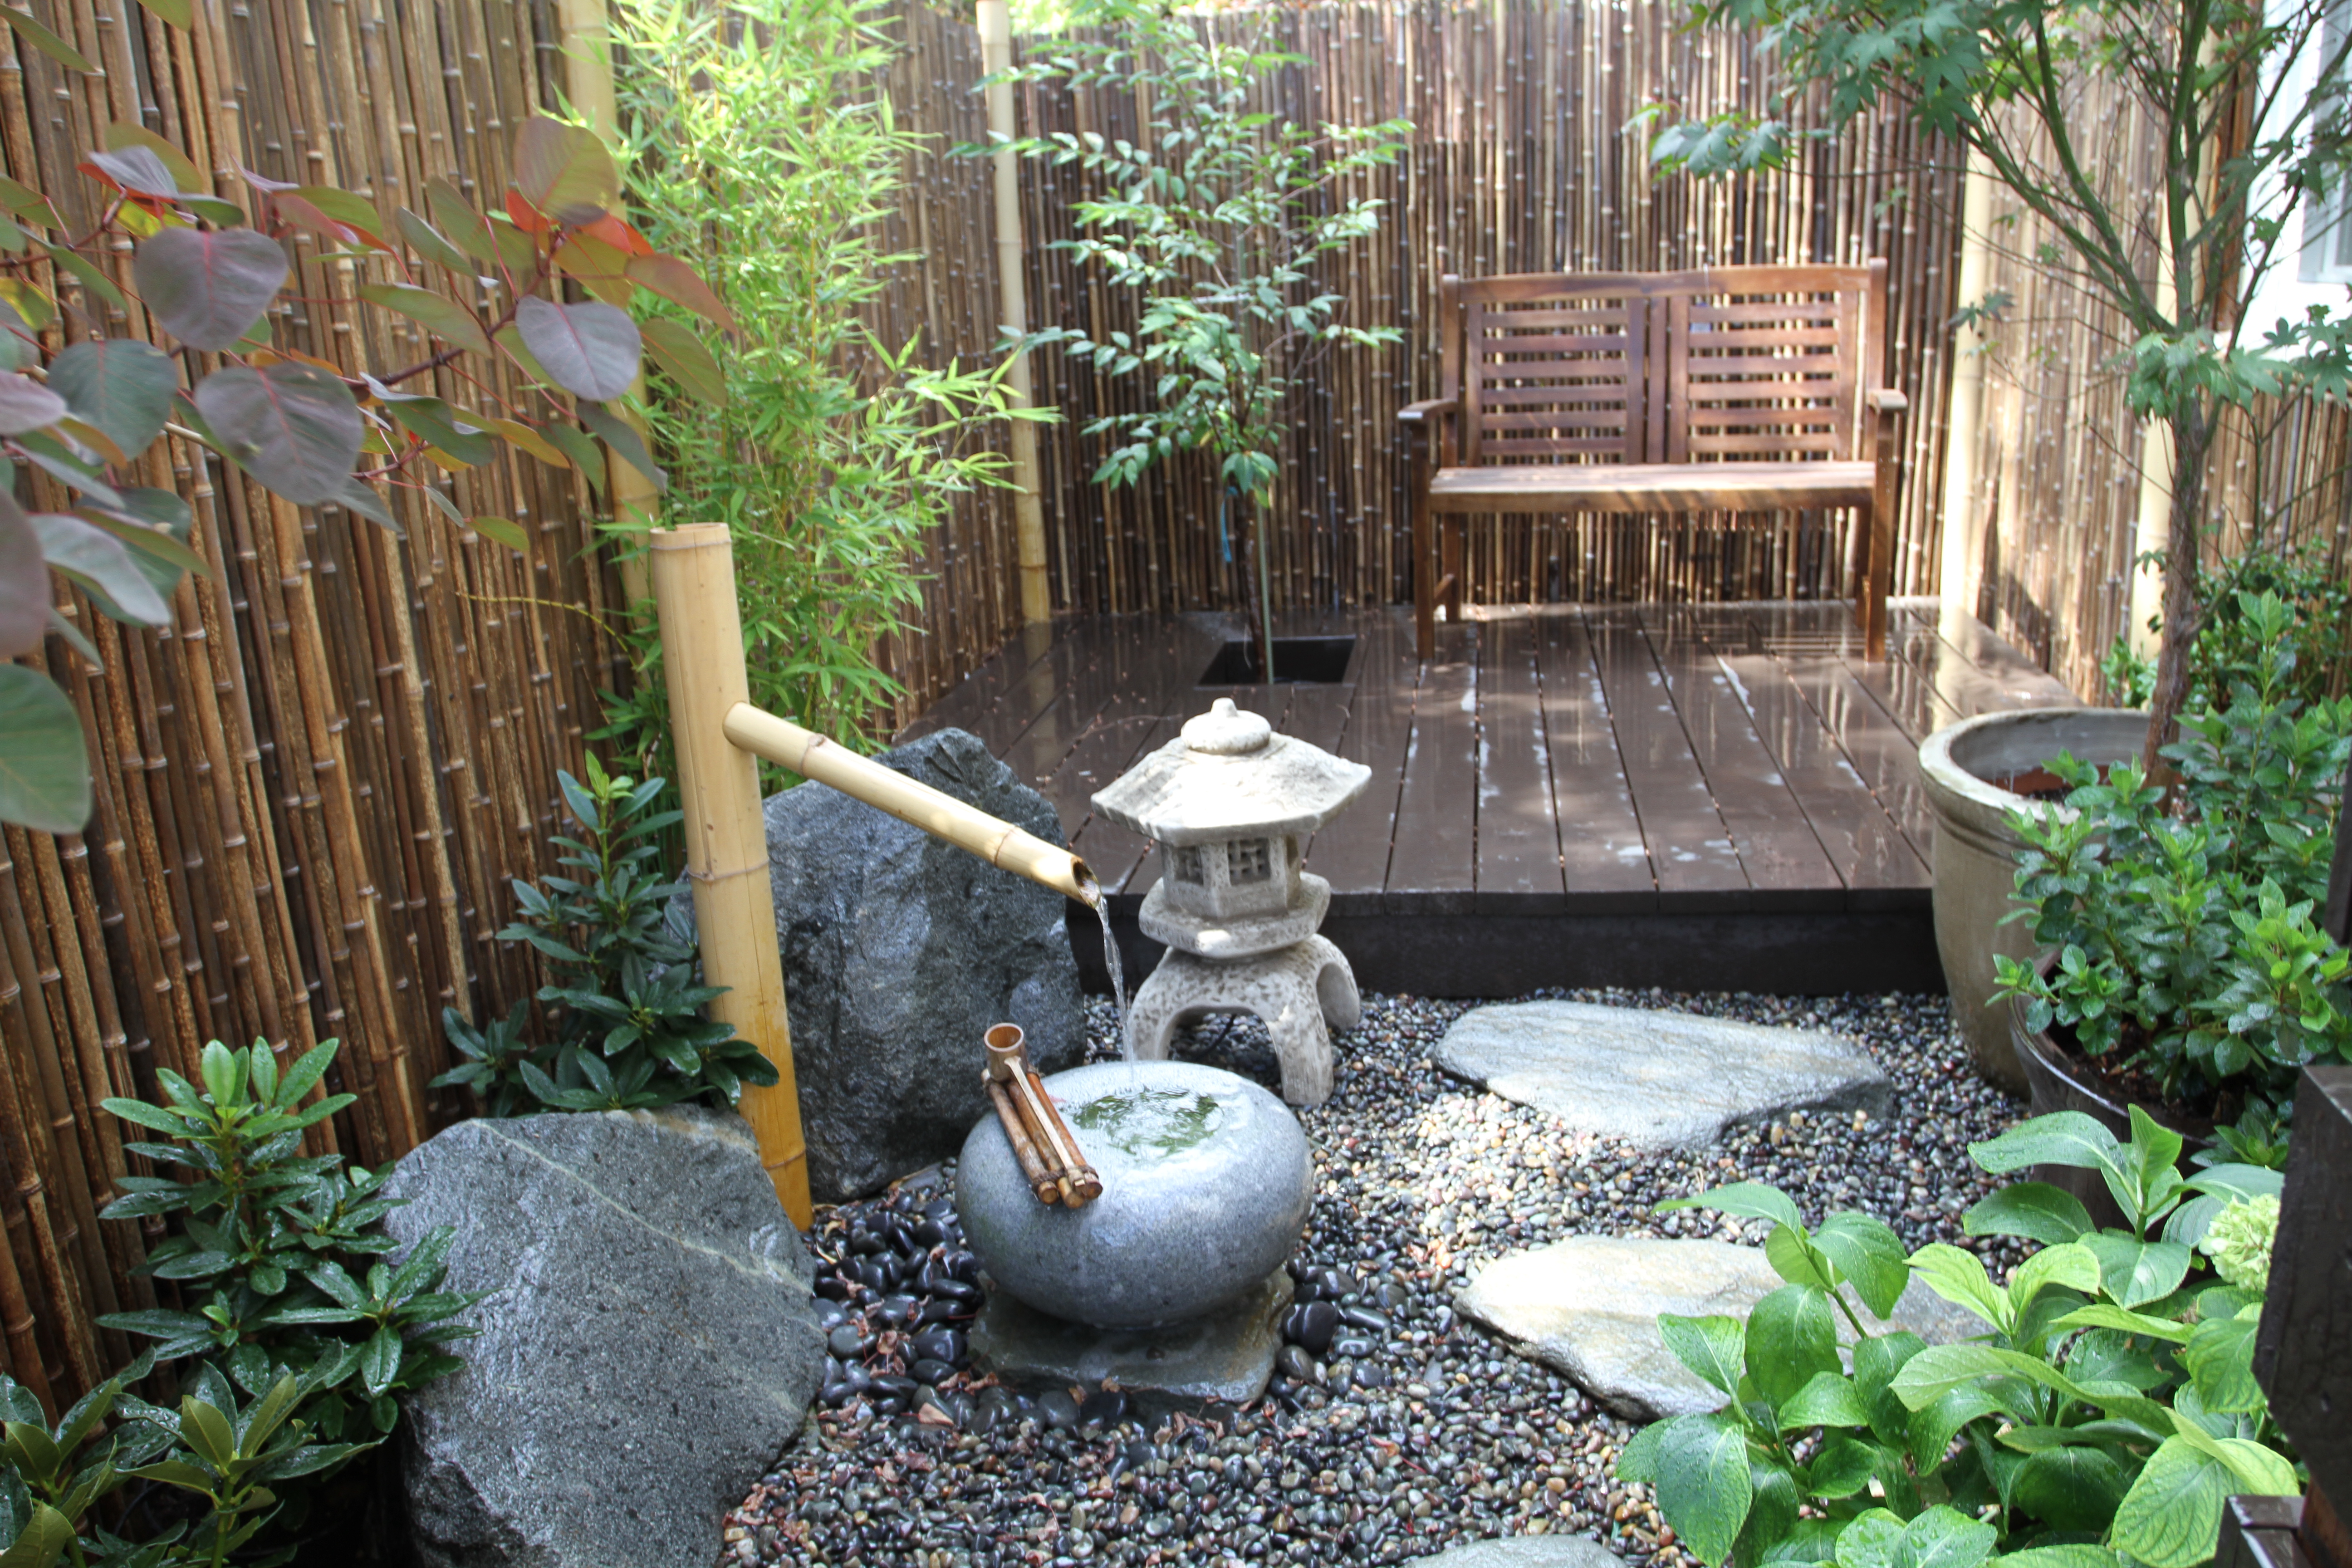
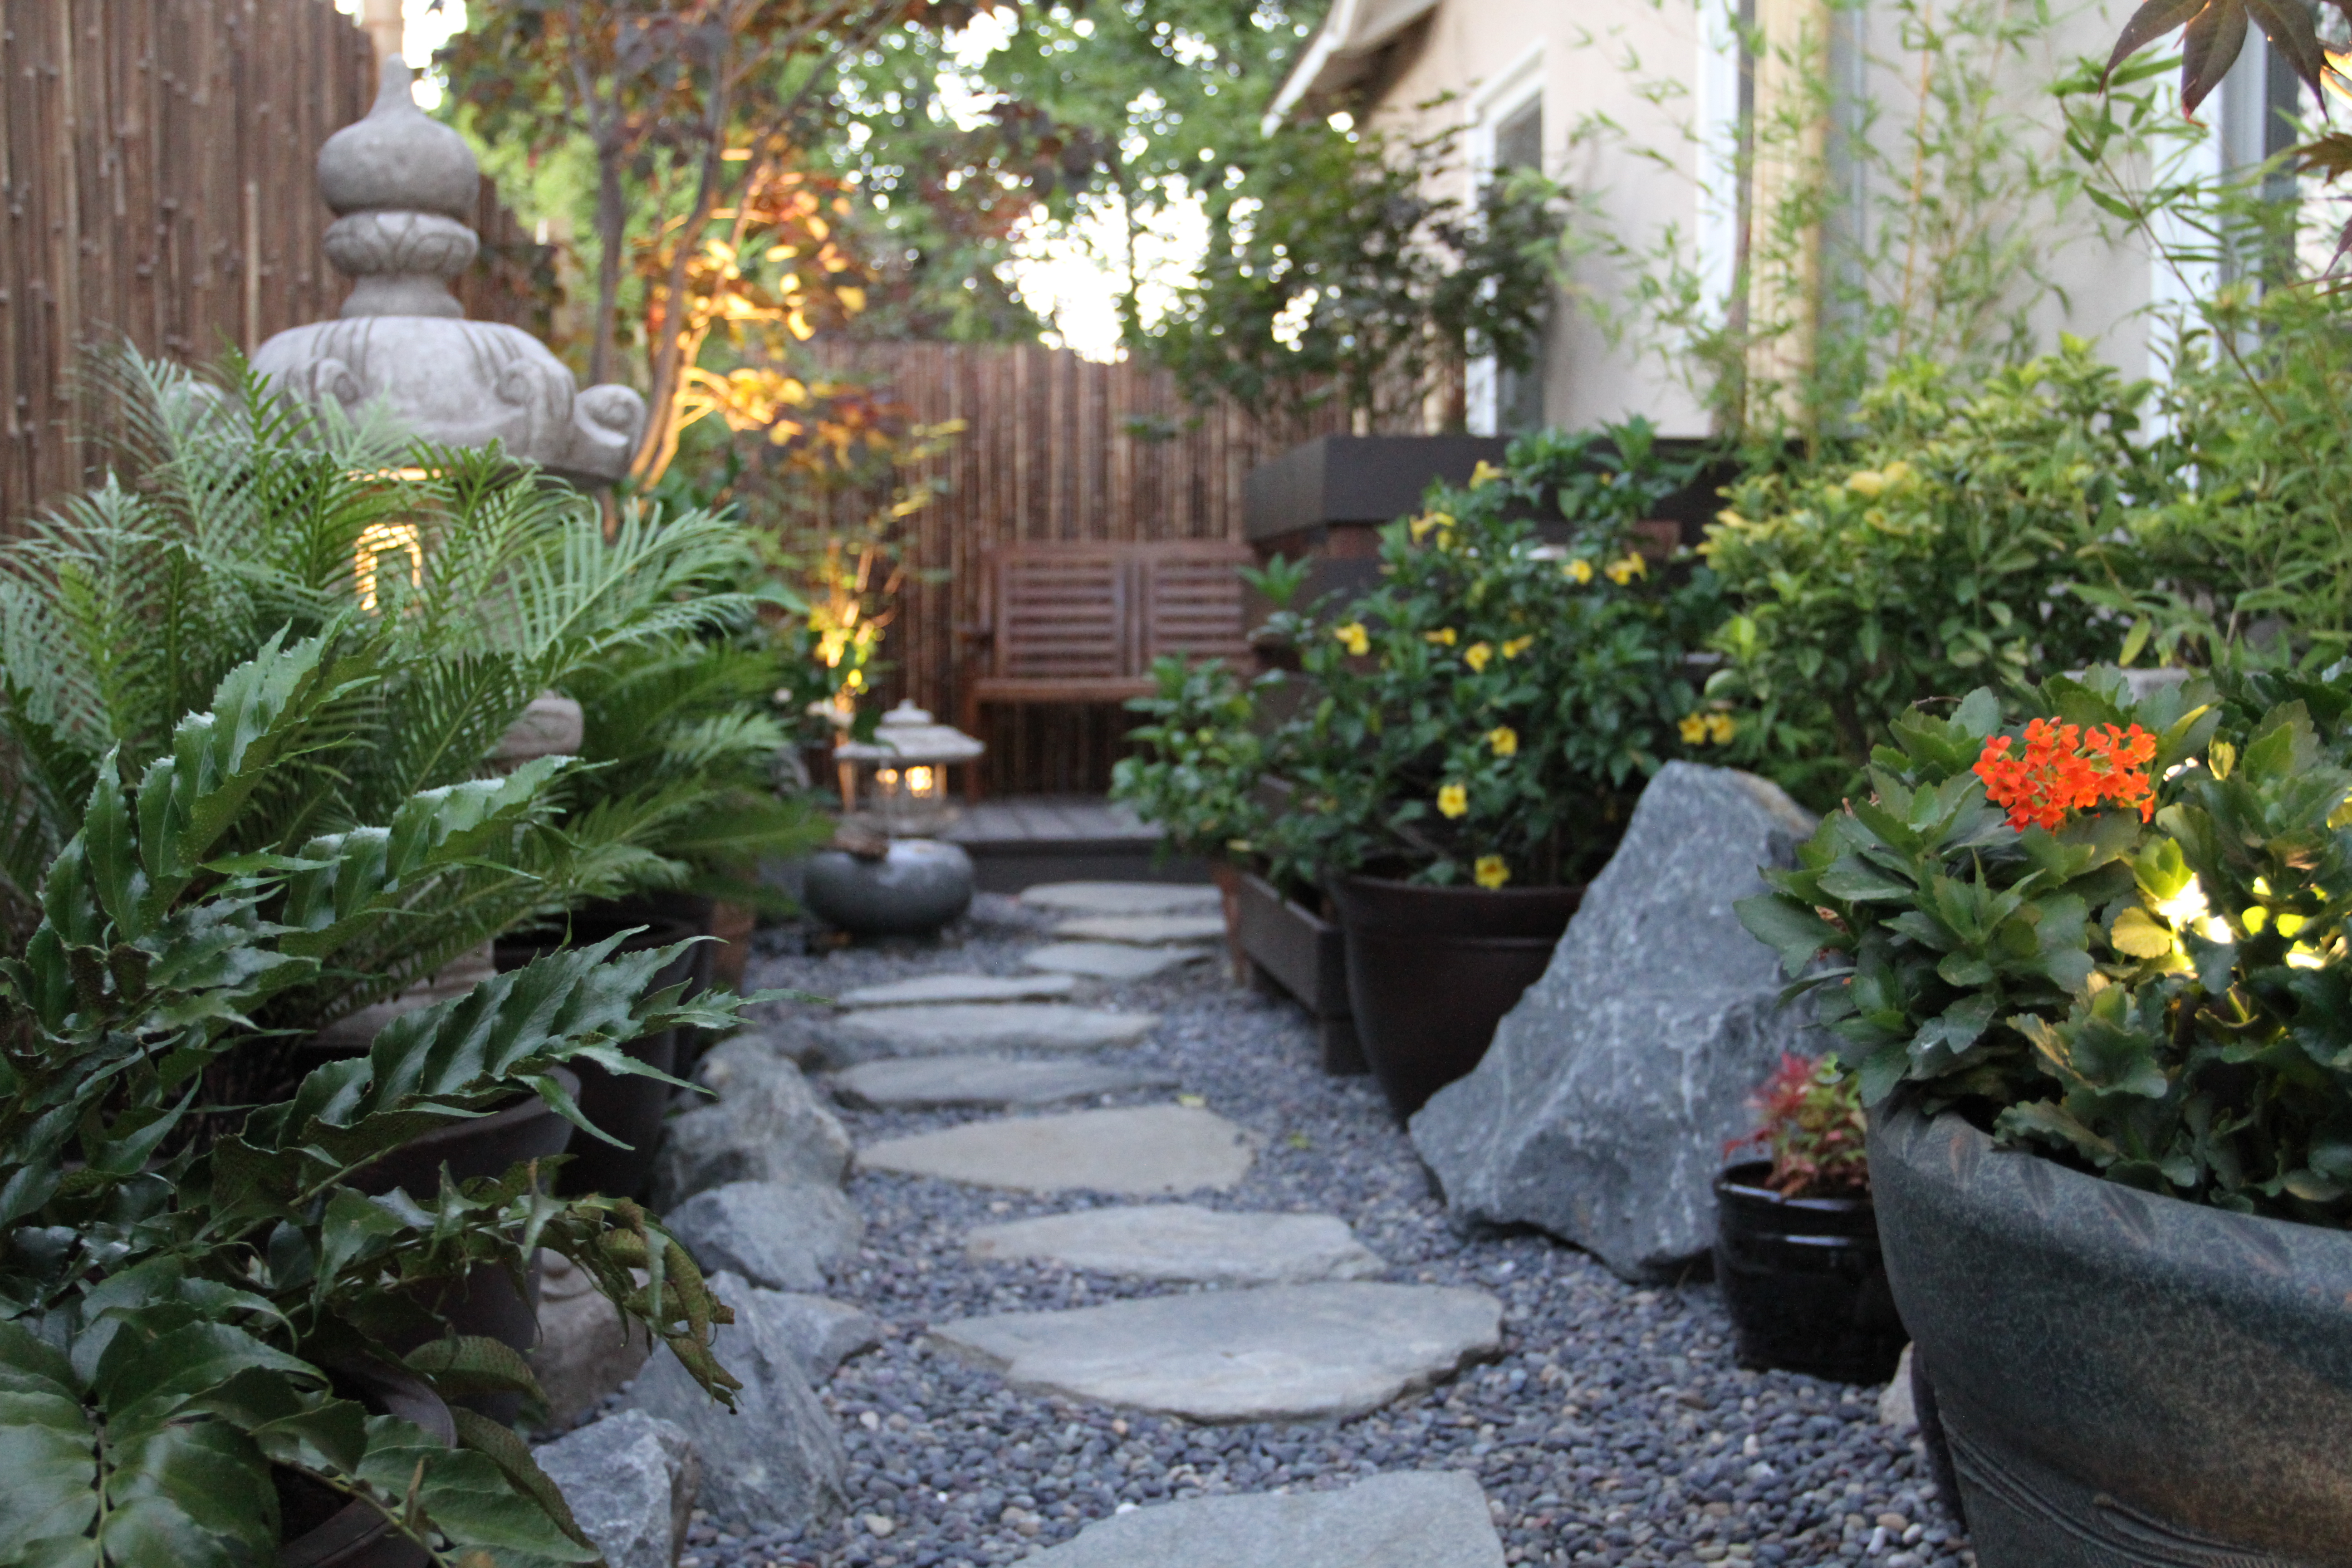
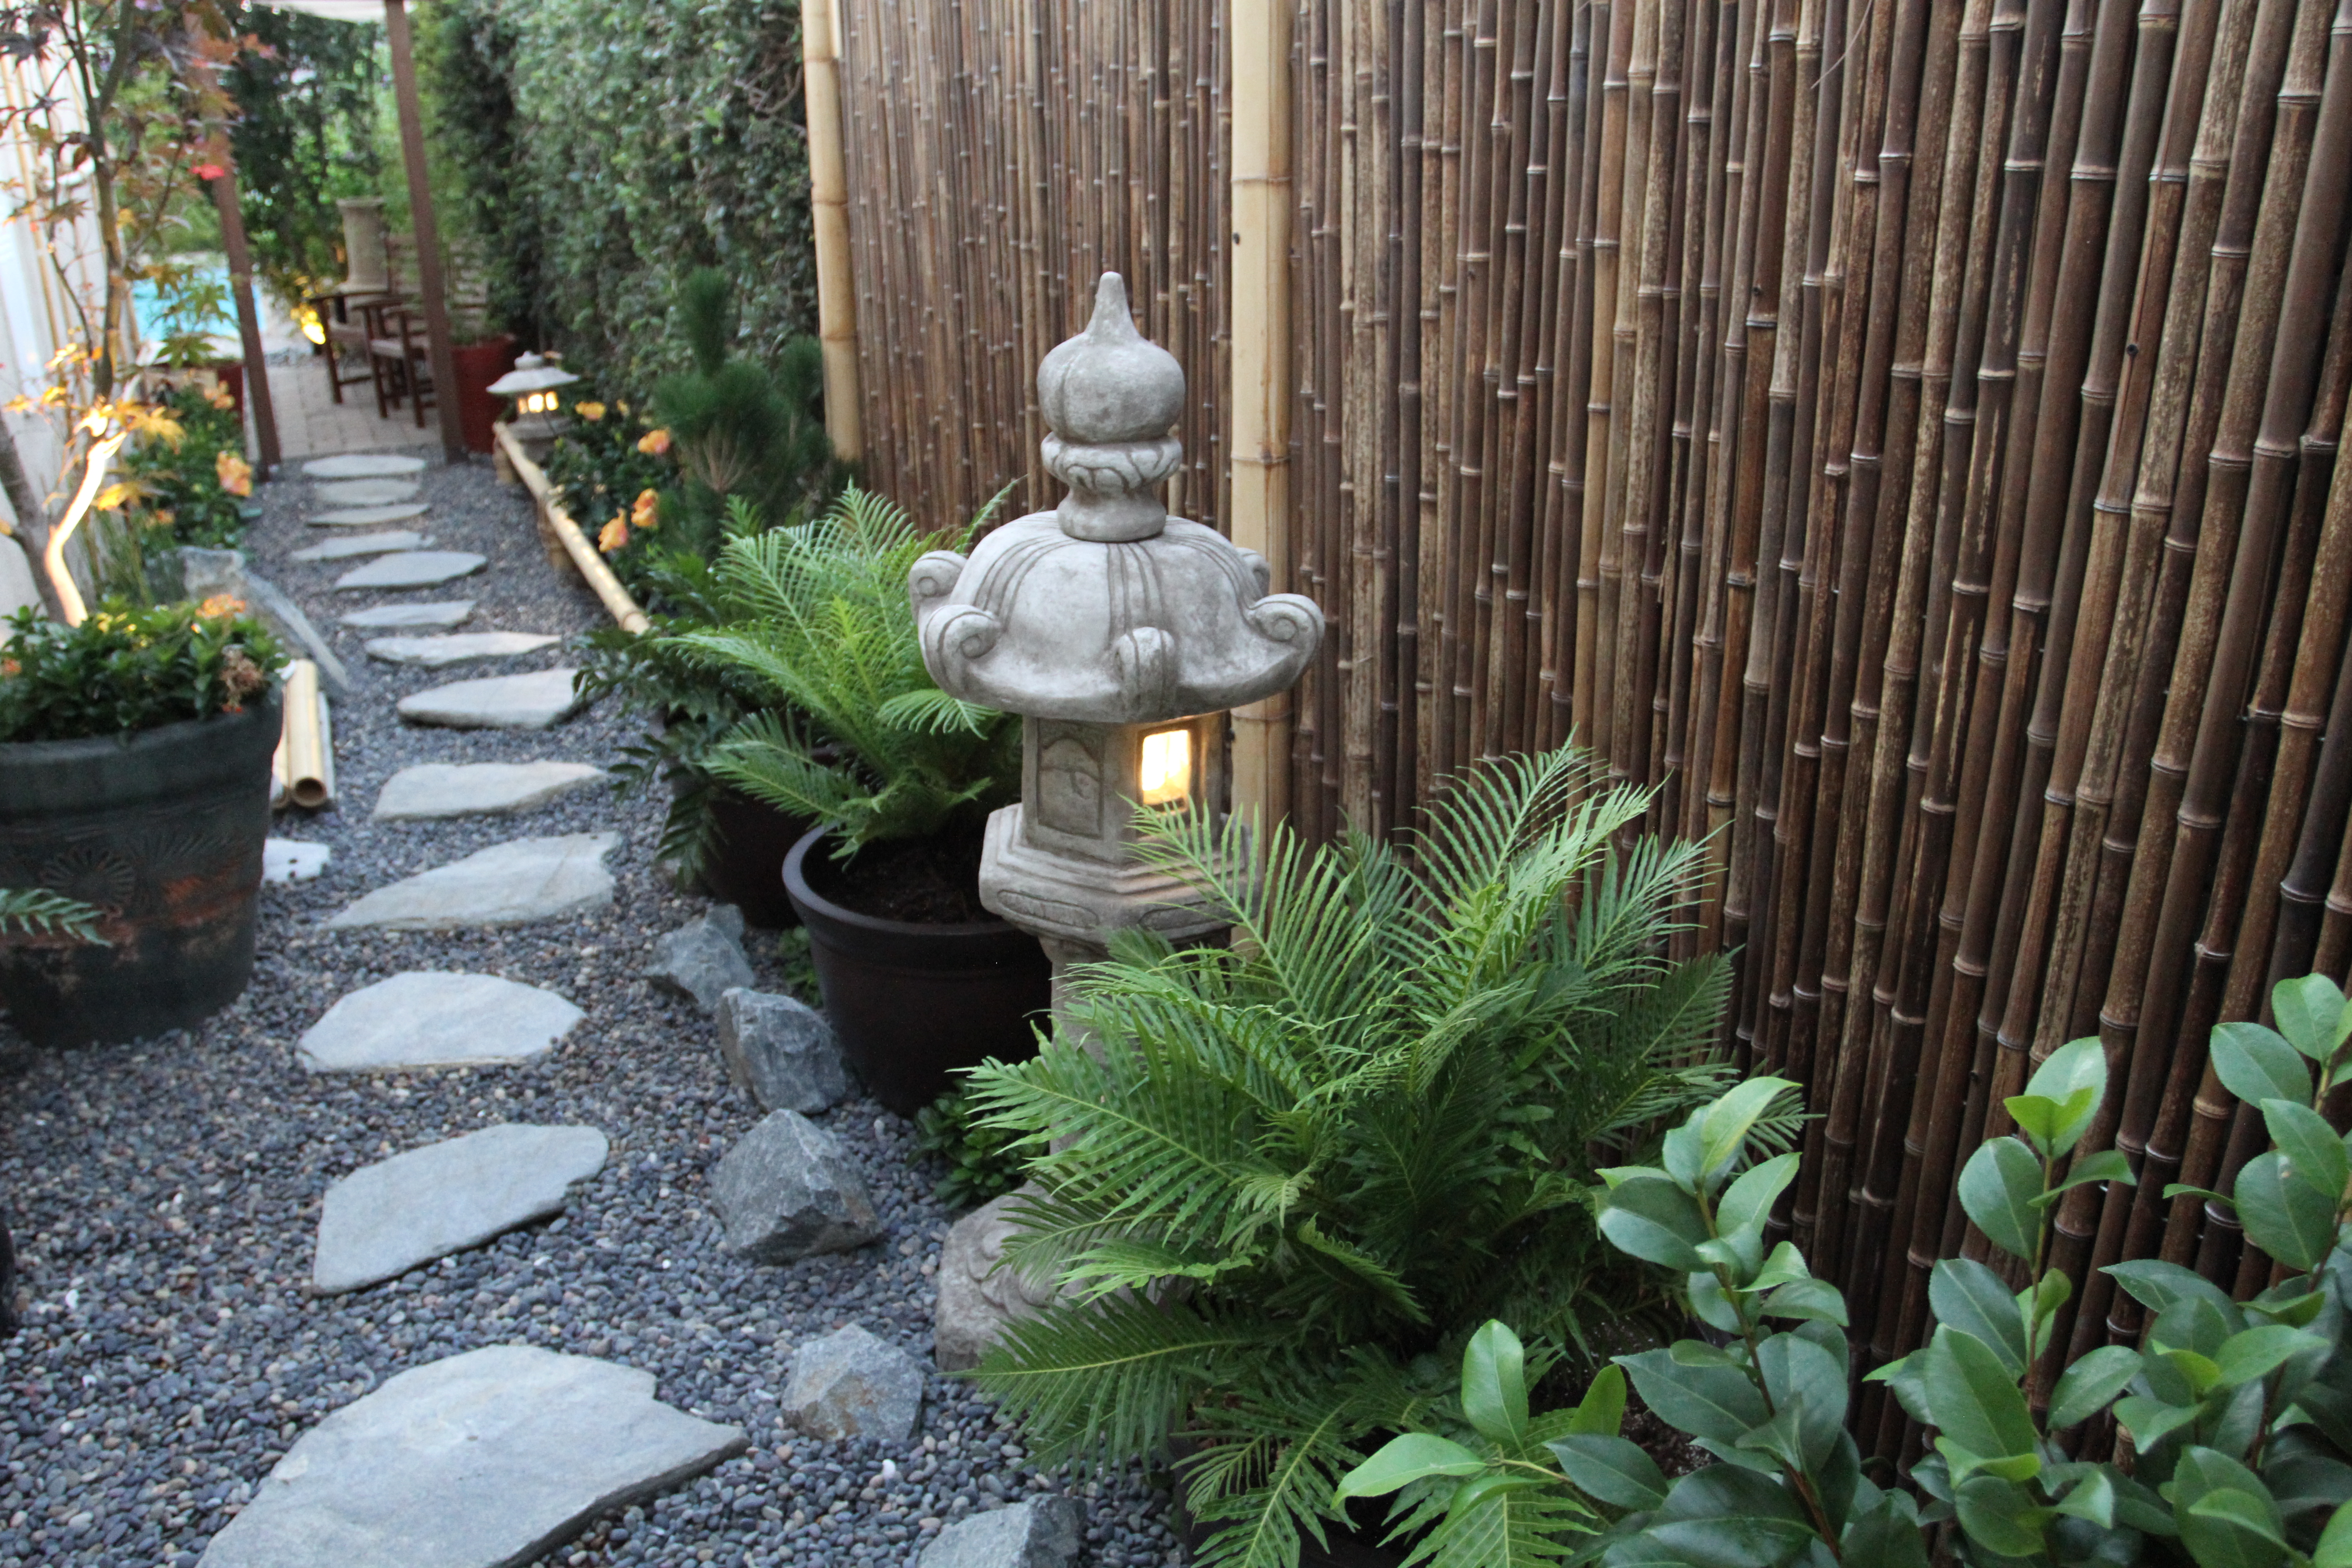
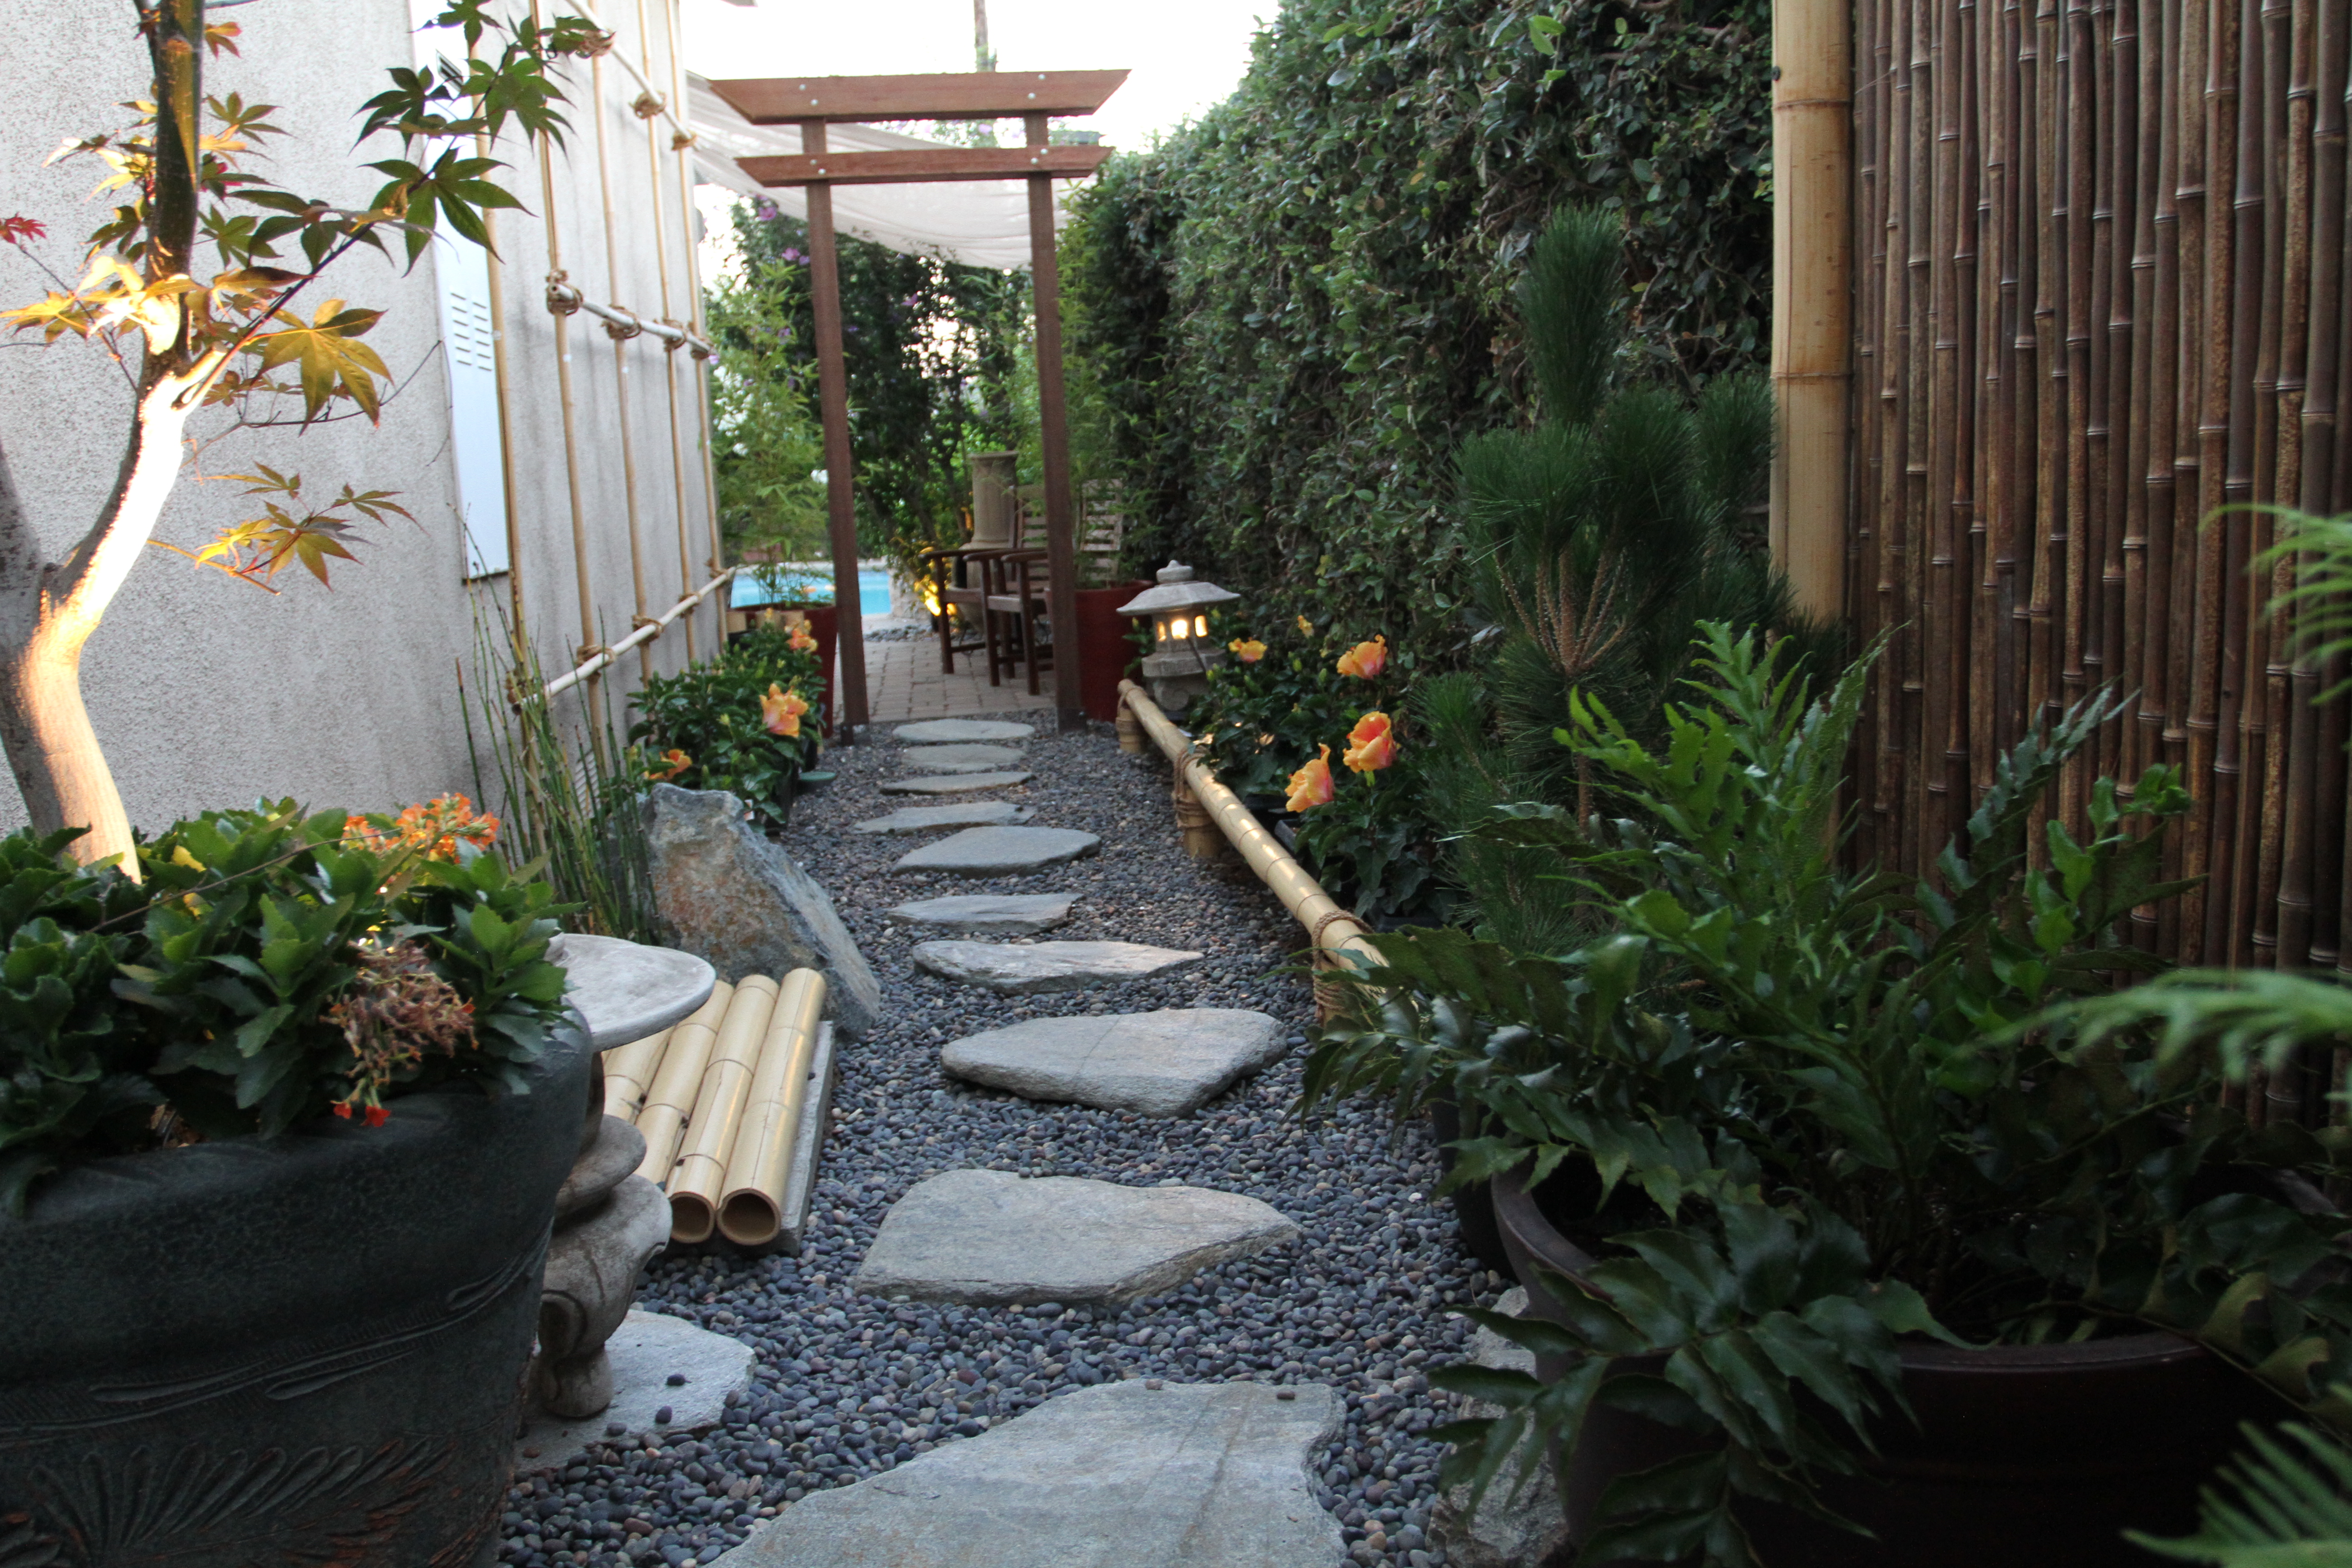
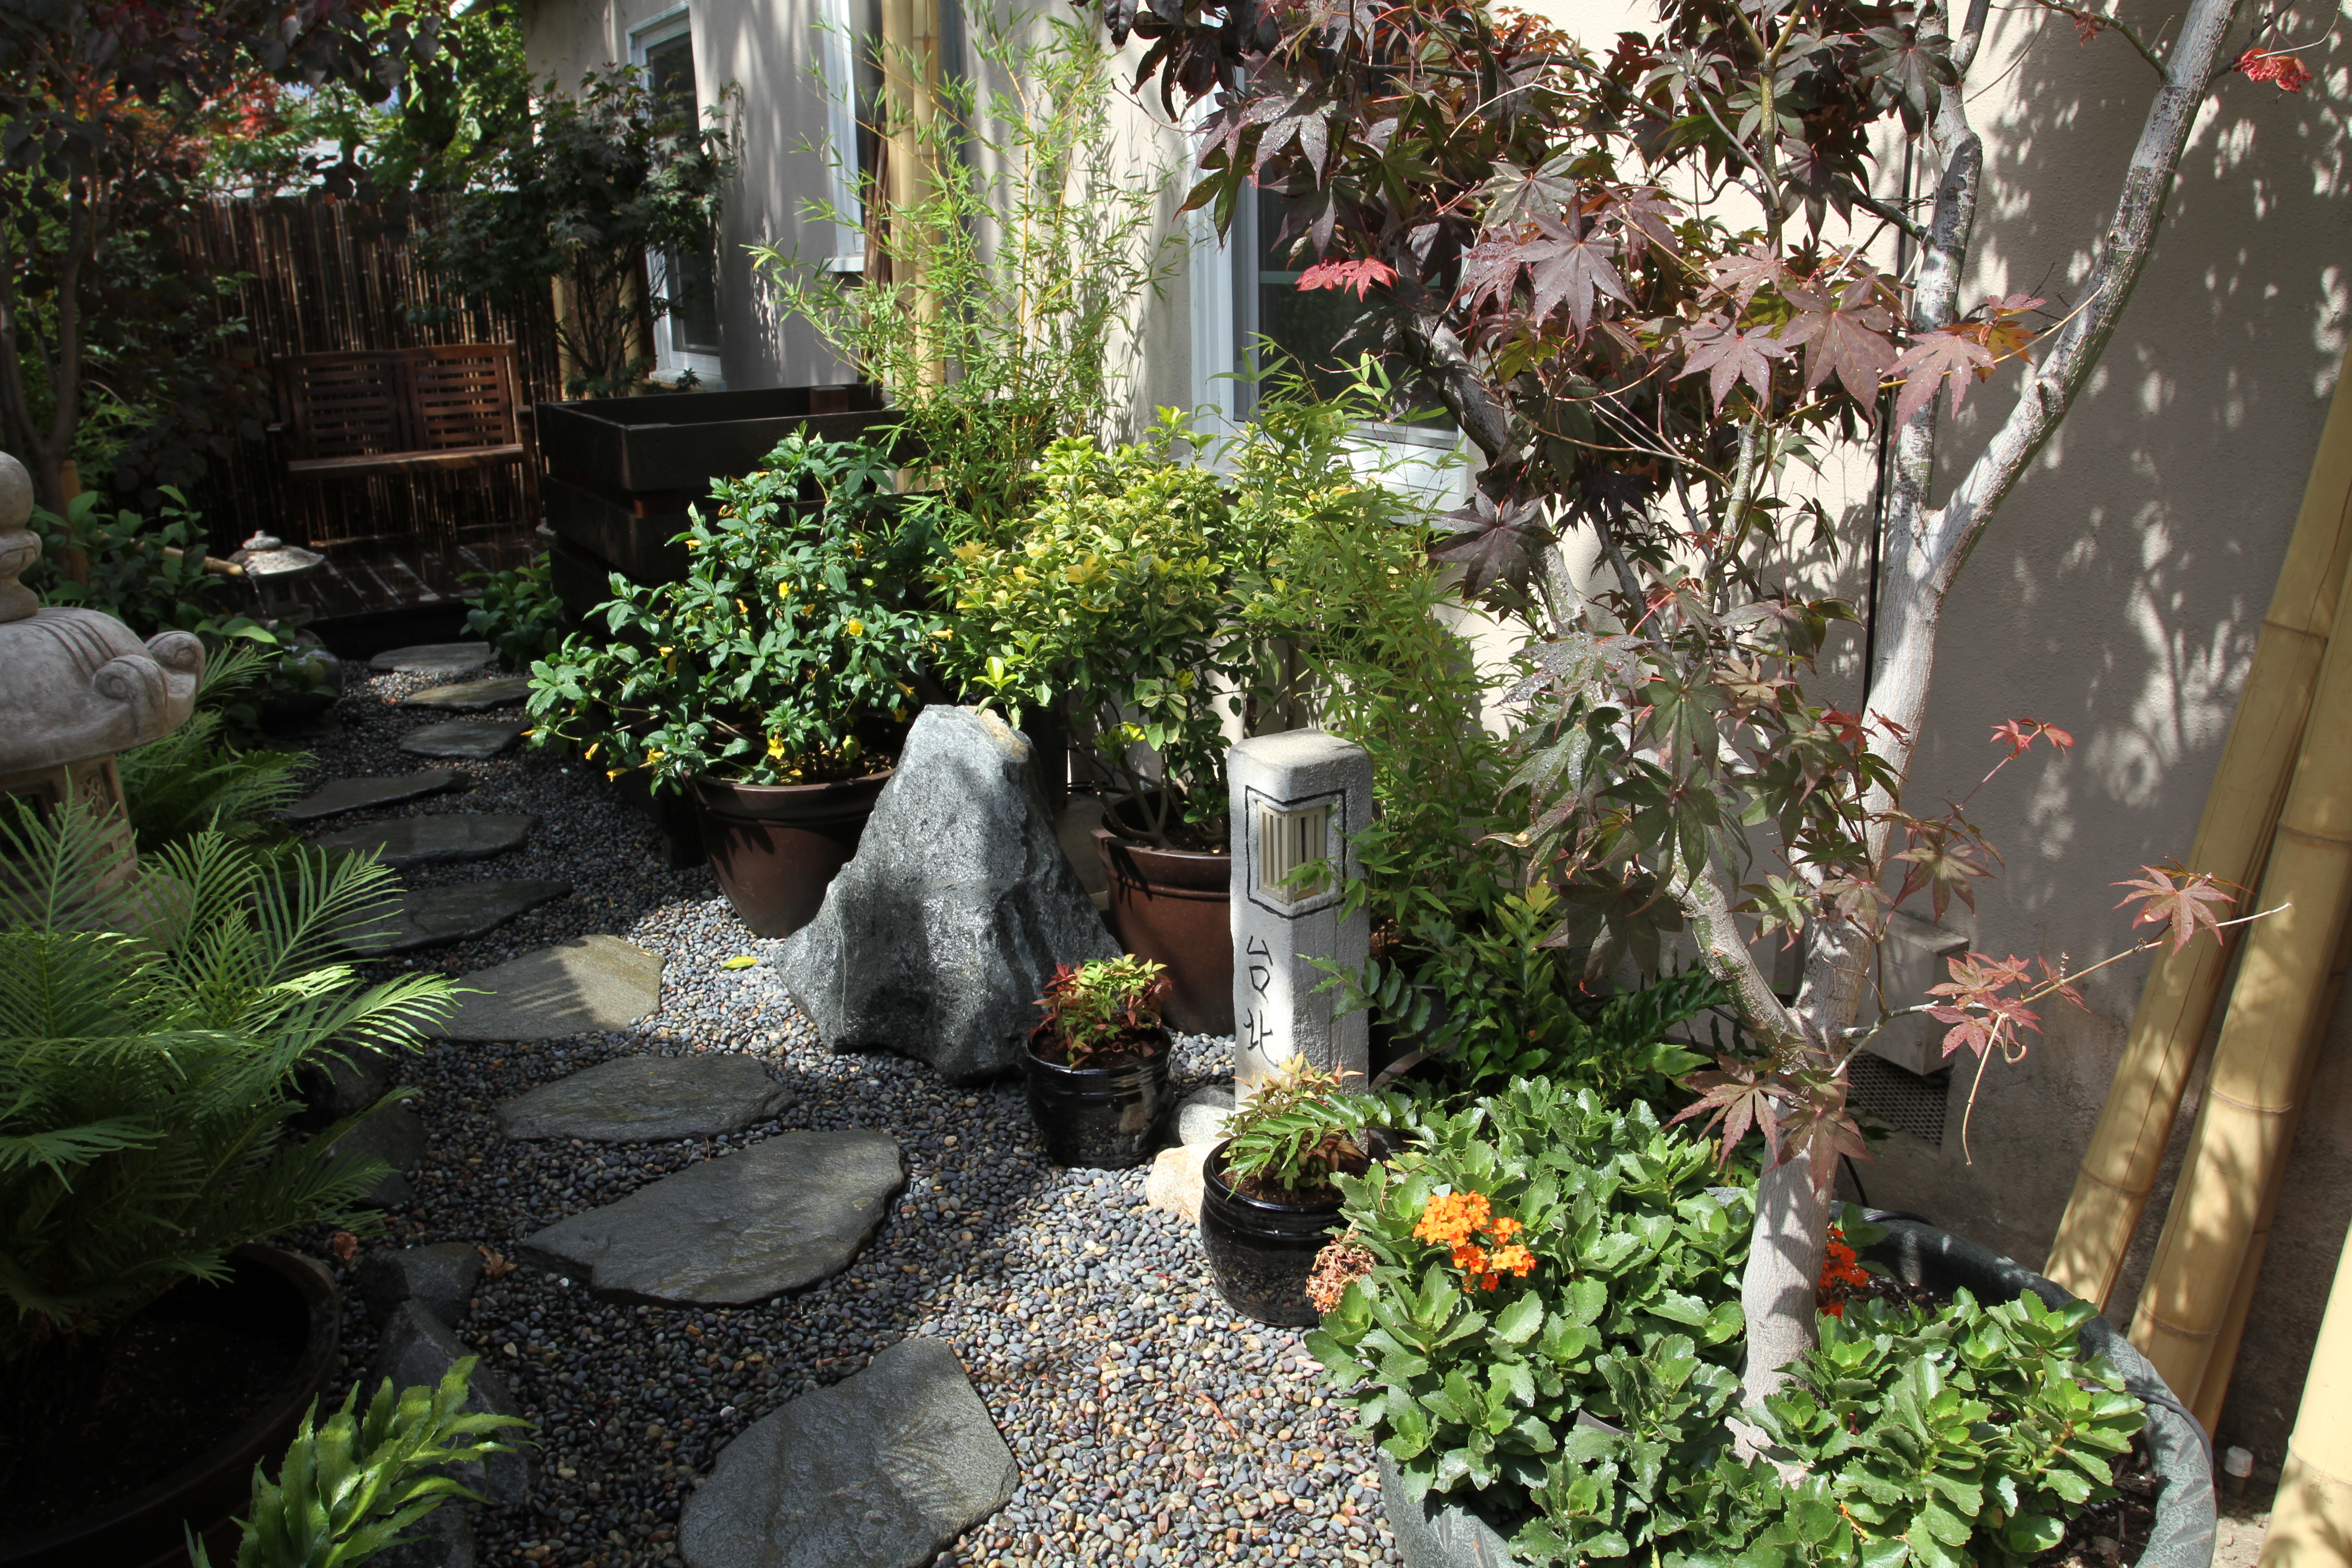
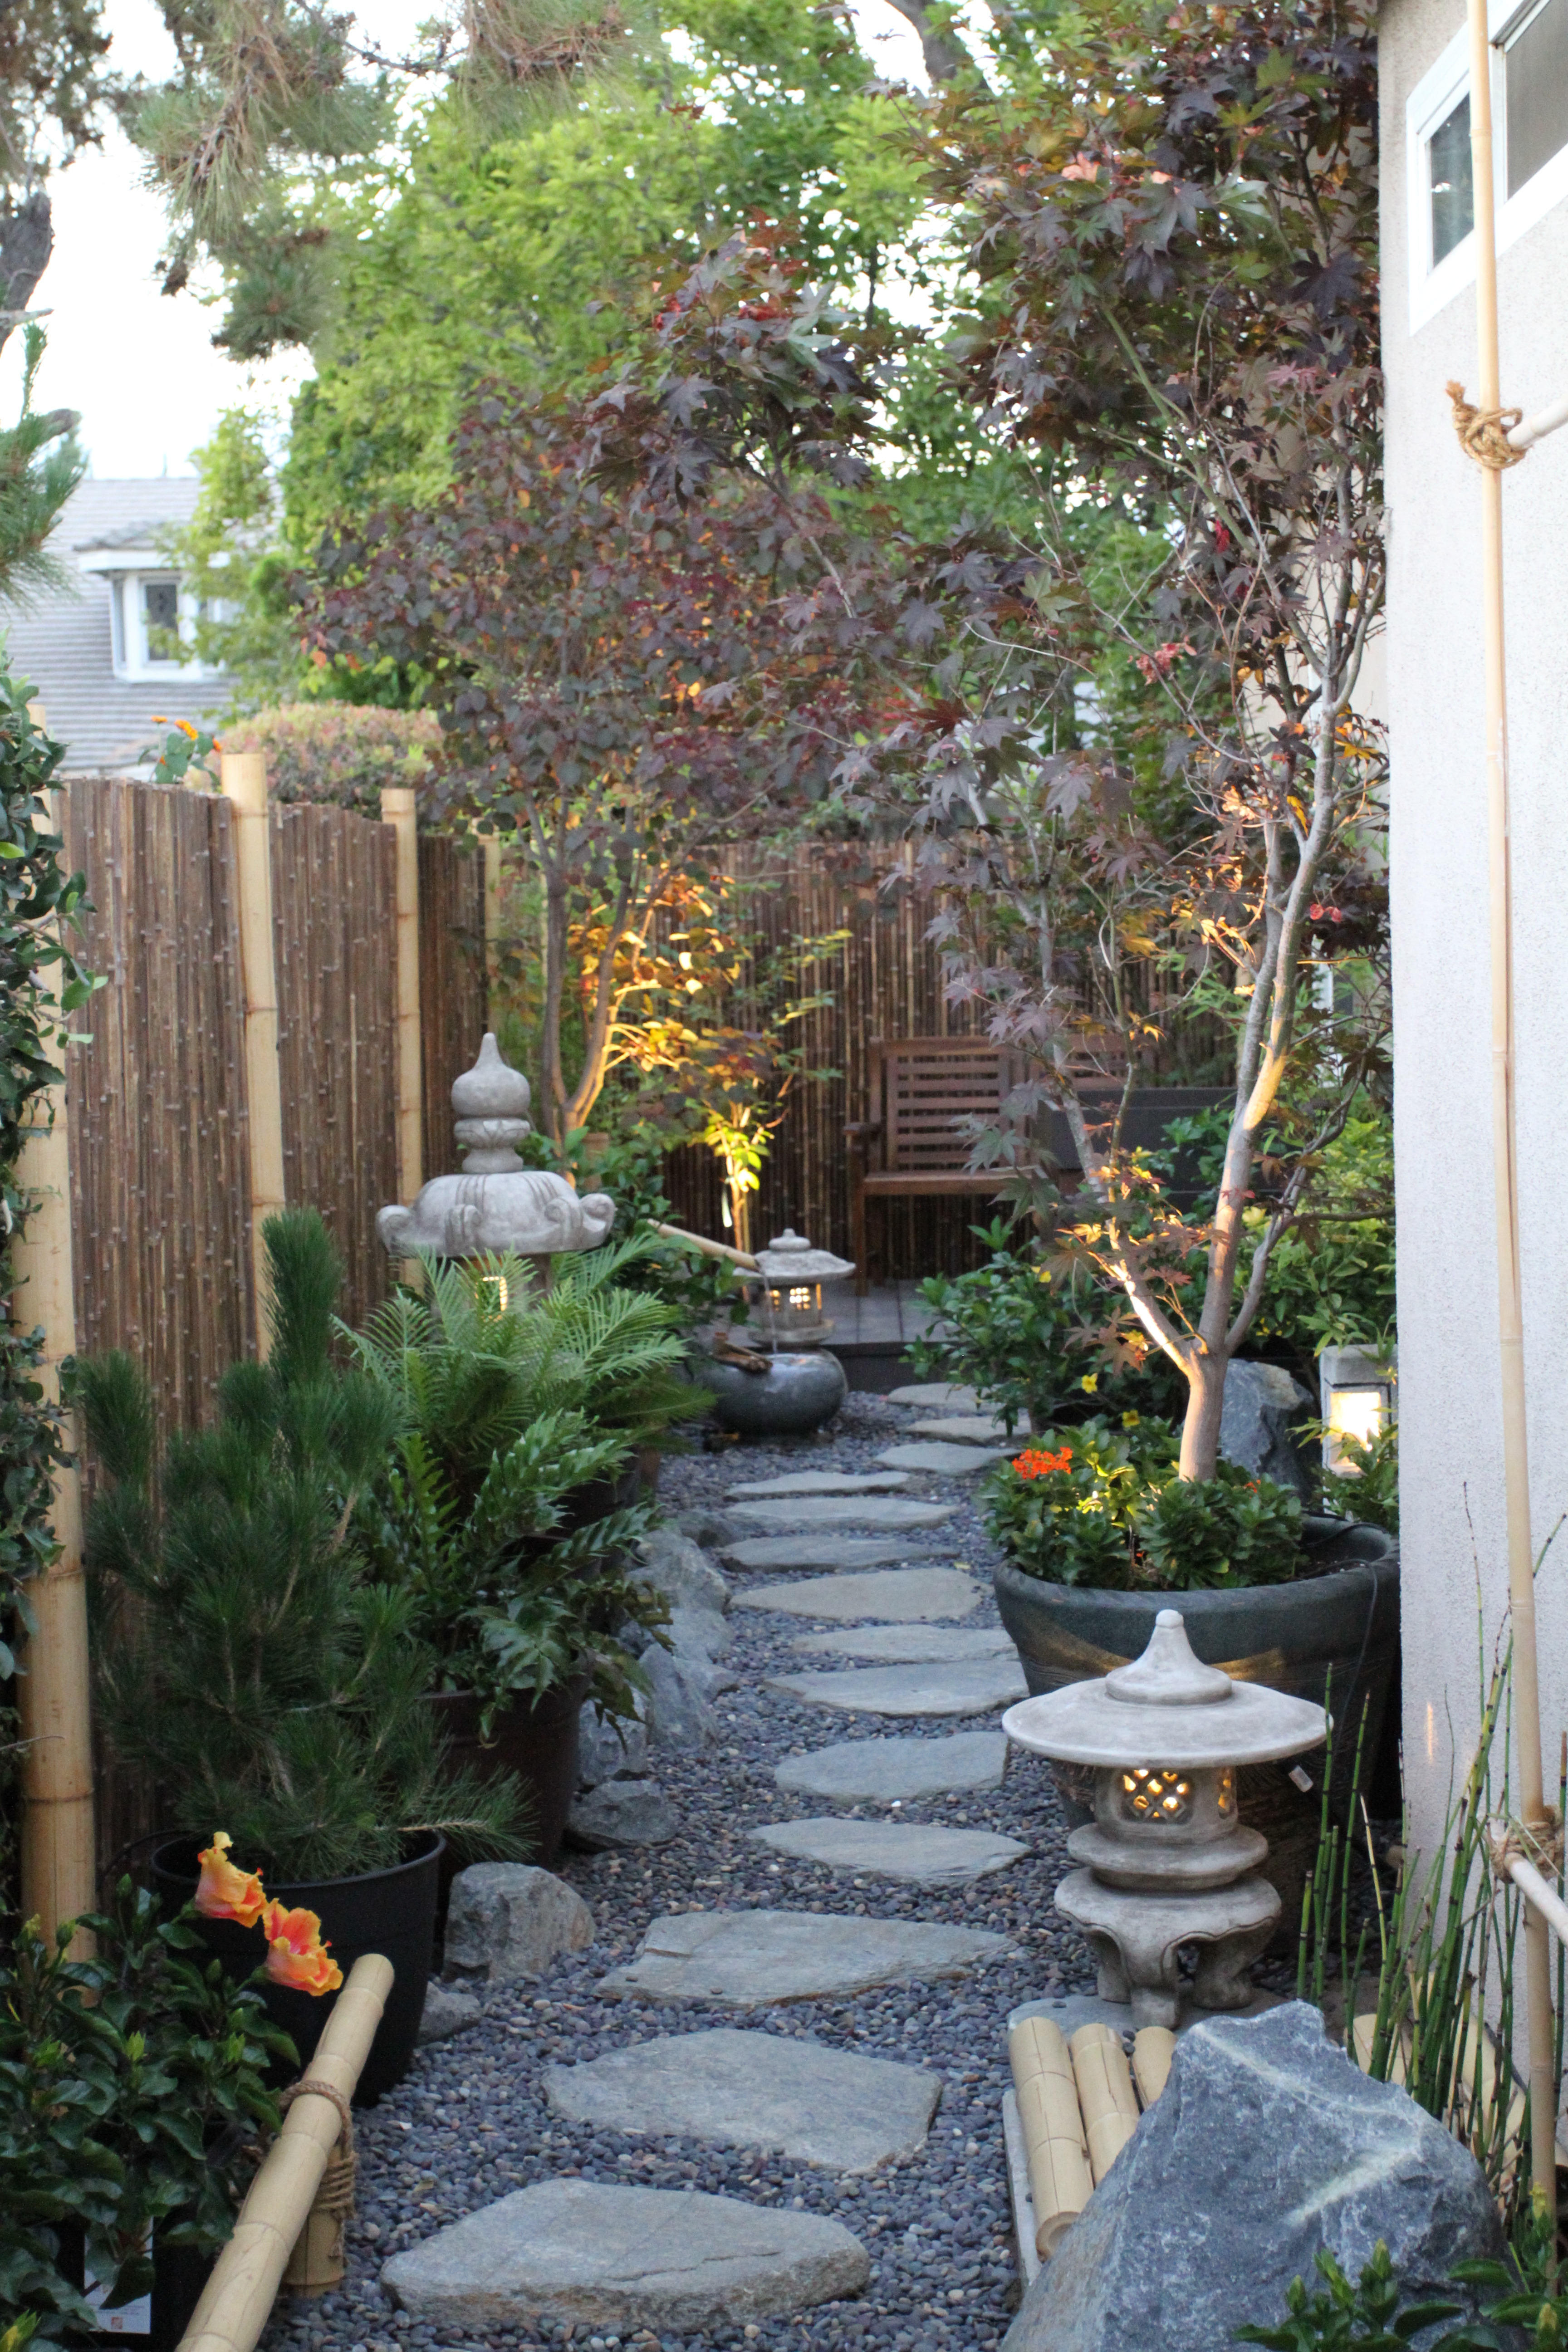
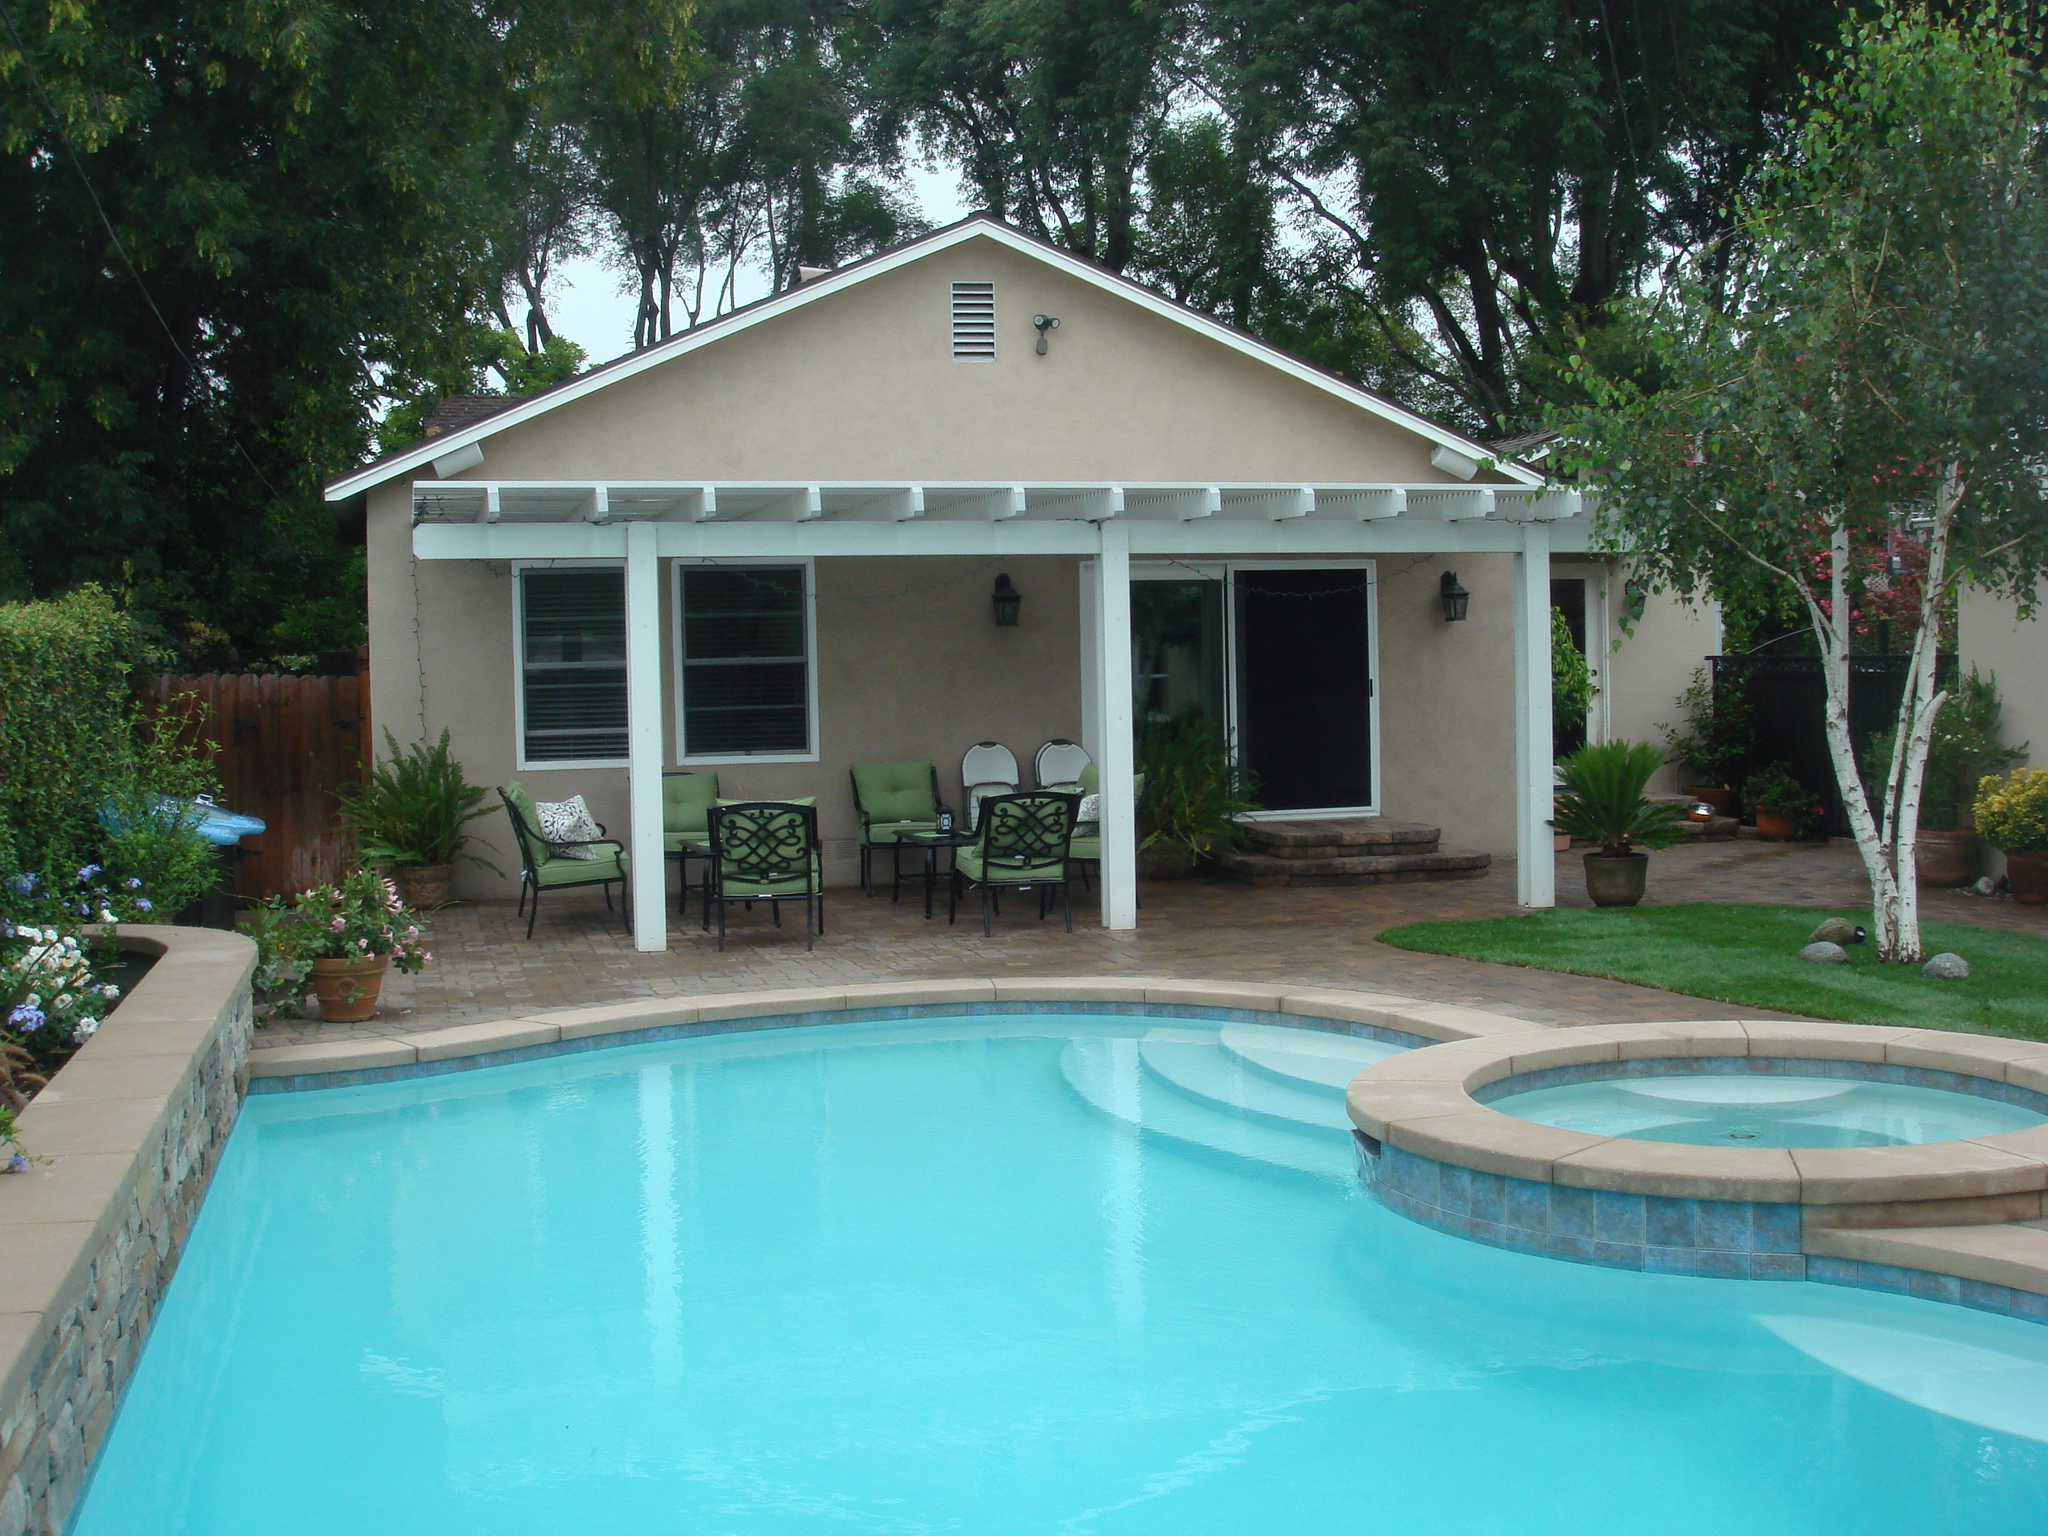
When I started this project I wanted to construct a garden that wouldn’t create a lot of extra daily/weekly upkeep. I also wanted to create a space that was usable both during the day and the evening. In order to help with the reduction of upkeep, I decided to utilize containers for most of my plants making them easy to change out if necessary and creating less soil prep and install individual drippers and automatic sprinklers for watering. To make the space appealing in the evenings, I opted for utilizing several Japanese Lanterns and Mileage stones and wiring them for light.


WATER

To complete this portion of my project, I utilized my existing value and PVC piping. The materials for this project all came from Lowes and are generally very simple to install and really just like putting puzzle pieces together.  Here are a list of the components I used:

  • Raindrip 5/8-in x 500-ft Polyethylene Drip Irrigation Distribution Tubing
  • Mister landscaper Drip Irrigation Micro Stake Assembly
  • Raindrip 5/8-in Polypropylene Drip Irrigation Tee
  • Raindrip 5/8-in Polypropylene Drip Irrigation Female Adapter
  • Raindrip 5/8-in Polypropylene Drip Irrigation Elbow
  • Agrifim 25-Pack 17mm Acetal Drip Irrigation Tees
  • Raindrip Full-Circle-Spray Drip Irrigation Multi-Stream Dripper Stake
  • Raindrip 1/4-in x 50-ft Polyethylene Drip Irrigation Distribution Tubing

All of the above can be sourced via the Irrigation section of Lowes web site:

http://www.lowes.com/Outdoors/Watering-Irrigation-Drainage/Drip-Irrigation/_/N-1z0wg7g/pl?Ns=p_product_qty_sales_dollar|1#!

437

ELECTRICAL

The electrical component to this project was accomplished utilizing low voltage outdoor lighting and a 20 ft extension cord.

The first part of my electrical project was to power my water basin pump which was accomplished easily by running an outdoor graded extension cord from an existing outdoor outlet.

The second part of the project included running low voltage wiring from a power pack to each of my lanterns and then connecting each with an outdoor lighting fixture.

Again, this is not a difficult process:

  1. Install Power Pack – The power pack pugs into a power outlet and is utilized as a transforming ensuring the correct voltage for your project.  Installing is as simple as drilling a couple of screws into the wall next to my power outlet and handing it so as to keep if off the ground
  2. Run low voltage wiring – The low voltage wire is connected to the power pack via two screws on the bottom of the pack and then the wire is run to your project. Simple to use connectors are available to connect additional wiring from the main wire to each area of the project were power is necessary
  3. Connecting light fixtures – Connectors are used to attach light fixture to low voltage wires. In most cases the fixture comes complete with an attached connector

All of the above can be sourced via the outdoor lighting section of Lowes web site:

http://www.lowes.com/Lighting-Ceiling-Fans/Landscape-Lighting/_/N-1z0yqsj/pl

Note: Although I used Lowes for the electrical and water part of my project, I found that their selection of product was not quiet as extensive in terms of the drip irrigation product as Home Depot’s is. While the product was easy to find and use and I have no doubt would satisfy most projects, unique issues might require a visit to home depot to resolve.

For the electrical component, I thought Lowes’ selection was quite good.


Total Water and Electrical Costs:$600

Total Running Project Cost: $4,330


444 443 442 441 440 439 438 437 436


Step 12 – Plants

455

Probably the most important part of my project was plant selection and placement. It was important to me to pick plants that not only provided some level of authenticity to a traditional Japanese garden but would also survive the southern California sun and summer heat.  Given the planting zones falling in the 9-11 range certain “traditional” Japanese garden plants were simply going to be off limits for me but the fact that my side yard was in a “part sun” spot, I would have some opportunities to incorporate Ferns and Maples. The balance of my plants would be picked by my taking liberties selecting plants and color that I thought would make for a interesting mix.

My selection process started by first utilizing my reference material (to understand the traditional Japanese garden plant, trees and shrubs and then several visits to the local nursery to gain additional insight and opinions. Luckily, the San Gabriel Nursery, which has a great selection of Japanese garden plants, is close to my home and provided me with a great resource for both research and acquisition of plants.

My picks:

Trees

Japanese Maple – Traditional – Growing well but needs protection from the hottest times of the year. Trends to green very quickly due to the California sun exposure which is a shame given its very pretty red color during the early spring. Still a great addition

Flowering Cherry – Traditional Cherry Blossom tree

Caribbean Copper Tree – Non Traditional – Great tree/tall shrub which produces a really pretty copper colored leaf. Seems to do well in a sun or partial sun environment and isn’t very dense which matches nicely with the Maple.

392

Bamboo

Golden – This worked out well since I was planting in containers I didn’t need to worry about my yard being overrun with bamboo given its very invasive nature.


388

Ferns

Japanese Holly Fern – Traditional

Japanese Beach Fern – Traditional

385

Flowering Plants

Azalea – Traditional

Hydrangea – Traditional

Camellia – Traditional

Peony – My pick


460


Total Plants and Containers: $1200

Total Running Project Costs: $5,530

Project Complete!

After several months, I have finally finished my garden. The last steps, after plant selection, were laying down the gravel, finding some appropriate planters and and some additional arrangements. There are a few things I will probably get to when time permits; painting the large planters for example, but for now I consider this a project complete.

I have to say that I am pretty pleased overall and while the final product is definitely different that what I first had in mind, I think the changes in direction along the way improved the overall experience.

I added a wood bench on my deck and that’s created a nice sitting area for two which my wife and I have enjoyed.  I must admit an 18 year old Jameson’s whiskey and a half hour, twilight session in my garden is pretty relaxing.

Here are some photos of the finished product…..


420


450

448

446


422

432


433


426

449

419


Final Finishing costs:  $600

Final Total Project Cost -$6,130

Value of Relaxation…..Priceless.

Reference Material for Your Own Japanese Garden

jpgarden2When I decided to create my Japanese Garden, I wanted to be sure that I incorporated not only my ideas based on Japanese and other Asian gardens I had visited, but also elements which were true to authentic Asian gardens worldwide.

I have visited various Asian based gardens in the United States, Japan, China and Australia and each of these gardens had a number of similarities that I felt I would be able to replicate in my own garden. The concern I had going into the project was that the gardens I have visited were all very large. I wanted to get some ideas of how I could re-create the visual experiences I had, in the space I had available for my garden considering it would be significantly smaller than those I had visited.

I also wanted to get ideas of perspective and materials selection which is something that very important in Japanese gardens.

For my research I began by using Google to search for keyword strings like “Japanese Gardens in small spaces” & Small Japanese Gardens”. Ultimately my searching led to 3 books which I choose to purchase, each have some attribute that I felt could be helpful.

The three books I purchased:

Japanese Gardening in Small Spaces by Isao Yoshikawa: This publication is more of a practical detailing of constructing the Japanese elements that the other of the two books I purchased. The first part of the book covers the elements of the Garden including stones and gravel, lanterns, water basins, plants and fences. This section is very detailed and extremely helpful. The first section of the book also contains some great photos of small gardens. The second section of the book, which is in black and white, covers in great detail and sketching, the constructing of your garden from planting to fence building.  Finally, sketches of the garden photos shown earlier in the book are detailed with descriptions of their individual elements.

Creating Your Own Japanese Garden by Takashi Sawano:  This books some good information on the historical background and element of Japanese Gardens in addition to some good plans that you can use to incorporate into your own space. The only drawback to this publication is that the photos are small but they are still very informative. I also like the mix of both large and small garden illustrations.

Creative Japanese Gardens by Ortho Books:  This is a great starter book which provides a lot of great pictures and great data on design, elements, fences, lanterns etc. It also had a very good plant section which includes planting zone information so you can correctly select plants that will grow in your particular part of the country. Overall this is a great reference book.

Up to this point, I’ve used each of the three books equally as they all provide very good data and some excellent images but as I get further into the actual physically appearance and selecting of material for my garden, I will update this blog as to which I used most frequently.

Here are the links to Amazon:

http://www.amazon.com/About-Creating-Japanese-Gardens-Orthos/dp/0897214897/ref=sr_1_3?s=books&ie=UTF8&qid=1384735780&sr=1-3&keywords=japanese+gardens

http://www.amazon.com/Japanese-Gardening-Small-Spaces-Yoshikawa/dp/0870409778/ref=sr_1_9?s=books&ie=UTF8&qid=1384735780&sr=1-9&keywords=japanese+gardens

http://www.amazon.com/Creating-Your-Own-Japanese-Garden/dp/087040962X/ref=sr_1_1?s=books&ie=UTF8&qid=1384735908&sr=1-1&keywords=creating+your+own+japanese+garden

Backyard Pool Project

DSC00276   066A few summers ago we decided that as a family we’d get more use of our backyard if we had a pool.  One of our reasons for purchasing the house when we did was its good-sized back yard.  Our prior house in San Gabriel has the drive way and garage behind the house  (the drive way to the garage went through the back yard) as we had a corner lot so there wasn’t much yard for the kids to play.

After a few years in the house we decided to remodel and add-on. We added a family room, bedroom, bathroom and extended our kitchen. During the remodel we lost some of the yard but it remained good-sized as far as southern California back yards go.  As the kids got older and used the yard less, we decided on the pool. During that project we had to remove a fair amount of our landscape including Fig, Pomegranate, Olive, Lemon and several very large palm trees.

The pool project was a pretty dramatic change to our landscape. During the process we had several large Melaleuca trees removed along with many bushes and plants that we’d planted during our remodel to replace lost landscaping.  Once the pool was installed, the backyard was pretty much a hardscape which then required a new design.

We decided to leave a small grass area for our dogs and kept the White Birch I had planted a year earlier. Along our back wall we planted two black plum and a Caribbean Copper Tree (later replaced with a Crepe Myrtle). Alone the pool retaining wall we planted White Roses and color and landscape plants including New Zealand Flax, Blue Lobelia and Purple Fountain Glass and then we installed sod around our white birch. The picture above was immediately after the completion of the project so we have considerable growth since this in addition to adding a new 6ft retaining wall at the back of the yard.

During this project, a new sprinkler system and landscape lighting we’re added and finally we needed to install a French drain and dry well to solve a drainage problem we discovered the first few times we used the pool when the kids were splashing around and water from the pool gathered by the BBQ. The French drain extends about 20 feet along the back wall of our property and solved our drainage issues.

3 Years in and the pool gets used a lot…especially by my In laws 🙂

DSC00276Rose's Pictures 104Rose's Pictures 109Rose's Pictures 099

Rose's Pictures 156043047050

078080088084

178    175 170 169  075 (2)    074 (2) 073 071 (2) 069 (2) 065  067